
Hardware & network
Connect your media player
Connect your CrownTV media player using Ethernet or Wi-Fi. Step-by-step with on-device photos for both setup flows + dashboard alternate path.
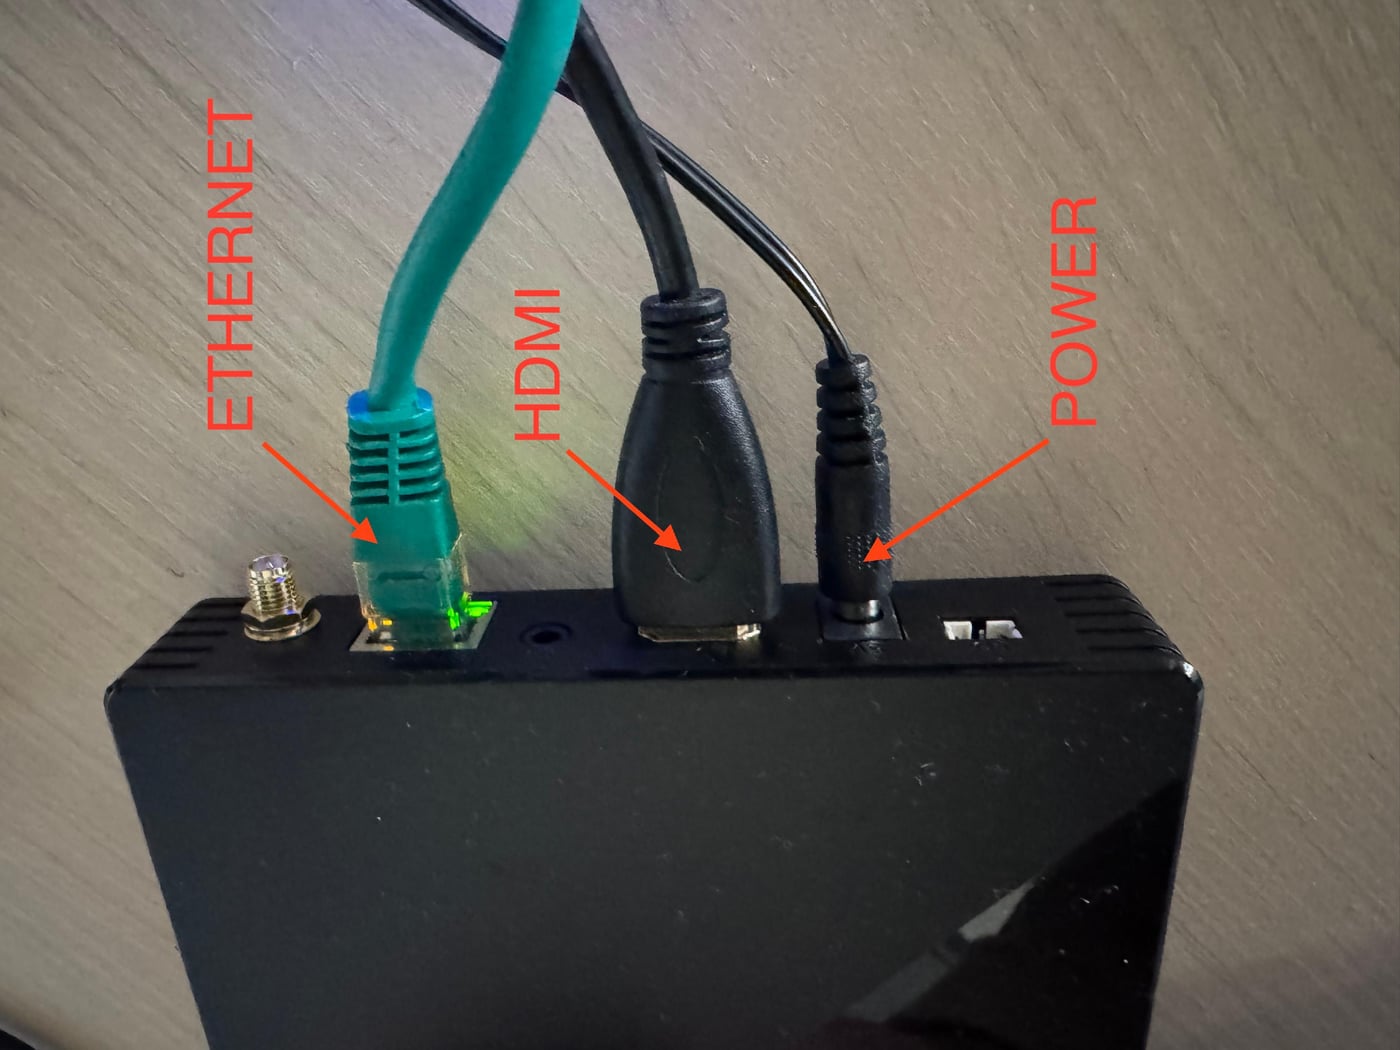
Your CrownTV media player can connect to the internet using either Ethernet or Wi-Fi. Pick the option that fits your install — both are supported, both are reliable, and both are easy.
Important — keep the player online
The CrownTV media player needs a continuous internet connection to receive content updates and talk to your dashboard.
If the player loses internet access:
- Existing content keeps playing — your screens won’t go blank.
- New schedules and updates won’t appear until the connection is restored.
Option 1 — Ethernet (recommended)
If you have an Ethernet cable available, this is the simplest and most reliable connection.
- Locate the Ethernet port on the back of your CrownTV media player.
- Plug one end of the Ethernet cable into the port and the other end into your internet router or wall network port.
- Make sure the HDMI cable is connected from the media player to the TV, and the power adapter is plugged in.
Once connected, your device will automatically access the internet — no further setup needed.
Option 2 — Wi-Fi
If Ethernet isn’t available, follow these steps to connect over Wi-Fi.
Step 1 — Connect a USB mouse
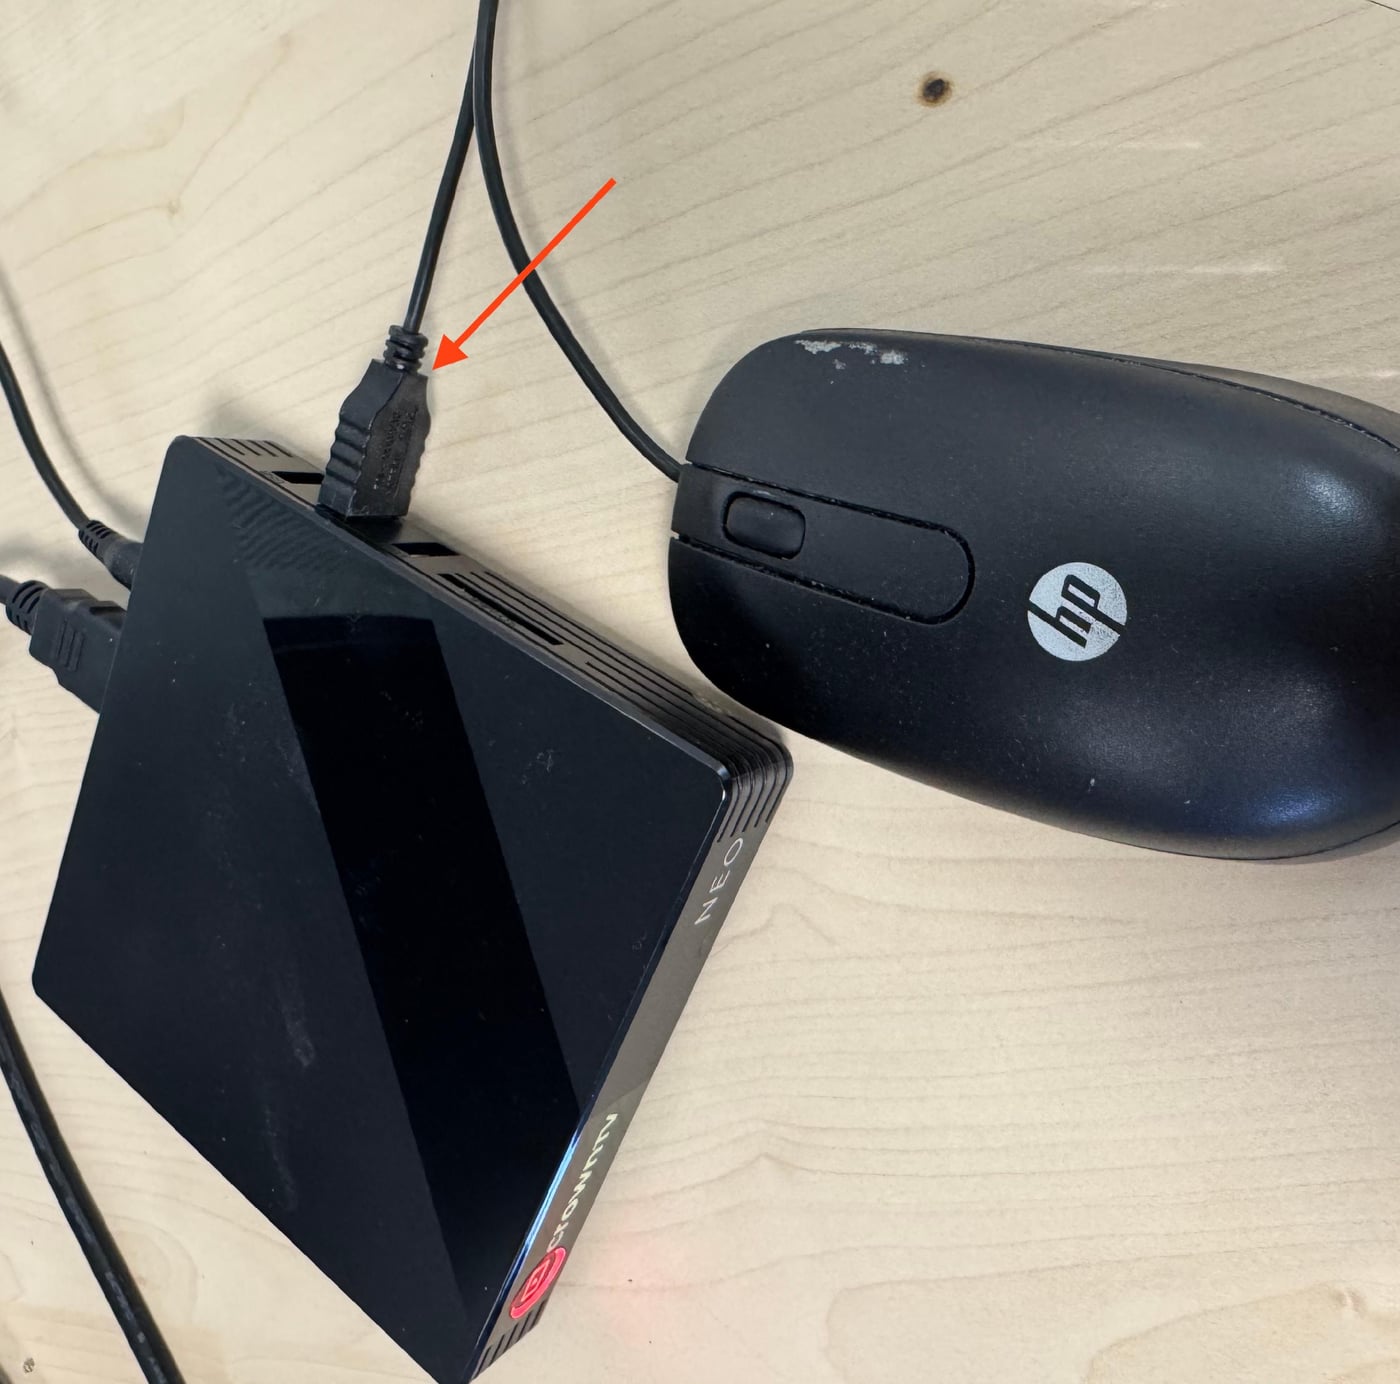
You’ll need a wired USB mouse to navigate the on-screen setup. CrownTV ships one in every package, but any wired USB mouse will work.
- Plug the mouse into one of the black USB ports on the side of the media player. Avoid the blue port.
- Move the mouse — if you see a pointer on screen, it’s working. If not, try another USB port or a different mouse.
Step 2 — Open Network Setup
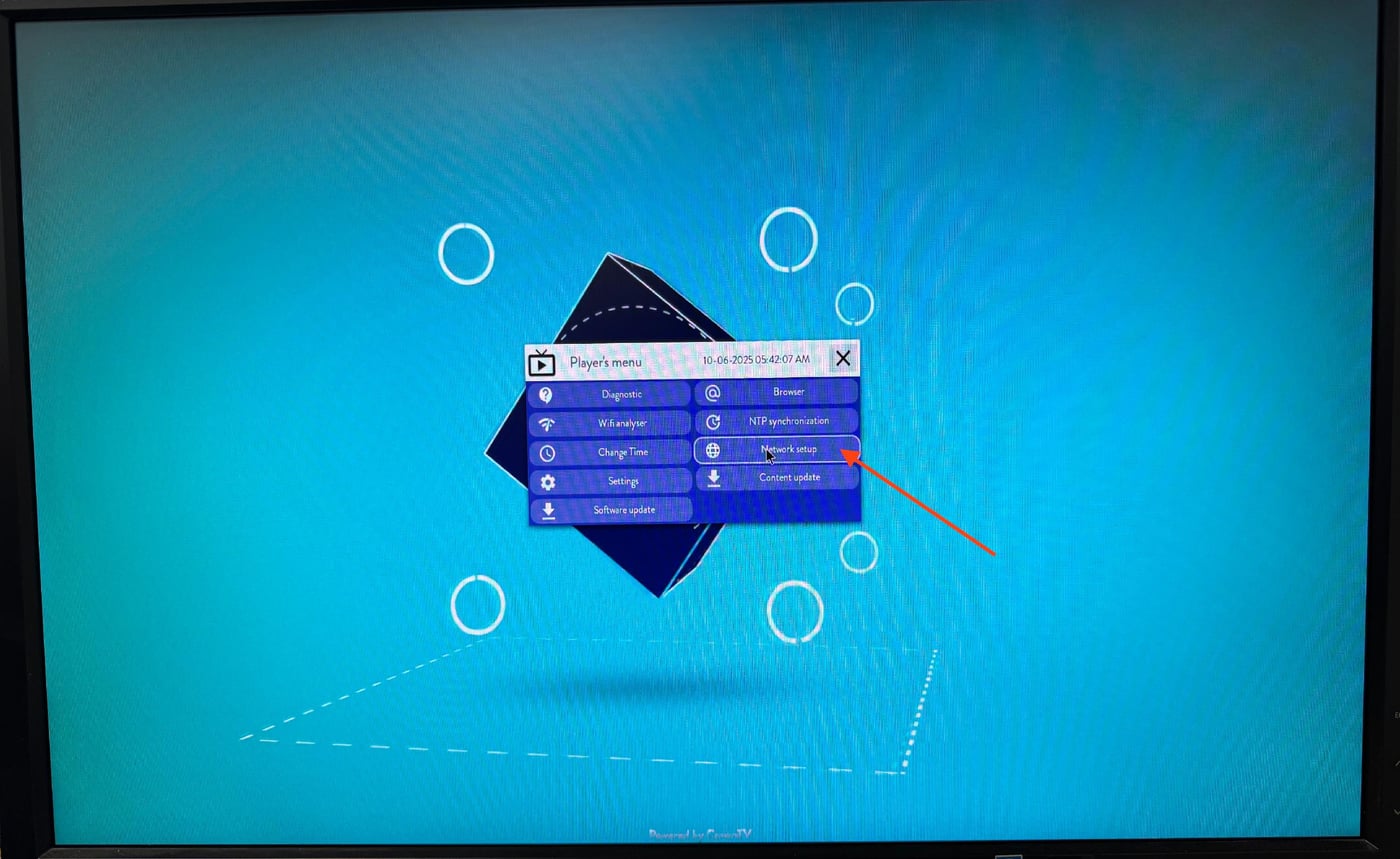
- Left-click anywhere on the screen to open the Player’s menu.
- Choose Network setup → Wi-Fi.
- Pick your Wi-Fi network (SSID) from the list.
- Enter your Wi-Fi password and click Next.
- When the Advanced Wi-Fi Configuration screen appears, click Done.
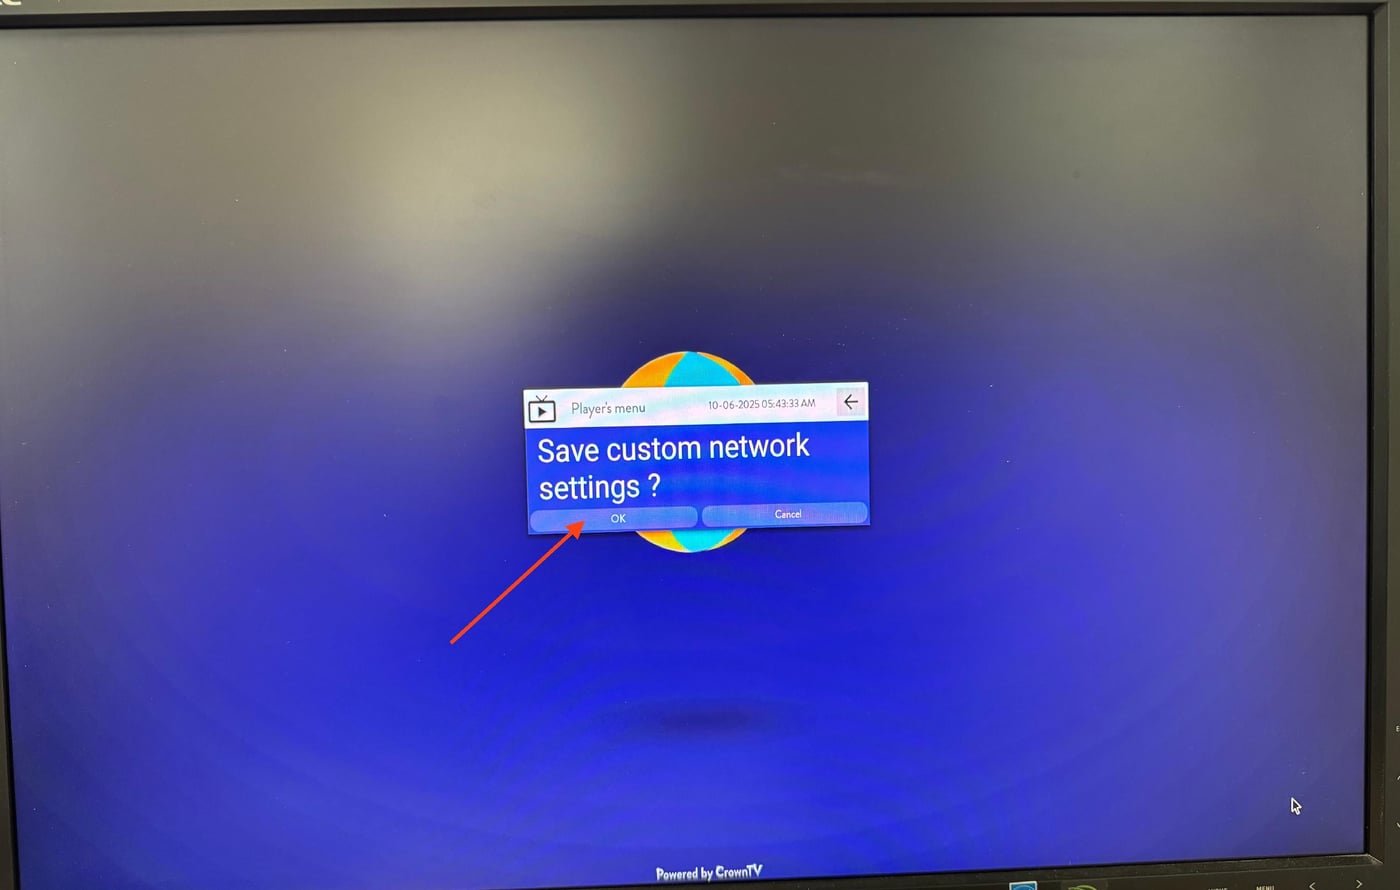
- If a dialog asks “Save custom network settings?”, click OK.
Step 3 — Verify the connection
- Right-click with your mouse to open the Diagnostics window.
- Check that:
- The connection status shows Connected (in green).
- The correct Wi-Fi SSID is displayed.
- Once verified, left-click to close the menu.
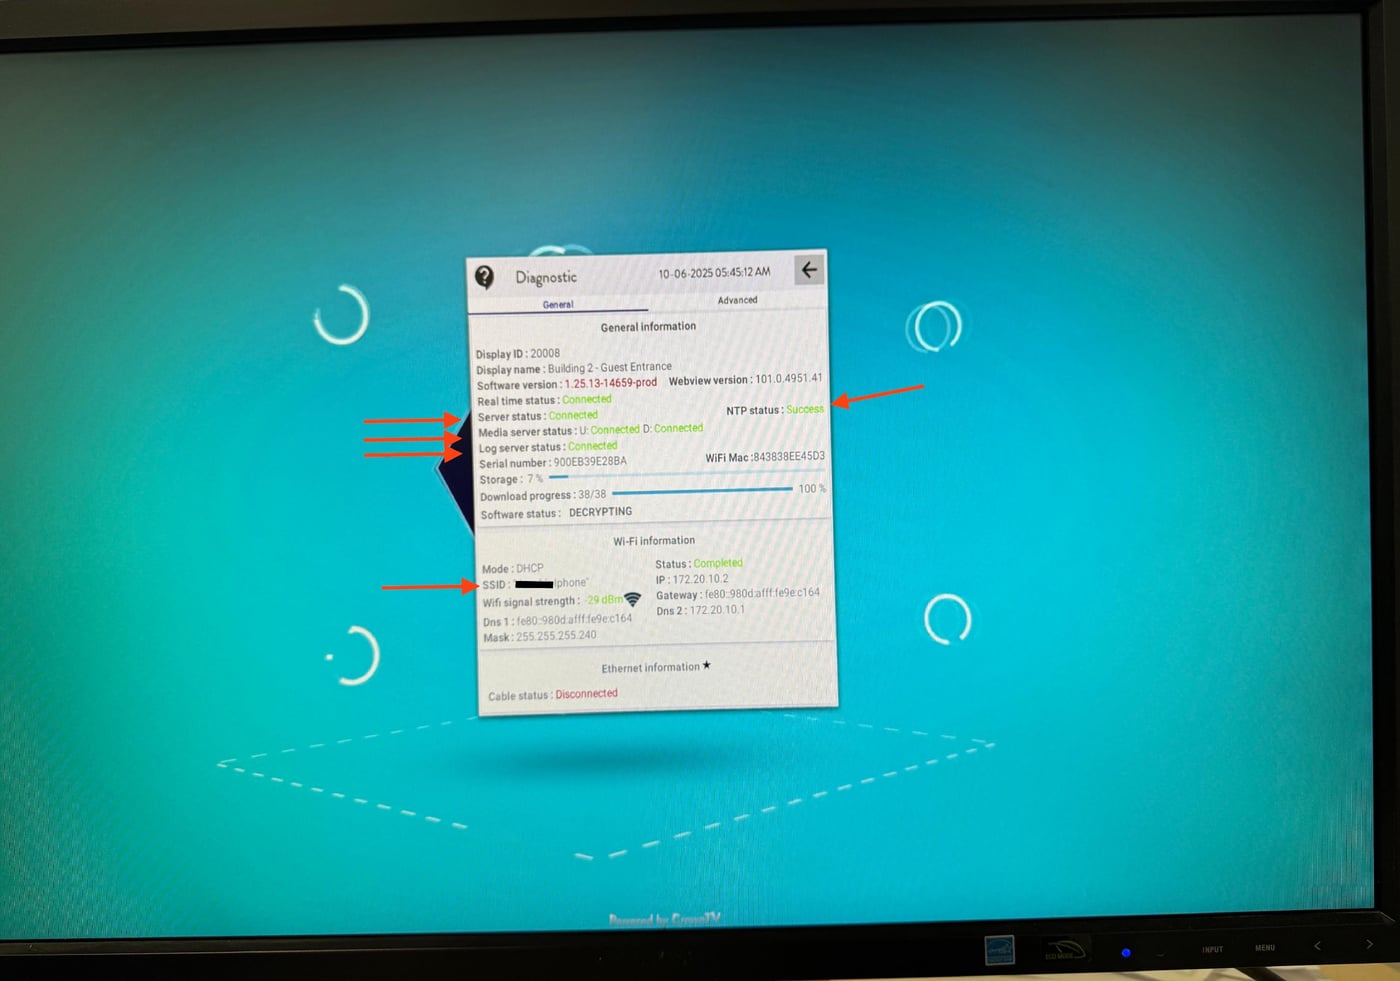
✅ Your CrownTV media player is now connected to Wi-Fi. If the screen displays the correct content and Connected status appears in green, your setup is complete.
Configure Wi-Fi from the dashboard (alternate path)
You can also push Wi-Fi credentials to a player from the dashboard if you’ve already connected the player by another means.
- Sign in and go to Displays → Management.
- Find the row for the display you want to connect.
- Open the Action menu (right edge) and choose Edit Settings.
- Scroll to the Network Information section.
- Choose WiFi.
- Enter your SSID and KEY (Wi-Fi password).
- Click Save.
The player picks up the new credentials on its next check-in.
Confirm the player is online
After updating the settings, open Displays → Monitoring. The Connection column shows a green dot when the player is online and a red dot when it isn’t. The Last Connection column shows when the player last checked in.
If the dot stays red:
- Double-check the Wi-Fi password (case-sensitive).
- Try a different Wi-Fi network or switch to Ethernet to isolate the issue.
- Use Download in the Monitoring row to grab diagnostic logs, then contact support via the in-app Help button.
Still stuck?
Submit a ticket and a CrownTV specialist will reply within 2 business hours.