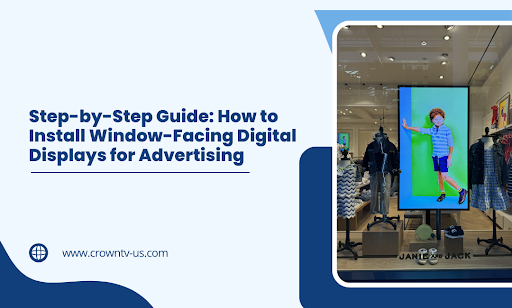
Your storefront window gets thousands of eyes every day. Most businesses squander that opportunity with static posters and fading flyers.
Window-facing digital displays turn casual passersby into paying customers by broadcasting dynamic content that stops people mid-stride. But here’s the catch: one wrong move during installation and you’ll burn through your budget on a screen nobody can see properly, or worse, one that violates local ordinances.
The difference between a display that drives foot traffic and one that collects dust? A methodical installation process that accounts for visibility, brightness, power requirements, and content strategy before you mount anything to the wall.
This guide walks you through each phase of installing window-facing displays that actually convert viewers into customers: You’ll learn which mistakes cost businesses thousands in re-installation fees and how to sidestep them entirely.
Phase 1: Gets Your Foundation Right Before You Spend a Dime
Most failed window display installations trace back to shortcuts taken during the planning phase. You can’t fix a poorly chosen location or an inadequate power supply after the screen goes up.
This phase protects your investment by answering four critical questions before you purchase hardware or schedule installation services.
Assess Your Location’s Visibility Potential
Walk outside and stand where your target viewers will be. Look at your window from multiple angles: directly across the street, from approaching sidewalks, and from different times of day.
Window-facing signage displays differ from indoor environments in several critical ways. Exterior displays face harsher conditions and require careful location assessment to deliver results.
Your location needs to clear these visibility hurdles:
- Viewing distance – Screens visible from 15-30 feet away convert best for foot traffic
- Direct sunlight exposure – South and west-facing windows require displays rated for at least 2,500 nits brightness
- Glare and reflections – Glass coatings, nearby buildings, and street lights create hotspots that wash out content
- Obstruction check – Street furniture, trees, parked vehicles, and window decals block sightlines
- Angle of approach – Pedestrians rarely stand directly in front of windows; they view at 30-45 degree angles
Measure the actual space available on your window. Account for window frames, existing fixtures, and any architectural elements that limit mounting options. The optimal viewing angle for window displays falls between 30 and 45 degrees from center, matching how pedestrians naturally approach storefronts.
Pro tip: Visit your location during morning, midday, and evening hours. Lighting conditions change dramatically, and a screen that looks perfect at 10 AM might become invisible at 6 PM when shadows fall across your window.
Calculate Your Power and Connectivity Requirements
Window-facing displays need reliable power and network connections. Running cables after installation costs three times more than planning routes beforehand.
- Start by identifying your nearest power outlet. Measure the distance from that outlet to your intended screen location. Standard power cables extend 6-10 feet, so gaps longer than that require additional wiring or outlet installation.
- Check your electrical panel capacity. A single commercial-grade display, such as Samsung OM75, draws 150-400 watts depending on size and brightness. If you’re installing multiple screens, calculate total wattage and confirm your circuit can handle the load without tripping breakers.
| Display Size | Typical Power Draw | Circuit Requirement |
| 32-43 inches | 150-200W | 15A circuit |
| 49-55 inches | 250-300W | 15A circuit |
| 65-75 inches | 350-450W | 20A circuit |
For network connectivity, you have three options:- Ethernet cables provide the most stable connection, but require running CAT6 cable from your router to the display.
- Wi fi works for single displays with strong signal strength.
- Cellular modems offer backup connectivity but add monthly data costs.
- Test your WiFi signal at the window location before committing to wireless. Thick walls and metal window frames kill wireless signals faster than you’d expect. Proper network configurations during the planning phase prevent connectivity issues that cause screen downtime later.
Setup typically involves connecting your Samsung OM75 display to both power and network infrastructure. Plan cable routes that meet building codes and maintain a professional appearance.
Research Local Permits and Regulations
Cities regulate window displays differently. Some require permits for electronic signage, others restrict brightness levels, and a few ban animated content entirely.
Contact your local planning or zoning department and ask these specific questions:
- Does your municipality classify window displays as outdoor signage?
- Do brightness restrictions apply to screens facing public streets?
- Are there content restrictions (no flashing, no video, specific hours of operation)?
- Do you need a permit for mounting hardware or electrical work?
- Are there historic district or architectural review requirements?
Building owners and property managers often have their own rules that supersede city regulations. Get written approval before proceeding if you lease your space. Regulatory compliance protects you from fines and forced removal of your displays.
Pro tip: Many cities allow unpermitted displays under certain size thresholds (often 32 square feet). Confirm the square footage limit and calculate your screen’s total area (width × height) before assuming you’re exempt.
Select Hardware That Matches Your Goals
Your hardware ecosystem determines what you can display and how reliably it performs. Cutting corners on any single component creates bottlenecks that limit your entire system.
1. Commercial Displays
- Commercial screens differ from consumer TVs in three critical ways. They’re built to run 16-24 hours daily without burning out. They offer higher brightness ratings (measured in nits) for daylight visibility. They include mounting options and input ports designed for continuous operation.
- Professional displays designed for business use provide reliable operation that consumer models can’t match. Retail stores depend on these displays to maintain consistent messaging without frequent replacements.
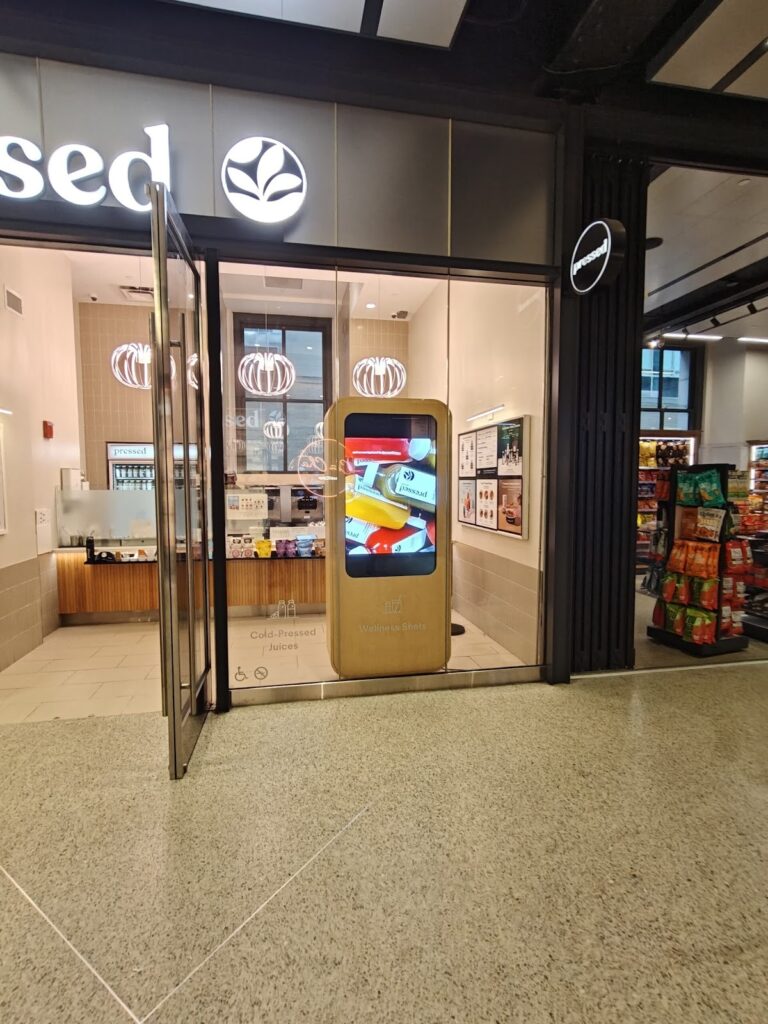
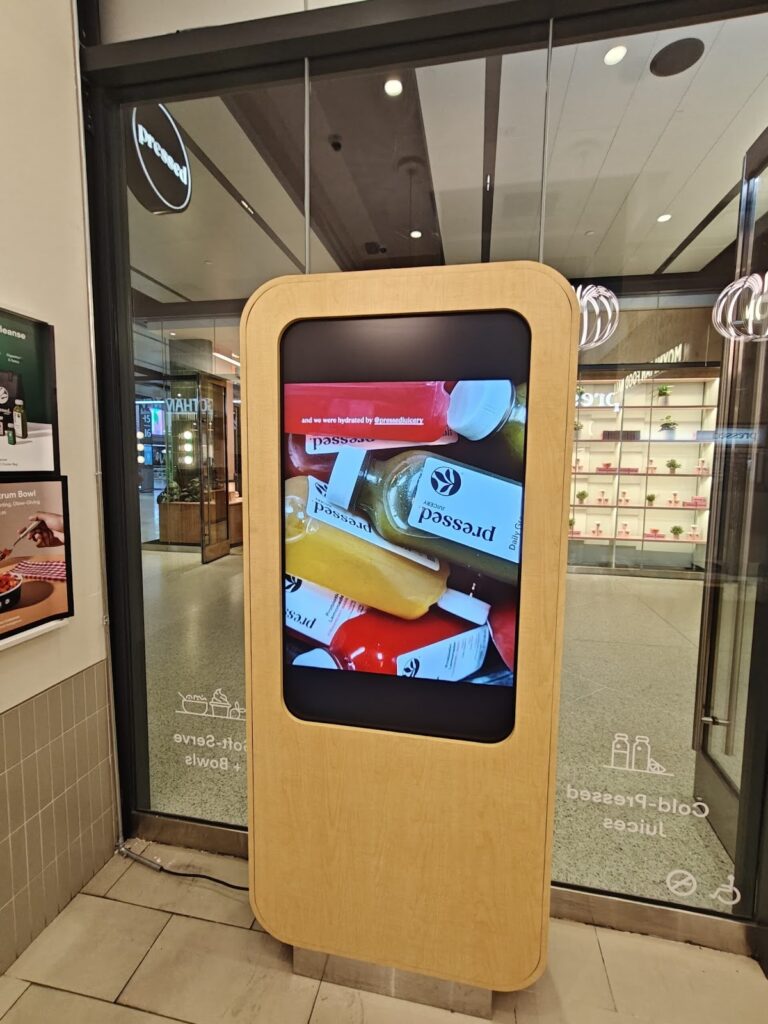
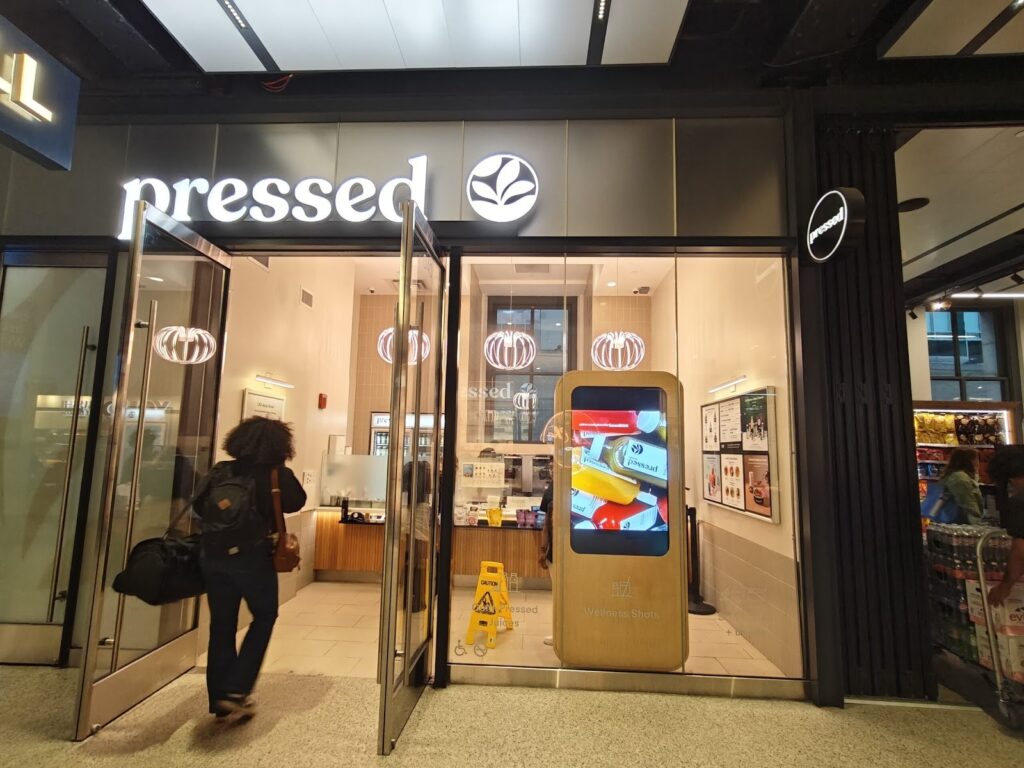
Brightness ratings matter more than screen size. A 43-inch display with 2,500 nits outperforms a 55-inch screen with 700 nits in window applications. Standard indoor displays measure 300-500 nits. Window-facing installations need 2,000-3,500 nits minimum. LED Screens deliver the brightness levels required for outdoor displays and high-ambient-light environments.
Screen orientation affects content strategy. Portrait (vertical) displays work better for menu boards and social media feeds. Landscape (horizontal) screens suit video content and promotional campaigns. Some businesses install both to maximize flexibility. The aspect ratio you choose determines what types of content work best on your Samsung OM75 displays.
Look for these features when comparing display models:
- Tempered glass protection – Prevents screen damage from window condensation and temperature swings
- Wide operating temperature range – Window environments experience more temperature fluctuation than indoor spaces
- Anti-glare coating – Reduces reflection interference from sunlight and street lights
- Commercial-grade panel – Rated for 50,000+ hours of operation versus 20,000 hours for consumer models
- Multiple input options – HDMI, DisplayPort, and USB connections provide setup flexibility
Dynamic displays capable of showing video and animated content require more processing power than static signage devices. Consider your content needs when selecting hardware specifications.
2. Media Players
Media players control what appears on your screen and when. This small piece of hardware makes or breaks your content delivery system. Modern systems integrate cloud-based software that enables remote management and automated software updates.
You have several media player categories to pick from.
- Built-in system-on-chip (SoC) players come integrated into the display itself and eliminate external devices.
- External media players connect via HDMI and offer more processing power for complex content.
- Computer-based solutions provide maximum flexibility but require ongoing maintenance.
Built-in players work well for basic content rotation and simple scheduling. They save space behind the display and reduce cable clutter. The tradeoff comes in limited storage capacity and fewer app integration options.
External media players handle more demanding content requirements. The CrownTV’s media player, for example, packs substantial processing power into a compact unit that mounts discreetly behind displays. It supports hundreds of app integrations from their App World library, which means you can pull live social media feeds, weather updates, and dynamic pricing without custom development work.
Pro tip: Match your media player to your content complexity. Static images and basic video loops run fine on entry-level players. Interactive content, live data feeds, and multi-zone layouts need dedicated processing power.
Key media player specifications to evaluate:
- Storage capacity – 8GB minimum for basic content, 32GB+ for extensive video libraries
- Processing power – Quad-core processors handle multiple content zones and transitions smoothly
- Network connectivity – Dual-band WiFi plus ethernet backup prevents connectivity dropouts
- Remote management – Cloud-based dashboards let you update content without physical access
- App ecosystem – Pre-built integrations save thousands in custom development costs
Key elements of a functional media player include sufficient processing power, adequate storage, and reliable network connectivity. These specifications determine whether your system delivers visually appealing content smoothly or struggles with playback issues.
3. Mounting Hardware
Your mounting system needs to support the display’s weight while allowing for precise positioning adjustments. Window installations face unique challenges compared to standard wall mounts.
- Wall-mount brackets attach directly to wall studs and provide the most stable support. They work best for locations with solid walls adjacent to windows. Look for mounts rated to support 1.5x your display’s weight as a safety margin. Larger displays may require more structural support than standard consumer mounts provide.
- Freestanding mounts don’t require wall penetration, which helps in rental spaces or historic buildings. They take up floor space but offer easy repositioning if your content strategy changes. Choose models with weighted bases to prevent tipping.
- Ceiling-mount systems suspend displays from above, creating eye-level viewing positions without floor or wall contact. They work well in large storefront windows where floor space is premium. The installation requires secure ceiling joists or reinforced mounting points.
- Articulating arms provide tilt and swivel adjustments after installation. This flexibility helps you optimize viewing angles as you test the display in real-world conditions. Fixed mounts cost less but lock you into the initial positioning.
4. Cables and Connectivity
Cable quality affects signal reliability and installation aesthetics. Cheap cables cause intermittent blackouts and signal degradation.
- HDMI cables carry video and audio from your media player to the display. Use certified High-Speed HDMI cables rated for 4K content, even if your current content runs at 1080p. This future-proofs your installation for higher resolution upgrades.
- Ethernet cables provide network connectivity for content management and remote monitoring. CAT6 cables support speeds up to 10 Gbps and handle longer runs without signal loss. Run cables through conduit or cable channels to protect them from damage and maintain a clean appearance.
- Power cables need a proper gauge rating for your display’s wattage. Undersized power cables create fire hazards and void warranties. Use 14 AWG wire minimum for displays drawing under 300W, 12 AWG for higher wattage units.
Cable management systems keep your installation looking professional. Raceways hide cables running along walls or window frames. In-wall conduit provides the cleanest look but requires more installation work.
5. Surge Protection and Power Management
Power surges destroy displays and media players in milliseconds. Window-facing installations face a higher risk from lightning strikes and electrical fluctuations.
- Commercial surge protectors filter power fluctuations and provide multiple outlets for your equipment. Look for units rated for at least 2,000 joules of protection with response times under 1 nanosecond.
- Uninterruptible power supplies (UPS) add battery backup that keeps displays running during brief power outages. This prevents content interruptions and protects against data corruption during unexpected shutdowns. Size your UPS to support your total system load for at least 10-15 minutes.
- Programmable timers or smart power strips let you schedule display on/off times automatically. This extends hardware lifespan and reduces electricity costs during off-hours. Some media players include built-in scheduling, eliminating the need for external timers.
6. Protective Enclosures and Weatherproofing
Window environments expose displays to temperature extremes, condensation, and potential physical damage. Protective measures extend hardware life and reduce maintenance costs.
- Anti-condensation heaters prevent moisture buildup on screens positioned in cold window areas. Condensation causes permanent screen damage and creates viewing quality issues. Small heating elements maintain the screen temperature above the dew point.
- Protective glass or acrylic shields add a barrier between the display and the window. They prevent direct sun exposure from accelerating screen aging and protect against accidental impacts. Anti-reflective coatings on shields improve visibility without reducing brightness.
- Ventilation systems manage heat buildup in enclosed spaces. Displays generate significant heat during operation, and window installations often trap that heat. Small fans or ventilation grilles prevent overheating and extend component life.
Security enclosures deter theft and vandalism in high-risk locations. Lockable metal housings with tamper-resistant fasteners protect expensive displays while maintaining content visibility.
7. Content Strategy Considerations
Your hardware choices should support the types of content you plan to display. Informational content requires less processing power than video or interactive elements. If you plan to display company news, social media feeds, or live data, choose hardware that supports these integrations natively.
Price out the complete system costs before finalizing your choice. The display itself represents 60-70% of total hardware expenses. Factor in media players, mounting brackets, cables, surge protection, and protective accessories. A complete professional installation typically runs $2,500-$8,000, depending on display size and feature complexity.
Phase 2: Turns Your Hardware Into a Working System
Poor installation technique wastes hours of planning and puts expensive equipment at risk. This phase requires precision, patience, and respect for electrical safety protocols.
You’re working with heavy displays, power tools, and electrical connections. One mistake can damage your screen, create fire hazards, or violate building codes.
Prepare Your Workspace and Gather Tools
Clear the installation area of furniture, merchandise, and obstacles. You need unobstructed access to the window, nearby walls, and power sources.
Essential Installation Tools
| Tool Category | Specific Tools | Purpose |
| Measurement & Leveling | Stud finder, laser level, measuring tape | Locate studs, ensure straight mounting |
| Power Tools | Drill with masonry/wood bits, impact driver | Create mounting holes, drive fasteners |
| Electrical | Voltage tester, cable tester, wire strippers | Verify power safety, test connections |
| Cable Management | Fish tape, cable puller, crimping tool | Route cables, terminate connections |
| Safety Equipment | Ladder/scaffolding, safety glasses, gloves | Safe access to mounting height |
Turn off the power at the circuit breaker for any electrical work. Test outlets with a voltage tester after shutting off power to confirm the circuit is dead.
Mount Your Display Securely
Wall studs provide the only safe anchor points for heavy displays. Drywall anchors fail under sustained weight and create liability risks.
Locating and Marking Stud Positions
Use your stud finder to locate studs adjacent to your chosen installation spot. Studs typically run 16 inches apart in residential buildings and 24 inches apart in commercial structures.
Mark the stud locations using this method:
- Scan horizontally with your stud finder at the desired mounting height
- Mark the center of each stud with painter’s tape
- Verify stud locations by drilling small test holes
- Measure and confirm studs align with your bracket’s mounting holes
Pro tip: If studs don’t align with your mounting bracket, install a horizontal backing board across multiple studs. The backing board creates a solid mounting surface at any horizontal position.
Wall-Mount Installation Steps
Hold your mounting bracket against the wall at the desired height. Use a level to confirm the bracket sits perfectly horizontal.
Step-by-step mounting process:
- Position the bracket – Hold it at the final mounting height and mark through the mounting holes
- Drill pilot holes – Use a bit slightly smaller than your lag bolts (prevents wood splitting)
- Attach wall bracket – Drive 3-4 inch lag bolts through the bracket into the studs
- Torque check – Tighten bolts firmly, but avoid stripping threads
- Mount display bracket – Attach VESA plate to back of screen per manufacturer specs
- Hang the display – Lift screen onto wall bracket with assistance (40-80 lbs typical)
- Level and adjust – Fine-tune position using bracket adjustment screws
- Secure retention – Engage safety locks or clips to prevent sliding
VESA Mounting Pattern Reference
Commercial displays like Samsung OM55B use standardized VESA patterns for universal bracket compatibility. Confirm your display’s VESA size before purchasing mounting hardware.
| Display Size | Common VESA Pattern | Bolt Size |
| 32-43 inches | 200x200mm | M6 |
| 43-55 inches | 400x400mm | M6 or M8 |
| 55-65 inches | 400x400mm | M8 |
| 65-75 inches | 600x400mm | M8 |
Freestanding Mount Installation
Position your freestanding mount at the desired location. Confirm it doesn’t block foot traffic, create tripping hazards, or obstruct emergency exits.
Installation checklist:
- Assemble the base according to the manufacturer’s instructions
- Attach the vertical pole to the base using the included hardware
- Mount the VESA bracket to the display back
- Lift the display onto the pole mount with assistance
- Level the screen using built-in adjustment points
- Add stabilizing weights to the base if provided
- Test stability by gently pushing the display top
- Install cable management clips along the pole
- Secure to the floor if in a high-traffic area
Run Power Cables Properly
Power cable routing affects both safety and aesthetics. Exposed cables create tripping hazards and look unprofessional.
Cable Management Options Comparison
Different routing methods suit different installation scenarios. Pick the approach that matches your space constraints and budget.
| Method | Installation Time | Visibility | Code Compliance | Best For |
| Surface raceway | 30-60 minutes | Medium | Good | Rental spaces, temporary setups |
| In-wall routing | 2-4 hours | Minimal | Excellent | Permanent installations |
| Floor conduit | 1-2 hours | Low | Excellent | Freestanding mounts |
| Existing pathways | 15-30 minutes | Varies | Good | Using existing cable runs |
Surface-Mount Cable Management
Cable raceways attach directly to walls and window frames, concealing cables in plastic or metal channels. They install quickly without cutting into walls.
Installation process:
- Measure the total cable run distance from the outlet to the display
- Add 10% extra length for corners and vertical sections
- Cut raceway sections using a fine-tooth saw
- Clean the mounting surface with isopropyl alcohol
- Peel the adhesive backing and press the base onto the wall
- Route the power cable through the channel
- Snap cover pieces into place
- Install corner pieces for 90-degree turns
- Seal end caps to prevent dust entry
Match the raceway color to your wall or window frame for the least visible installation. White, black, and wood-grain finishes blend with most commercial interiors.
In-Wall Cable Installation
In-wall routing creates the cleanest appearance but requires more work and electrical knowledge. Some jurisdictions require licensed electricians for any in-wall power work.
Safety requirements for in-wall power:
- Use CL2 or CL3-rated cables (standard power cords violate code)
- Install junction boxes at all connection points
- Maintain proper wire gauge for the amperage load
- Separate power cables from data cables by 6+ inches
- Use conduit in fire-rated walls
- Ground all outlets properly
- Test with a voltage tester before use
Fish your power cable from the existing outlet to the new outlet box location. Use fish tape to guide cables through wall cavities.
Pro tip: Drill access holes near the top of walls where they’ll be hidden by the display. Patch and paint holes if you need to reroute cables during installation.
Run Network Cables for Reliable Connectivity
Network connectivity keeps your content management system communicating with the display. Intermittent connections cause content gaps and scheduling failures.
Network Connection Method Decision Tree
Choose your connectivity method based on these installation factors:
- Use Ethernet if:
- Display is within 300 feet of the router
- You need guaranteed bandwidth for 4K content
- Multiple displays will share the network
- You’re running cables anyway for power
- The building has existing network infrastructure
- Use WiFi if:
- Display location makes cable runs impractical
- You have a strong signal at the mounting location (test first)
- Content doesn’t require guaranteed bandwidth
- You need installation flexibility
- Budget won’t accommodate cable installation
- Use Cellular if:
- No existing network infrastructure available
- Display is in a remote location
- You need backup connectivity
- Content updates are infrequent
- Monthly data costs fit your budget
Ethernet Cable Installation Best Practices
CAT6 cables provide the most stable connection for digital signage. They support faster speeds than older CAT5e cables and handle longer runs without signal degradation.
Professional cable routing standards:
- Maintain separation – Keep 6+ inches from power lines
- Secure properly – Use cable clips every 12-18 inches
- Respect bend radius – Don’t bend sharper than 4x cable diameter
- Label both ends – Use permanent labels or tags
- Test before termination – Verify continuity with cable tester
- Follow color codes – Use T568B standard for RJ45 termination
- Leave service loops – Extra 3 feet at each end for adjustments
- Protect from damage – Use conduit or raceway for exposed runs
Cable Termination and Testing
Terminate cables with RJ45 connectors using a crimping tool. Poor terminations cause intermittent connectivity that’s difficult to troubleshoot.
| Wire Position | T568B Color | Function |
| Pin 1 | White/Orange | TX+ |
| Pin 2 | Orange | TX- |
| Pin 3 | White/Green | RX+ |
| Pin 4 | Blue | Unused |
| Pin 5 | White/Blue | Unused |
| Pin 6 | Green | RX- |
| Pin 7 | White/Brown | Unused |
| Pin 8 | Brown | Unused |
Test each cable with a network tester before connecting equipment. A $30 cable tester saves hours of troubleshooting failed connections.
WiFi Connection Optimization
WiFi works for single displays in locations with strong signal strength. Test signal quality at the mounting location before committing to wireless connectivity.
WiFi setup checklist:
- Position the router within the line-of-sight of the display
- Use 5GHz band for less interference
- Configure static IP assignment via DHCP reservation
- Set channel width to 40MHz or 80MHz for better throughput
- Enable WPA3 security if available
- Document network credentials in installation notes
- Test connection stability for 24 hours before finalizing
- Install a WiFi extender if the signal drops below -70 dBm
Position Displays for Maximum Visibility
Mounting height and viewing angle determine how many people actually see your content. Small adjustments create dramatic differences in visibility.
Optimal Viewing Height Guidelines
Eye level for standing adults falls between 57 and 65 inches from the floor. Mount your Samsung OM55B display so the center sits within this range for maximum engagement.
| Audience Type | Center Height | Reason |
| Pedestrian traffic | 57-62 inches | Average adult eye level |
| Mixed foot traffic | 52-58 inches | Accommodates shorter viewers |
| Vehicle traffic | 65-72 inches | Elevated driver sightlines |
| Children’s areas | 48-54 inches | Child’s eye level |
Account for the window sill height in your calculations. A windowsill 30 inches high forces you to mount displays higher, which may push them above the optimal viewing range.
Angle Adjustment for Street Visibility
Viewers rarely stand directly in front of the Samsung OM55B displays. They approach at angles while walking down sidewalks or driving past.
Angle optimization settings:
- Tilt (vertical): 5-10 degrees downward for pedestrian viewing
- Rotation (horizontal): 10-15 degrees toward primary foot traffic direction
- Distance from window: 6-18 inches back reduces glare
- Screen brightness: Adjust based on outdoor lighting conditions
Walk outside and test visibility from multiple approach angles:
- Direct frontal view (rare in practice)
- 30-degree angle from the primary approach direction
- 45-degree angle from the secondary approach
- Extreme 60-degree angles (content should still be recognizable)
Pro tip: Take photos from various viewing positions. Glare and reflection issues often show up more clearly in photos than during an in-person assessment.
Screen Size to Viewing Distance Ratio
Display size and mounting distance work together to create effective viewing zones. Your screen needs to be large enough to read from your target viewing distance.
| Viewing Distance | Minimum Display Size | Recommended Size | Text Height |
| 10-15 feet | 32 inches | 43 inches | 2+ inches |
| 15-25 feet | 43 inches | 55 inches | 3+ inches |
| 25-40 feet | 55 inches | 65-75 inches | 4+ inches |
| 40+ feet | 75 inches | 85+ inches | 6+ inches |
Test content readability from your actual viewing distances. Text needs to be large enough that viewers can read key messages without stopping or squinting.
Test All Connections Before Finalizing
Power on your display and confirm it receives a signal from your media player. Check that brightness settings are adequate for current lighting conditions.
Comprehensive system test checklist:
- Display powers on without flickering
- Media player connects and displays content
- Network connection stable (ping test for 5+ minutes)
- Brightness is adequate in the current lighting
- All content zones display correctly
- Audio levels appropriate (if applicable)
- Remote management access works
- Scheduled content transitions properly
- No visible cable slack or tension
- Mounting hardware is secure and level
- Outdoor visibility confirmed from multiple angles
- No screen glare or reflection issues
Run your display through a complete content cycle. Confirm that all scheduled content appears correctly and transitions work smoothly.
Why Professional Installation Protects Your Investment
Window-facing display installation carries risks that outweigh the money saved attempting DIY work. The potential costs of mistakes far exceed professional installation fees.
Risk Assessment for DIY Installation
| Risk Category | Potential Consequence | Typical Cost to Fix |
| Electrical mistakes | Fire hazard, code violations | $2,000-5,000+ |
| Improper mounting | Display falls, property damage | $3,000-8,000 |
| Screen damage during install | Cracked panel, void warranty | $2,500-6,000 |
| Code violations | Fines, forced reinstallation | $1,500-4,000 |
| Poor cable routing | Failures, safety hazards | $800-2,500 |
Professional installers carry liability insurance that covers equipment damage and property issues. They know local building codes and permit requirements.
Hidden Costs of DIY Installation
The money you “save” on installation gets consumed by these overlooked expenses:
- Tool rental or purchase:
- Professional drill and bits: $150-300
- Stud finder: $40-80
- Cable tester: $30-100
- Fish tape and pulling tools: $50-120
- Ladder or scaffolding rental: $75-200/day
- Cable crimping tools: $60-150
- Wasted materials from mistakes:
- Incorrect bracket purchase: $100-300
- Wrong cable types or lengths: $50-200
- Extra mounting hardware: $40-100
- Additional trips to hardware stores: Time + gas
- Time investment:
- Research and planning: 4-8 hours
- Actual installation work: 6-12 hours (first time)
- Troubleshooting issues: 2-10 hours
- Total time cost: 12-30 hours
A damaged display during DIY installation isn’t covered by manufacturer warranties. Drop a $3,000 screen while mounting it yourself, and you’re buying a replacement out of pocket.
Professional Installation Value Proposition
For businesses in the United States, CrownTV handles the complete installation process from start to finish. Their technicians assess your location, install hardware correctly, configure your content management system, and provide training on how to update content.
What professional installation includes:
- Site assessment and mounting location optimization
- All necessary tools and equipment
- Proper cable routing that meets building codes
- System configuration and testing
- Staff training on content management
- Liability coverage for equipment and property
- Warranty protection (DIY voids most warranties)
- Ongoing technical support after installation
You get a working display system without the risks and frustrations of self-installation. Their nationwide service network means you have support across multiple locations. A professional installation takes 2-4 hours versus the 12-30 hours you’d spend figuring things out yourself.
The choice comes down to risk tolerance. Save $500-1,000 on installation costs and accept the risk of thousands in potential damages, or invest in professional installation and get guaranteed results with zero liability.
Phase 3: Bring Your Hardware to Life
Your mounted display is useless withouta content strategy. This phase transforms blank screens into attention-grabbing marketing tools that drive measurable results.
You’ll configure your content management system, design visuals that stop passersby mid-stride, and build scheduling logic that matches when your audience actually walks past your window.
Set Up Your Content Management Dashboard
Content management systems control what appears on your screens and when. The dashboard becomes your command center for all content operations.
Log in to your content management platform using the credentials provided with your media player. Most commercial systems require you to create an organizational account before adding individual displays.
First-time setup checklist:
- Create an organizational account with business details
- Add display devices using MAC addresses or serial numbers
- Assign device names that identify location (e.g., “Main St Window 1”)
- Set time zone and operating hours for each display
- Configure display resolution and orientation settings
- Test the remote connection from the dashboard to display
- Set up user accounts for team members who’ll manage content
- Define permission levels (admin, editor, viewer)
CrownTV’s dashboard supports managing screens across multiple locations from a single interface. You can update content for displays in different cities without physical access to any of them. Their system includes built-in security protocols that prevent unauthorized access while allowing your team the flexibility they need.
Display Organization and Grouping
Group displays logically to streamline content management. Groups let you push content to multiple screens simultaneously rather than updating each one individually.
| Grouping Strategy | When to Use | Example Groups |
| By location | Multiple displays per site | “Downtown Store”, “Suburban Location” |
| By content type | Different messaging needs | “Promotions”, “Menu Boards”, “Brand Content” |
| By schedule | Different operating hours | “24-Hour Displays”, “Business Hours Only” |
| By audience | Different demographics | “Street-Facing”, “In-Store”, “Corporate Lobby” |
Create groups during initial setup. Reorganizing later requires updating each display’s settings individually.
Pro tip: Use a naming convention that scales with your business. “Store-001-Window-A” works better than “Front Window” when you expand to multiple locations.
User Permission Management
Control who can edit content, approve campaigns, and access system settings. Poor permission management leads to unauthorized content changes and security vulnerabilities.
Recommended permission structure:
- Admin – Full system access, billing, user management, and all content control
- Content Manager – Create and publish content, manage schedules, and view analytics
- Content Creator – Upload and design content, submit for approval
- Viewer – View analytics and scheduled content, no editing rights
Require manager approval for content that goes live on customer-facing displays. The approval workflow prevents mistakes and maintains brand consistency.
Create Content That Commands Attention
Window-facing displays compete with smartphones, conversations, and dozens of other visual stimuli. Your content needs to grab attention in under 3 seconds, or viewers keep walking.
Content Design Principles for Window Displays
Effective window content follows different rules from indoor signage. Viewers see your content from farther away, at awkward angles, and in varying light conditions.
Core design requirements:
| Element | Window Display Spec | Why It Matters |
| Text size | 100+ pixels tall for headlines | Readable from 20+ feet away |
| Color contrast | 4.5:1 minimum ratio | Overcomes glare and reflections |
| Animation speed | 3-5 seconds per frame | Viewers don’t stop to watch |
| Text density | 7 words or fewer per frame | Quick comprehension while walking |
| Brand elements | Logo visible for 2+ seconds | Builds recognition without overwhelming |
Use bold sans-serif fonts. Thin or decorative fonts become illegible from a distance. Avoid script fonts entirely for window displays.
High-Contrast Color Combinations
Your color choices determine visibility in bright daylight and evening darkness. Poor contrast makes even the brightest displays difficult to read.
Most effective color pairs for window displays:
- High visibility combinations:
- Black text on yellow background
- White text on dark blue background
- Yellow text on black background
- White text on red background
- Black text on white background
- Avoid these low-contrast pairs:
- Gray on white
- Blue on purple
- Red on orange
- Light green on white
- Any pastel combinations
Test your color choices by viewing them on your phone screen at full brightness in direct sunlight. If you struggle to read the text on your phone, viewers will struggle with your window display.
Content Type Strategy and Mix
Vary your content types to maintain viewer interest over time. The same promotional message loses effectiveness when people see it daily.
Recommended content distribution:
| Content Type | % of Total Airtime | Update Frequency | Purpose |
| Promotions | 40% | Weekly or bi-weekly | Drive immediate action |
| Brand messaging | 25% | Monthly | Build awareness and identity |
| Social proof | 15% | Weekly | Show customer satisfaction |
| Event announcements | 10% | As needed | Promote time-sensitive offers |
| Entertainment | 10% | Daily or weekly | Attract and hold attention |
Entertainment content includes non-promotional visuals that make people stop and look. Local weather, news headlines, sports scores, or artistic visuals create interest without selling.
Pro tip: CrownTV’s App World gives you access to hundreds of pre-built content integrations. Pull live social media feeds, weather updates, or stock tickers without custom development work. The integrations update automatically, keeping your content fresh without manual intervention.
Image and Video Specifications
Technical specifications affect how content appears on your display. Wrong specs cause pixelation, letterboxing, or loading failures.
Optimal file specifications:
- For static images:
- Resolution: Match your display’s native resolution exactly
- File format: PNG for graphics with text, JPG for photos
- File size: Under 5MB for quick loading
- Color space: sRGB for consistent colors across devices
- For video content:
- Resolution: 1920×1080 minimum (4K for larger displays)
- Frame rate: 30fps for standard content, 60fps for fast motion
- Codec: H.264 for broad compatibility
- Bitrate: 10-20 Mbps for smooth playback
- Duration: 10-30 seconds per clip (longer videos lose viewer attention)
- Audio: Skip it for window displays (most have no speakers)
Compress videos using HandBrake or similar tools. Uncompressed video files cause playback stuttering and exceed most media player storage capacity.
Build Smart Scheduling Logic
Content scheduling determines when specific messages appear on your displays. Smart scheduling matches content to viewer context for better engagement and conversion.
Different times of day attract different audiences with different needs. Your morning commuter audience won’t respond to the same messages as evening shoppers.
Daypart scheduling framework:
| Time Block | Typical Audience | Recommended Content | Example Message |
| 6-9 AM | Commuters, early shoppers | Quick offers, breakfast items | “Grab & Go: Coffee $2” |
| 9 AM-12 PM | Shoppers, professionals | Standard promotions, services | “Summer Sale: 30% Off” |
| 12-2 PM | Lunch crowd, tourists | Lunch specials, quick services | “Lunch Combo: Ready in 5 Min” |
| 2-5 PM | Afternoon traffic, students | Snacks, after-school offers | “Happy Hour Starts at 4” |
| 5-8 PM | Evening commuters, diners | Dinner options, evening services | “Dinner Special: Two for $30” |
| 8 PM-Close | Late night, weekend crowds | Entertainment, late offers | “Open Until Midnight” |
Create content playlists for each daypart. Schedule them to rotate automatically based on time of day.
CrownTV’s scheduling system lets you set different playlists for different days of the week. Your Saturday content can differ from your Tuesday content without manual intervention. The platform handles the switching automatically based on your preset rules.
Day-of-Week Scheduling Variations
Weekday audiences behave differently from weekend crowds. Match your content strategy to these patterns.
Weekly content calendar approach:
- Monday-Thursday – Professional audience, routine purchases, practical messaging
- Friday – Mix of professionals and early weekend shoppers, promotional content
- Saturday – Leisure shoppers, family groups, entertainment-focused content
- Sunday – Relaxed pace, brunch crowds, longer dwell time tolerance
Program your system to automatically switch content based on the day. Friday evening content should differ from Monday morning content without you remembering to make manual changes.
Weather-Responsive Content
Weather conditions influence buying behavior and viewer receptiveness to certain messages. Dynamic content that responds to weather performs better than static rotation.
Weather-triggered content examples:
| Weather Condition | Content Adjustment | Business Application |
| Rain/Snow | Hot beverages, comfort items | “Warm Up: Hot Chocolate $3” |
| High heat | Cold drinks, AC services | “Beat the Heat: Iced Drinks” |
| Cold snap | Heating solutions, warm clothing | “Winter Gear: 40% Off Today” |
| Sunny | Outdoor products, seasonal items | “Perfect Beach Weather” |
Set up weather-triggered rules in your content management system. Many platforms integrate with weather APIs to automatically swap content based on current conditions.
Event-Based and Special Occasion Scheduling
Calendar events and local happenings create content opportunities that drive traffic when activated at the right moments.
Event content calendar:
- Annual events to program in advance:
- Major holidays (Christmas, New Year’s, Thanksgiving)
- Retail events (Black Friday, Back to School)
- Local festivals and parades
- Sporting events (playoffs, championships)
- Community events specific to your location
- Real-time event responses:
- Local team wins (trigger celebration content)
- Breaking news relevant to your business
- Sudden weather events
- Competitor actions
- Viral social media moments
Create content assets for predictable events months in advance. Store them in your media library, ready for deployment. You’ll avoid last-minute rushes to create holiday content while managing regular business operations.
Match Content to Foot Traffic Patterns
Foot traffic analysis reveals when potential customers pass your window. Schedule your most compelling content during peak traffic periods.
Analyze Your Traffic Patterns
Track foot traffic for at least two full weeks before finalizing your content schedule. Patterns vary by location type, day of week, and season.
Traffic analysis methods:
- Manual counting:
- Stand inside and tally passersby during different time blocks
- Record 15-minute intervals for a complete hourly picture
- Note the differences between weekday and weekend patterns
- Track traffic direction (which way are they walking)
- Automated counting:
- Install door counters that track entry versus passersby
- Use video analytics software to count people
- Review POS data for purchase timing patterns
- Analyze parking lot traffic if applicable
- Traffic pattern documentation:
| Time Block | Mon-Fri Average | Weekend Average | Peak Days | Content Priority |
| 7-9 AM | 150 people/hour | 50 people/hour | Tuesday | High |
| 9-11 AM | 80 people/hour | 120 people/hour | Saturday | Medium |
| 11 AM-1 PM | 200 people/hour | 180 people/hour | Friday | Very High |
| 1-3 PM | 90 people/hour | 140 people/hour | Sunday | Medium |
| 3-5 PM | 110 people/hour | 100 people/hour | Thursday | Medium |
| 5-7 PM | 180 people/hour | 160 people/hour | Friday | High |
Peak Period Content Strategy
Concentrate your most valuable content during high-traffic periods. Save secondary messages for slower times when fewer people see them anyway.
Content prioritization by traffic volume:
- High-traffic periods (150+ people/hour):
- Primary promotional offers
- New product launches
- Call-to-action messages with urgency
- Brand-building content with strong visuals
- Special events and limited-time offers
- Medium-traffic periods (75-150 people/hour):
- Secondary promotions
- Educational content about products/services
- Customer testimonials and reviews
- Seasonal messaging
- General brand awareness
- Low-traffic periods (under 75 people/hour):
- Ambient brand visuals
- Entertainment content
- Community information
- Operating hours and contact details
- Lower-priority announcements
Rotate your premium content through high-traffic slots first. Use lower-traffic periods to test new creative concepts before committing them to prime time slots.
Content Rotation Timing and Frequency
How long each piece of content stays on screen affects message retention and viewer fatigue. Too fast, and viewers miss the message. Too slow, and they walk past before seeing your full rotation.
Optimal rotation timing guidelines:
| Content Type | Display Duration | Rotation Frequency | Total Loop Length |
| Static image | 8-12 seconds | Every 5-8 frames | 60-90 seconds |
| Text-heavy message | 12-15 seconds | Every 6-10 frames | 90-120 seconds |
| Video content | 15-30 seconds | Every 4-6 frames | 90-180 seconds |
| Animation | 10-15 seconds | Every 5-8 frames | 75-120 seconds |
Build content loops that complete in under 2 minutes total. Viewers who stop to watch should see your complete message cycle before losing interest.
Change your content library weekly minimum. Daily exposure to identical content causes viewer blindness, where regular passersby stop noticing your display entirely.
Test and Refine Your Content Performance
Track which content drives results and which gets ignored. Data-driven optimization improves performance over time.
Key Performance Indicators to Monitor
Your content management system should provide analytics on content performance. Focus on metrics that correlate with business outcomes.
Essential metrics to track:
- Dwell time – How long viewers stop to watch (5+ seconds indicates engagement)
- Content completion rate – Percentage who watch the full message versus partial view
- Peak performance times – Which dayparts generate most engagement
- Content type performance – Video versus static, promotional versus informational
- Call-to-action response – Foot traffic increases during specific content
Pro tip: Correlate display content with POS data. Track sales spikes that align with specific promotional content. This proves ROI and guides future content decisions.
A/B Testing Framework
Test content variations against each other to identify what resonates with your audience. Small changes in messaging, colors, or calls-to-action can produce dramatically different results.
Elements to test systematically:
| Test Variable | Variation A | Variation B | Measure |
| Headline copy | Feature-focused | Benefit-focused | Click-through, foot traffic |
| Color scheme | Brand colors | High-contrast | Dwell time, engagement |
| Call to action | “Shop Now” | “Limited Time” | Conversion rate |
| Image style | Product photos | Lifestyle images | Stop rate, interest |
| Animation speed | 10-second frames | 5-second frames | Completion rate |
Run each test for at least one full week to account for day-of-week variations. Split test timing between similar periods (don’t compare Monday against Saturday).
Seasonal Content Adjustments
Viewer needs and traffic patterns shift with seasons. Your content strategy needs to adapt to remain relevant and effective.
Seasonal content considerations:
- Winter months:
- Earlier darkness affects viewing hours and brightness requirements
- Holiday shopping creates different traffic patterns
- Weather-related messaging becomes more relevant
- Indoor comfort messaging resonates
- Spring/Summer:
- Extended daylight requires brightness adjustments
- Outdoor activities influence product interest
- Vacation season affects local traffic patterns
- Seasonal products take priority
- Back-to-school/Fall:
- Family shopping traffic increases
- Routine establishment affects timing
- Weather transition creates dual messaging needs
- Holiday preparation begins
Review and refresh your content library at each season change. Archive off-season content for reuse next year rather than recreating it from scratch.
Your content management system determines how effectively you communicate with potential customers. CrownTV’s platform combines intuitive scheduling tools with powerful analytics that show which content drives real business results. The system scales from single displays to nationwide deployments without added complexity, giving you consistent control regardless of how many screens you manage.
Phase 4: Validates Your Installation Against Real-World Conditions
Your display works in controlled conditions. Now test it against sunlight, viewer behavior, and daily operational demands.
This phase catches problems before they affect your target audience and establishes routines that keep your digital signage system running smoothly for years. Proper testing protects your digital signage investment from premature failures and performance issues.
Adjust Brightness for All Lighting Conditions
Window displays face dramatically different lighting throughout the day. Settings that work at 10 AM become invisible at noon or create eye strain at night.
LED displays require different brightness levels depending on ambient light conditions. Modern digital signage hardware includes automatic brightness sensors, but manual verification ensures they function correctly.
Daylight Brightness Testing
Test your display during the brightest part of the day, typically 11 AM to 2 PM. Stand at your primary viewing distance and confirm text remains readable without squinting.
Brightness optimization by time of day:
| Time Period | Recommended Brightness | Adjustment Reason |
| Dawn (6-8 AM) | 60-70% maximum | Low ambient light, avoid glare |
| Midday (10 AM-3 PM) | 90-100% maximum | Peak sunlight, needs full power |
| Afternoon (3-6 PM) | 70-85% maximum | Decreasing sun angle |
| Evening (6-9 PM) | 50-65% maximum | Artificial street lighting only |
| Night (9 PM+) | 40-50% maximum | Avoid light pollution complaints |
Program automatic brightness adjustments based on time of day. Manual adjustments get forgotten and leave your display too dim or too bright. Access these controls through your digital signage software dashboard.
Pro tip: Take photos of your display at different times. Your eyes adjust to lighting conditions, but cameras reveal actual visibility issues that viewers experience.
Fine-Tune Viewing Angles and Position
Walk the same paths your customers take. Note where your display becomes visible, where glare appears, and where content becomes unreadable.
Make these micro-adjustments after observing real viewer behavior for 2-3 days:
- Tilt adjustment – Decrease the downward angle by 2-3 degrees if the bottom content gets cut off from the viewer’s perspective
- Rotation adjustment – Shift screen toward dominant foot traffic by 5-10 degrees
- Height modification – Raise or lower by 3-6 inches if viewers consistently crane necks or look down
- Distance from window – Move back 4-8 inches if glare remains problematic
Document your final settings. Future adjustments or replacements should start from these optimized positions rather than guessing again.
Verify System Integration and Connectivity
Confirm all components communicate properly. Installing digital signage involves multiple connection points that need verification before considering the project complete.
- Check your network settings to ensure stable connectivity between displays and your content management system cms. Test remote access from multiple devices to confirm you can update digital signage content from any location.
- Verify power and data lines run cleanly without crossing or creating interference. Loose connections cause intermittent failures that are difficult to troubleshoot later.
- Test any interactive elements if your installation includes touchscreen capabilities or sensor-based triggers. Confirm response times meet user expectations, and gestures are registered accurately.
Establish Preventive Maintenance Routines
Regular maintenance prevents small issues from becoming expensive failures. Build these tasks into your operational calendar.
Maintenance schedule template:
| Task | Frequency | Time Required | Purpose |
| Clean screen surface | Weekly | 5 minutes | Remove dust, fingerprints, and smudges |
| Check cable connections | Monthly | 10 minutes | Prevent signal loss from loose cables |
| Verify content updates | Daily | 2 minutes | Confirm scheduled changes deployed |
| Test backup systems | Quarterly | 15 minutes | Ensure redundancy functions |
| Update software/firmware | As released | 20 minutes | Security patches, bug fixes |
| Inspect mounting hardware | Quarterly | 15 minutes | Detect loosening before failure |
Use microfiber cloths for screen cleaning. Paper towels and harsh chemicals damage anti-glare coatings. Clean in circular motions to avoid streaking.
Monitor system health through your dashboard. Address error notifications within 24 hours before they cascade into larger problems. Modern digital signage solutions include diagnostic tools that alert you to performance degradation before complete failures occur.
Test Advanced Functionality and App Integrations
If your setup includes digital signage apps for live data feeds, social media integration, or dynamic pricing, verify that each integration functions correctly. Check that advanced features like multi-zone layouts, video walls, or synchronized displays across multiple digital signs operate as intended.
The digital signage market offers countless integration possibilities. Test each one individually before running them simultaneously to isolate any conflicts or performance bottlenecks.
Your testing phase determines whether your digital signage installation achieves optimal performance or requires additional adjustments. Take the time to validate every component before declaring the project complete.
Your Window Display Now Works Around the Clock
You’ve gone from empty window space to a sophisticated advertising system that operates 24/7. The hardware delivers content reliably, your scheduling matches actual foot traffic patterns, and brightness settings adapt to changing light conditions.
Here’s what your completed installation accomplishes for your business:
- Captures attention from 15-30 feet away with properly sized displays and high-contrast content that stops pedestrians mid-stride and pulls eyes away from smartphones
- Eliminates static poster limitations by rotating promotional content, seasonal campaigns, and real-time information that stays fresh and relevant to current viewer needs
- Reduces marketing labor by 70% through automated scheduling that switches content based on time, day, weather, and traffic patterns without manual intervention each week
- Protects your investment with systematic maintenance routines, brightness optimization, and viewing angle adjustments that extend hardware life and prevent expensive failures
- Scales across multiple locations using centralized content management that updates all displays simultaneously, maintaining brand consistency without visiting each site physically
For businesses across the United States, CrownTV handles everything from initial site assessment through final optimization. Their technicians install hardware that meets commercial durability standards, configure content management systems that scale with your business, and provide ongoing support that keeps your displays running without interruption.
You get proven expertise that eliminates trial-and-error learning while your competitors struggle through DIY installations that drain time and budget.