In this guide, we explore everything you need to know about why 80% of digital signage installs fail and how it can transform your business communications.
You don’t need more digital screens. You need smarter installs. Here’s the brutal truth: most digital signage projects fail before the digital signage content even hits the screen. Not because of bad design. Not because of weak messaging. But because of bad planning, rushed setup, and poor execution.
A survey found that up to 80% of signage rollouts miss performance targets — either due to underwhelming visibility, mismatched tech, or systems that break down under pressure. And that’s before factoring in the hidden costs of reinstallation, content downtime, or the sheer frustration of tech that doesn’t do what you paid for.
We’ve seen a restaurant chain spend $75K on outdoor displays that couldn’t fight glare. We’ve seen retail franchises wire up 30+ screens—only to learn they couldn’t sync them properly. This stuff adds up. And none of it is inevitable. You can get ahead of the problems if you know where they hide.
In this article, we’ll break the whole issue down:
- The most common digital signage installation mistakes that sabotage digital signage from the start
- Bad placement choices that kill visibility and foot traffic
- Brightness levels that fall short for outdoor or glass-facing displays
- Electrical and network issues that take screens offline and kill uptime
- Software gaps that force teams to micromanage updates or deal with black screens
- How to match the setup to the business need — and stop wasting money
- Tools that fix the system from day one, including where CrownTV fits into the fix
This guide is built to save you time, money, and aggravation. And if your screens are already up? This could be the checklist that gets them working the way they should’ve from the start.
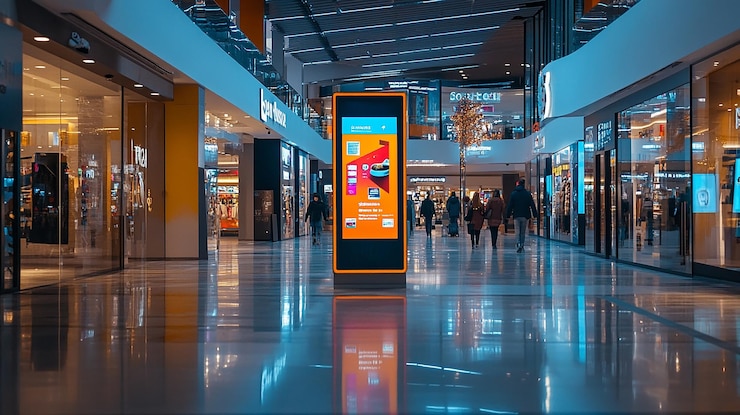
Why 80% of Digital Signage Installs Fail: Placement Mistakes That Push Customers Right Past Your Screens
Location matters more than content. If your screen can’t grab eyes within the first few seconds, everything that follows—branding, promotions, upsells—gets ignored.
And yet, this is where digital signage trips up most often: screens get placed based on convenience, not visibility. Let’s break down the most common mistakes:
Mounting Too High or Too Low
Screen height should never be eyeballed. It should be calculated based on the primary viewing angle and average audience height, whether that’s standing, seated, or in motion.
Here’s how to break it down:
- For standing viewers (e.g., retail aisles, lobbies): center the screen between 60–66 inches from the floor. That’s the average adult eye level in public spaces.
- For seated viewers (e.g., restaurants, salons, waiting rooms): drop the center to 48–52 inches, depending on table and chair height.
- For screens above eye level (menu boards, transportation hubs): use a 15–30° tilt angle downward to correct the field of view and minimize neck strain.
Key technical note: Improper height leads to what’s known as the viewing cone problem. Commercial-grade screens typically have 178° horizontal and vertical viewing angles, but brightness and color degrade once a viewer steps outside of that optimal cone. Mount too high, and your content fades out — especially on matte-finish displays or screens without wide-angle panels.
Facing The Wrong Direction
Orientation and screen tilt directly affect dwell time, glare management, and line-of-sight engagement. Yet most screens get aligned based on wall space, not on how people actually move through the area. Fix this by doing the following before installation:
- Track foot traffic flow. Use in-store analytics, security cams, or physical walkthroughs to map how people move. Screens should face inbound movement, not sit parallel to it.
- Set the viewing angle between 30° to 90° from the line of approach. Anything less and you risk viewers walking right past before the content becomes legible.
- Avoid oblique angles for text-heavy content. Fonts get distorted and harder to read, especially at more than a 45° offset.
In high-traffic zones, poor orientation doesn’t just reduce visibility. It lowers conversion rates and wastes high-value ad real estate.
Competing With Other Visuals
Visual clutter is one of the most overlooked killers of screen impact. The human brain filters out non-contrasting stimuli. If your signage blends into its environment — too many colors, patterns, or static visuals around it — the message gets ignored by default.
Here’s how to protect visual clarity:
- Avoid screen placement within 3–4 feet of competing print material, such as posters, shelf signage, or murals.
- Leave at least a 10–20% visual buffer zone around the screen area, where possible — especially in bright environments or areas with textured walls.
- Choose matte-finish enclosures or neutral wall mounts to avoid reflection buildup that competes with the display itself.
And never mount screens against LED strip lighting or patterned walls. These cause moiré effects, light interference, and visual fatigue — all of which reduce the attention window your content gets.
Blocking With Furniture or Decor
Obstructions don’t need to be permanent to cause damage. Even seasonal décor, rotating displays, or added shelving can disrupt the sightline triangle — the invisible zone between the viewer’s eyes, the screen, and the intended interaction point (like a product, entrance, or checkout).
To prevent that:
- Use a 1:1:1 placement model — one screen per key interaction point, with nothing in front of the viewer within 2 feet horizontally or 3 feet vertically.
- Keep screen sightlines clear within a 15° cone both horizontally and vertically from the center. This ensures maximum visibility from multiple approach paths.
- Do quarterly visual audits. Every time your layout changes, verify screen effectiveness from at least three customer vantage points: entrance, aisle midpoint, and target zone.
If a chair, rack, or holiday wreath blocks your content, the screen’s not underperforming — the floor plan is.
When Brightness Misses the Mark and Screens Wash Out
A display might look crisp indoors — until it meets sunlight. That’s where brightness specs get put to the test. And if your signage faces glass, sits near entry points, or operates outside, subpar nit levels will flatten your content before it’s even noticed.
This is one of the top reasons outdoor signage fails. Screens get selected based on cost, not luminance range — and once they’re in place, there’s no fix that doesn’t involve a full swap.
Understand How Brightness is Measured
Brightness is expressed in nits — a shorthand for candelas per square meter (cd/m²). It measures luminous intensity per surface area, which directly impacts how visible your screen remains under competing ambient light.
In practical terms:
- 300–500 nits: Suitable for low-traffic indoor zones with controlled lighting — think break rooms or boardrooms.
- 700–1,000 nits: Minimum for retail interiors, lobbies, or corridors exposed to fluctuating daylight.
- 1,500–2,500 nits: Necessary for glass-facing displays or partially shaded outdoor areas.
- 3,000+ nits: The threshold for direct sunlight exposure in open-air settings like drive-thrus, sidewalks, and open storefronts.
Professional-grade signage displays often include auto-dimming sensors that adjust brightness based on lux readings from the surrounding environment. Without this feature, static brightness settings can create either underperformance during peak daylight or glare and eye fatigue after sundown.
You’re not picking a number off a chart — you’re sizing luminance output to match light interference, and that means factoring in hour-to-hour variations.
Match Brightness to Environment, Not Just Location
Screen placement labels — “indoor,” “semi-outdoor,” “outdoor” — are often too broad to rely on. The real determinant of required brightness is the ambient light intensity that the screen must overcome at its exact position.
Examples:
- South-facing window displays can experience upwards of 8,000–10,000 lux, especially in mid-latitude cities during summer afternoons. A 700-nit screen will completely fade out under those conditions.
- Drive-thru menus require at least 2,500 nits not just for visibility, but for compliance. Many fast food brands mandate these levels in their display procurement specs.
- Bus shelters, outdoor kiosks, and wayfinding systems typically need 3,000–4,000 nits, especially when deployed in urban zones with reflective glass buildings or polished stone that bounces sunlight.
Best practice: Use a lux meter on-site during peak sun hours before specifying hardware. This data-backed approach prevents under-sizing the panel’s luminance profile and avoids costly replacements down the line.
Other Technical Factors that Affect Brightness Performance
Brightness isn’t just about raw nits — it’s the end result of multiple technical specs working together. Get one of them wrong, and the effective luminance gets compromised.
Here’s what else affects it:
- Panel Type:
- IPS panels offer wider viewing angles and consistent brightness across screen width, but can suffer from lower native contrast ratios.
- VA panels may appear brighter in the center but fade faster off-angle, problematic in wide-view applications.
- Anti-reflective (AR) vs. Anti-glare (AG) Coatings:
- AR coatings reduce glass reflection, critical in glass-heavy or sun-exposed installs.
- AG coatings scatter ambient light, useful indoors, but can degrade clarity in outdoor setups if not balanced with contrast.
- Backlight System:
- Edge-lit LEDs tend to be thinner but distribute light unevenly, resulting in dimmer corners.
- Direct-lit or full-array backlights give higher sustained brightness and better uniformity, but increase unit depth and cost.
- Thermal Management:
- Displays without active cooling (fans, heat exchangers) may experience brightness throttling under thermal stress — a protective behavior where the system dims to prevent damage.
- High TNI-rated screens are purpose-built to operate above 110°C surface temperatures, avoiding color distortion and image retention even under direct sun.
- Brightness Decay Curve:
- Lower-cost LED backlights degrade faster, with brightness dropping 20–30% over 12–24 months.
- Commercial-rated displays typically come with lumen maintenance ratings (L70/L80) indicating expected performance over time.
To specify brightness the right way, you need to treat the screen as part of a larger lighting ecosystem. It’s not an isolated element—it’s a visual endpoint influenced by everything from architecture to latitude to time of day.
What Kills Uptime Faster Than Power and Network Mistakes
Your display might look clean on the wall, but if the electrical and network setup behind it isn’t rock solid, it’s only a matter of time before it fails.
Power issues and unstable connections are two of the most common—and costly—causes of digital signage downtime. And when they hit, the impact isn’t cosmetic. It’s missed promotions, frozen content, black screens during high-traffic hours, and service calls that eat into your margin. Let’s break the key failure points down:
Power Circuits that Can’t Handle the Load
Most commercial-grade signage displays pull 2.5 to 4.5 amps per unit under full brightness. That may not sound like much—until you chain multiple displays into a single 15A or 20A circuit without calculating peak demand conditions. Add in media players, wireless bridges, or ambient light sensors, and the draw compounds fast.
Common digital signage errors/problems start small: flickering, auto-restarts, and unexplained blackouts. But the real risk comes from voltage drops and thermal load. Overdrawn circuits don’t trip breakers instantly — they run hot, degrade insulation, and reduce component efficiency.
Best practices for power planning:
- Calculate total circuit load at 80% max capacity to meet NEC (National Electrical Code) safety margins
- Run dedicated circuits for clusters of screens, especially in zones running displays >700 nits
- Label and isolate circuit breakers per screen zone for fast diagnostics
- Use isolated grounding to prevent ground loop interference in high-density installs
This isn’t just an IT task — it’s an electrical engineering step. Skip it, and your uptime drops fast.
Lack of Surge Protection or Voltage Regulation
Digital signage hardware is vulnerable to both transient voltage spikes and long-duration sags. These events don’t always cause immediate failure — instead, they degrade power supply units and logic boards over time.
Even commercial buildings with regulated mains can see overvoltage conditions from nearby elevator banks, HVAC systems, or industrial machinery.
Layered protection strategy:
- Stage 1: Surge Protection Devices (SPD) installed at the panel or distribution level — minimum UL 1449 rating, with a clamping voltage ≤ 600V
- Stage 2: Inline surge filters or rackmount PDUs with isolated banks and EMI/RFI filtering
- Stage 3: Automatic Voltage Regulators (AVR) or double-conversion UPS systems in locations with grid instability or high equipment density
For outdoor displays, use IP65-rated enclosures with internal SPDs rated for lightning protection (IEC 61643). Don’t rely on consumer-grade surge strips. They aren’t rated for commercial signage loads or long-term deployment.
Improper Cable Routing and Connector Use
Signal reliability depends on physical integrity. But many signage setups suffer from pinched cables, poor shielding, or over-extended video runs that exceed spec limits.
Let’s break this down:
- HDMI 2.0 has a soft limit around 50 feet before signal attenuation becomes visible (sparkles, flickers, or sync failures)
- Passive extenders often fail over Cat5 — HDBaseT over Cat6A or fiber converters should be used for any run exceeding 100 feet
- Unshielded cable in high-EMI environments (e.g., near elevators, HVAC ducts, fluorescent lighting) introduces artifacts and packet loss
Connector issues are just as common:
- Loose HDMI or DisplayPort plugs sag under gravity over time, especially with articulating mounts
- Adapters weaken signal integrity, especially cheap HDMI-to-VGA or miniDP setups
- Cable stress without strain relief causes internal conductor breaks — invisible but deadly
Implementation checklist:
- Use locking HDMI connectors or active baluns where applicable
- Strap and dress cables with slack loops — never tensioned tight
- Test signal strength with EDID verification tools before closing up walls or ceilings
Clean cable infrastructure isn’t about aesthetics. It’s performance insurance.
Unstable or Unsecured Network Connections
A powered screen that can’t receive or report data is operationally dead. Yet many signage rollouts still depend on consumer-grade Wi-Fi, flat unmanaged switches, or unsecured routing schemes that expose the system to failure, or worse, intrusion.
Breakdowns occur in three main areas:
- Latency and throughput issues from saturated wireless environments (guest networks, shared access points)
- Dropouts due to DHCP leases expiring or interference from adjacent SSIDs
- Security breaches from unsegmented networks — signage systems getting scanned, pinged, or bottlenecked by unrelated traffic
Professional-grade setup requirements:
- Wired Ethernet (Cat6 or better) to all screens or player devices — especially for 4K or motion-heavy content
- Managed PoE+ switches with SNMP monitoring and port isolation
- VLAN segmentation to separate signage traffic from POS, admin, or guest zones
- Static IP addressing for all media players and CMS endpoints to prevent DHCP misfires
- If Wi-Fi is unavoidable, use enterprise-grade APs with beamforming, 5GHz channel bonding, and traffic prioritization (QoS)
Add network watchdog tools or CMS integrations that ping each screen every 60–90 seconds. If a device goes unresponsive, your team should know before a customer notices.
When the Software Holds the Screens Hostage
Digital signage doesn’t fail loudly. It fails quietly—one black screen, one missed update, one frozen promo at a time. And at the center of most of those failures? Underpowered or poorly designed digital signage software platforms that turn basic management into a high-effort, low-control grind.
The right content management system (CMS) should reduce workload and boost visibility. But the wrong one forces your team to babysit screens, juggle updates manually, and troubleshoot without context. Implementing digital signage strategies that prioritize automation and flexibility is what separates operational control from constant firefighting.
No Centralized Control for Multi-screen Networks
When signage deployments grow past a handful of screens or locations, the need for centralized control becomes non-negotiable. Without it, teams face operational entropy: content inconsistencies, broken campaigns, and update delays that scale exponentially with every new site. Digital signage enhances reach—but only if it’s centrally managed across all your multiple locations.
Here’s what centralized control should offer:
- Hierarchical screen grouping by location, brand, department, or content type
- Role-based access control (RBAC) to delegate permissions across regions or teams
- Content versioning to track what’s live, what’s pending, and what’s out of date
- Batch publishing that allows scheduled deployment across hundreds of endpoints in one action
Without these features, your digital signage network becomes a manual mess, especially when operators are forced to push updates display-by-display using static file transfers or local USB keys. That opens the door to:
- Off-brand messaging across locations
- Screens are stuck on outdated or irrelevant content
- Operational lag every time the content changes
You can’t scale signage across a franchise, campus, or chain without putting centralized command and version control in place.
Limited Scheduling and Dayparting Tools
Signage isn’t static. Promotions shift by the hour. Traffic patterns rise and fall. In retail, QSR, and transit settings, content needs to flex based on timing, context, and behavioral cycles. That’s where marketing strategies need tools that can respond, not just display.
If your CMS lacks proper scheduling tools, here’s what you’re losing:
- Dayparting logic that automates which content runs in the morning, at lunch, or after close
- Conditional rulesets that can trigger different playlists based on business hours, staff activity, or calendar events
- Loop timing controls to ensure screen dwell times match audience behavior—critical in places like checkout queues or drive-thrus
- Recurring schedules that automate promotions (e.g., “Every Friday from 3–6PM”) without needing manual reprogramming
Instead, teams stuck with limited platforms end up:
- Rebuilding playlists weekly from scratch
- Re-uploading time-sensitive media for every shift change
- Forgetting to swap promos when context shifts—leading to irrelevant or mistimed content
Without automation, your signage becomes a dated marketing tool instead of a dynamic asset.
No Remote Status Feedback or Screen Health Monitoring
If your CMS can’t provide telemetry, you’ve lost visibility—and with that, control. And we’re not talking about basic “online/offline” indicators. We’re talking about a full diagnostic layer that lets you manage screen health the way IT manages servers.
Professional-grade monitoring should include:
- Heartbeat pings at 30–60 second intervals to validate player activity and CMS connection
- Last media check-in timestamps to ensure content refreshes are propagating
- Playback verification via screenshots, stream previews, or file hash matches
- Hardware performance metrics such as CPU load, temperature, and available storage
- Custom alerting via email, webhook, or SMS for offline screens, failed uploads, or playback errors
Without this data, screens can silently fail. They might show digital signs stuck on stale content, a black screen, or hang on boot. And the team won’t know until someone walks by—or worse, a customer calls it out.
Interactive features like alerts, previews, and live sync status don’t just improve control—they build accountability into your system.
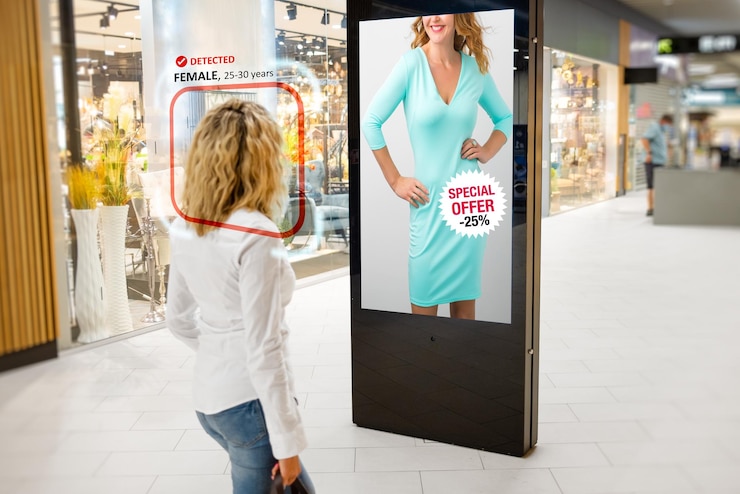
Incompatible With Dynamic Content or App Integrations
The days of static signage are over. Today’s business environments demand content that responds to live data—inventory levels, queue times, social feeds, traffic patterns, or sensor inputs. If your CMS locks you into MP4s and image playlists, it’s holding you back.
Here’s what modern platforms need to support:
- Dynamic widgets (HTML5/JavaScript) that auto-update based on external APIs
- App connectors for POS, CRM, ERP, or CMS systems
- Trigger-based logic for conditional content (e.g., display a warning when occupancy exceeds 80%)
- Playlist injection APIs that allow content overrides based on real-world signals (e.g., weather alerts, product launches, local events)
Interactive content lets you speak to your target audience in the moment, not after the fact. That drives relevance, customer engagement, and long-term customer loyalty.
And yes, it also drives significant cost savings when you’re not manually refreshing every asset by hand. Modern signage software should function like a live application layer, not a static file manager.
Why Matching Tech to Business Goals Saves You Thousands
A digital signage system isn’t a standalone purchase. It’s an infrastructure decision. And if the interactive digital signage solutions don’t fit the actual business use case, you’ll spend more fixing problems than you did buying the gear in the first place.
Too many rollouts go wrong because they treat digital signage like a one-size-fits-all checklist:
✔ screen
✔ player
✔ software
✔ mount
But here’s the reality: function, environment, and content requirements must shape the system, not the other way around. Let’s lay the alignment process out.
Start With the Use Case, Not the Tech
What’s the signage supposed to do?
- Increase menu visibility in a fast-paced QSR environment?
- Support wayfinding in a multi-building campus?
- Promote product bundles in an end-cap retail display?
- Provide emergency messaging in a factory zone?
Each one requires different specs:
| Use Case | Brightness | Screen Type | Network | Software Features |
| QSR Menu Board | 2,000–3,000 nits | Outdoor-rated with a wide viewing angle | Hardwired Ethernet | Dayparting, POS integration |
| Retail End Cap | 500–700 nits | Commercial LCD | Wi-Fi with local caching | Local overrides, template rotation |
| Factory Floor | 700–1,500 nits | IP-rated enclosure with anti-glare | Isolated VLAN | Alert injection, auto-updates |
| Healthcare Lobby | 350–500 nits | Vertical orientation support | Secured wired or wireless | Directory sync, schedule loops |
If you skip this step and default to generic hardware, you’ll overspend where it doesn’t matter and underinvest where it does.
Right-size The Hardware to The Operational Environment
Not every location needs a $3,500 commercial screen. But putting a $500 consumer-grade display in a high-traffic, 24/7 zone guarantees failure. That’s the same mistake businesses make when they treat static displays as interchangeable with high-performance signage systems.
Here’s what to weigh:
- Run-time demand: If the screen operates more than 12 hours per day, it needs a rated duty cycle to match.
- Viewing angles: Wide-angle IPS panels outperform VA screens in open-plan or mobile viewer environments.
- Thermal exposure: Outdoor or semi-enclosed zones require high-TNI-rated screens (≥110°C) with heat dissipation or active cooling.
- Ingress protection: Look for IP54 or higher ratings for dusty, humid, or grease-heavy environments.
High-traffic environments where customer interaction is expected—like QSR order points or retail endcaps—need durable, always-on electronic displays that won’t overheat or degrade after two years. Match the panel to the conditions, not the pricing tier. Cutting $1,000 off the initial hardware cost can lead to $4,000+ in early replacements, service calls, and labor losses within 18 months.
Build Workflows Around the People Using It
Your signage platform won’t succeed unless it fits the internal processes of the team managing it. That includes marketing teams, location staff, and IT, each with their own pace and expectations.
That means understanding:
- Who controls content updates? (Corporate? Local staff? Marketing?)
- How often does the content change? (Daily specials? Monthly promos?)
- Does the team need approvals or scheduling controls?
- What devices do they use to log in—desktop or mobile?
If the system isn’t aligned with how the team works, your marketing efforts get bogged down. People avoid using it, updates fall behind, and brand visibility suffers.
A mismatch here leads to:
- Black screens due to missed updates
- Underused capabilities because the UI is too complex
- Branding errors from unsupervised local edits
Interactive displays and smart content tools won’t fix a broken process. The platform must serve the team, not slow them down.
Account for the Total Cost of Ownership, Not Just the Invoice
Initial screen cost is only one slice of the budget. You also need to factor in:
- Licensing or subscription fees (annually or per screen)
- Mounting hardware and installation labor
- Replacement cycles for lower-tier digital displays (usually 2–3 years)
- IT time spent handling offline alerts, firmware patches, or failed content pushes
- Downtime costs from outages or misconfigurations
And don’t forget: older systems that rely on printed signage or traditional advertising methods often look cheaper up front—but bring limited flexibility, slower turnaround, and higher labor costs when content needs to change fast. A modern setup that uses interactive elements, dynamic scheduling, and engaging content can bring your display messages into the present, without added complexity.
When well-executed, these systems also foster brand loyalty by delivering a more responsive and tailored customer experience across all locations. Integration with social media feeds, promotional campaigns, or real-time product updates is no longer a bonus—it’s expected.
And with emerging trends pushing signage into more adaptive and customer-centric use cases, the goal is no longer to just display a message—it’s to keep your network of multiple screens aligned with your brand, your data, and your users. A setup that looks “affordable” at $5,000 may cost over $12,000 in maintenance and recovery over three years, while a $7,800 build with higher-spec equipment and a stable CMS might run without disruption.
How to Lock the System Down from Day One
Fixing signage failures after the fact is expensive. What works better? Building it right the first time—with the right tools, mapped to real business use. That’s where things shift from guessing to getting it right. You stop piecing parts together and start locking the system down as a unified platform—hardware, software, services, and support all built to work as one.
This is where CrownTV comes into the picture—not as another vendor, but as the operator that sets the entire foundation up to succeed. With advanced features, screen control, and field-tested hardware, you’re not chasing fixes. You’re building a system that holds.
Start With a Full-Service Installation Team That Handles the Heavy Lifting
Installing digital signage isn’t as simple as hanging a screen on the wall. There are structural codes, load ratings, power planning, thermal requirements, and ADA guidelines that most general contractors—or IT teams—aren’t built to handle on their own.
CrownTV’s installation service brings the technical planning, commercial-grade mounts, cabling expertise, and structural layout into one controlled process. The team scopes the environment, selects the right gear for the lighting and visibility conditions, and ensures every display is secured, cabled, and optimized for visual appeal and line-of-sight engagement. We don’t leave you with boxes—we leave you with a working system.
Included with their installation services:
- Screen and component sourcing
- On-site surveys and placement plans
- Professional mounting, wiring, and testing
- Configuration of media players and software
- Project oversight across single or multi-site rollouts
For retail stores, QSRs, corporate campuses, and even a high-traffic flagship store, this process eliminates guesswork and gets content live faster, with long-term cost savings baked in.
Use a Dashboard That Keeps the System Under Control
A well-installed screen still fails if the content layer isn’t easy to control. CrownTV’s digital signage dashboard solves this by replacing chaos with clarity. You get a cloud-based CMS built for business, not for IT hobbyists.
Here’s what you can do from a single login:
- Push updates to hundreds of screens instantly
- Schedule promotions by time, date, or location
- Monitor what’s live, what’s offline, and what needs attention
- Group screens by region, store, or campaign
- Integrate live content from apps, data integration tools, or business systems
This creates a closed-loop system for managing content, tracking uptime, and keeping screen networks aligned across teams. It also helps you monitor performance and extract valuable data tied to location, timing, and customer behavior.
Run Content Through a Dedicated Media Player Designed for Reliability
The CrownTV’s media player is a compact powerhouse. It’s small enough to tuck behind any screen, but powerful enough to run high-resolution video, animations, and live feeds without lag or failures.
Key benefits include:
- A commercial-grade build for 24/7 operation
- Pre-configured sync with the CrownTV CMS
- Built-in storage and auto-recovery for content loss scenarios
- Support for data-driven insights and smart display triggers
Whether you’re rolling out screens in corporate settings or public environments, this player removes the dependency on fragile consumer hardware and creates a scalable backbone for reliable screen delivery.
Use Commercial Displays That Are Actually Built to Last
Consumer-grade TVs cut upfront costs—but break quickly when pushed into commercial environments. CrownTV curates a lineup of commercial displays that match the job: brightness, orientation, enclosure type, and runtime requirements, all matched to your actual deployment.
Options include:
- Outdoor-rated displays with 3,000+ nit brightness
- High TNI-rated panels for sun-exposed windows
- IP-rated enclosures for kitchens, industrial zones, or transit hubs
- Slim-profile indoor displays for seamless integration into branded environments
High-brightness displays attract more foot traffic, and custom zoning allows you to tailor messages by location, demographic, or time of day, giving you a competitive edge over passive signage systems that rely solely on static content.
And don’t overlook the environmental benefits: better displays last longer, reduce failure rates, and lower printing costs, especially in networks where screen content changes frequently across seasons or promotions.
Build the System That Works From Day One
You don’t need to reinvent the workflow. You need a system that supports it. When signage is built to serve marketing teams, IT, ops, and end-users—all within one connected framework—it delivers numerous benefits far beyond display quality.
From reducing manual tasks to boosting customer satisfaction with live, engaging visuals, digital signage done right can boost sales, shorten friction points, and reduce perceived wait times—all while building brand awareness in a way traditional advertising methods can’t match. And if you need help getting it all off the ground? CrownTV’s done it before. Across industries. Across networks. Across scale.
Wrapping Up: Stop the Failures Before They Start with CrownTV
Most signage failures aren’t caused by bad content or cheap screens. They’re caused by preventable setup mistakes—power issues, software gaps, poor placement, or screens that don’t fit the space they’re in. Now that you know what to look out for, you’re ahead of the curve.
You’ve seen where projects break down—and more importantly, how to build a system that holds up under pressure. From smarter placement to stronger power infrastructure, from scalable dashboards to pro-grade installations, the difference is in the details.
Let’s recap what we covered:
- Why poor installs—not poor strategy—take most signage systems down
- How bad placement ruins visibility and cuts foot traffic short
- The impact of underpowered brightness in glass-facing or outdoor zones
- Electrical and networking mistakes that quietly knock screens offline
- What happens when software forces your team to micromanage content
- How to match your setup to your environment, content needs, and business goals
- The tools that build a stable system from day one, with CrownTV as the full-stack provider
If you’re serious about building a signage system that works—and keeps working—don’t leave it up to guesswork. Need a foolproof install? Get expert help today with CrownTV’s all-in-one signage solution—hardware, software, setup, and support that’s actually built to last.