Digital signage looks simple from across the room: a bright screen, a clean layout, a message that updates on cue. The reality, especially the first time you deploy it, is a little messier. You’re juggling hardware choices, mounting, networking, software logins, content workflows, and the big question: “Who’s going to own this once it’s live?”
In this how-to guide, we’ll walk through how to set up digital signage from planning to installation to publishing, using the same practical steps we see work in retail, restaurants, corporate offices, healthcare facilities, and multi-location businesses. We’ll also point out where teams typically get stuck, and how a turnkey approach (like CrownTV) removes the most common technical and operational headaches.
Key Takeaways
- To set up digital signage successfully, plan the full chain (CMS → media player → display) so reliability isn’t broken by a weak link.
- Choose commercial-grade displays sized for real viewing distance and brightness (nits) to prevent unreadable, washed-out screens in bright spaces.
- Use a dedicated media player and a cloud CMS with scheduling, monitoring, roles/permissions, and templates to keep multi-screen updates consistent and controllable.
- Install with sightlines, safety, ventilation, service access, and clean cable management in mind, because a good mount-and-wire job makes long-term maintenance easier.
- Prefer Ethernet over Wi‑Fi and validate network basics early (no captive portals, correct firewall/DNS/timezones) to avoid “random offline” screens and missed schedules.
- Keep digital signage effective with a baseline test playlist, clear glanceable design, and disciplined scheduling (dayparting, local overrides, and expiration dates) so content stays accurate and owned over time.
What Is Digital Signage and How Does It Work
Digital signage is a system that uses digital displays (screens) to show dynamic content, menus, promos, wayfinding, announcements, brand video, dashboards, even real-time data. Unlike printing posters or swapping static signs, digital signage lets us update messaging instantly, schedule content by time and location, and keep brand standards consistent across every screen.
At a practical level, digital signage works because four core components cooperate like a small “broadcast network” inside your building:
- The display (screen)
This is the commercial TV/monitor that customers and employees see. It needs to be bright enough for the space, reliable for long run-times, and mounted securely.
- The media player
The media player is the small device connected to the display (usually via HDMI). It downloads your playlists, renders your layouts, and plays content smoothly. Think of it as the “computer” behind the screen.
- Digital signage software (CMS)
The content management system is where we create layouts, upload media, schedule playlists, and push updates to one screen or hundreds. Most modern deployments are cloud-managed so we can publish from anywhere.
- The content itself
Content includes images, videos, menus, slides, templates, RSS/news, social feeds, HTML widgets, and more. The best results come from content designed for “glance viewing”, clear, bold, and readable at the distance people stand.
The simple content flow (CMS → player → screen)
Here’s the mental model we use when planning a rollout:
- We create/schedule content inside the CMS.
- The player checks in, downloads updates, and caches what it needs.
- The display shows the output continuously.
That’s why reliability depends on the whole chain. A great screen with a finicky player is still a headache. And great software won’t help if the display is too dim for a sunny storefront.
Why businesses adopt digital signage
For digital signage for business, we typically see three reasons come up again and again:
- Speed: change messaging in minutes (pricing, promos, wait times, safety notices).
- Consistency: brand-approved templates across departments/locations.
- Measurable control: scheduling, proof-of-play, and performance feedback (depending on platform).
If you’re new to this and want a broader orientation before diving into setup, our preview of the getting-started signage roadmap is a helpful companion read.
Step 1: Choose the Right Hardware for Your Setup
Hardware decisions are where many first-time deployments go off track, usually because a consumer TV looked “good enough” on paper, or because brightness and mounting weren’t planned for the real environment.
In this step, we’ll pick the right display, media player, and mounting approach for the space.
Commercial vs. consumer displays (what actually matters)
A consumer TV can be fine for a living room. In a business, it often becomes the weakest link.
Commercial-grade displays are designed for:
- Long duty cycles (often 16/7 or 24/7)
- Higher sustained brightness and better thermal management
- Orientation flexibility (landscape/portrait)
- Remote management features and more robust components
Consumer TVs may cost less upfront, but we’ve seen hidden costs show up quickly: premature panel wear, unreliable operation during long hours, limited control, and warranties that don’t align with commercial use.
If you’re evaluating whether a smart TV can be a fit in your environment, our breakdown on using a smart TV for signage in a commercial setting can help you spot the tradeoffs before you buy.
Picking the right size (distance beats preference)
Screen size isn’t just aesthetic, it’s legibility.
A few real-world rules we use when sizing:
- Reception/lobbies: larger screens help because people view from different angles and distances.
- Aisles/endcaps: size depends on sightlines and how close viewers stand.
- Menu boards: choose size based on the longest likely viewing distance and the amount of menu data you must show.
When in doubt, we plan around the farthest “important” viewing position. If guests can’t read it from where they queue, the screen isn’t doing its job.
Brightness (nits): the spec that saves you from washed-out screens
Brightness is measured in nits. The brighter the environment, the more nits you need.
- Typical indoor areas: often fine in the ~300–500 nit range (depending on lighting).
- Bright retail floors / near windows: frequently needs higher brightness to avoid washed-out content.
- Outdoor or direct sun: requires purpose-built outdoor displays (a different class entirely).
A quick test we use: if the screen will face daylight or strong overhead lighting, plan for higher brightness and avoid glossy panels that reflect everything.
Media player choices (and why “built-in apps” can be limiting)
Some businesses try to run signage directly off a TV’s built-in apps. That can work for basic looping, but it often falls short when you need:
- consistent playback across locations
- advanced scheduling
- remote troubleshooting
- reliable caching and updates
- tight control over what displays when
A dedicated player per screen creates a predictable, supportable environment.
The easiest route: pre-configured displays + a purpose-built player
If your goal is a clean, low-friction deployment, the most painless option is to choose hardware that arrives ready to go.
CrownTV’s approach is built for that: pre-configured commercial-grade displays paired with a proprietary plug-and-play media player. In practice, that means less time hunting for compatible parts, fewer surprises during installation, and fewer “why isn’t this updating?” tickets later.
Mounting options you should plan now (not on install day)
We’ll go deeper on installation in Step 3, but hardware choice should already reflect:
- Wall mounts (fixed, tilting, or full-motion)
- Ceiling mounts (common in QSRs and wayfinding)
- Portrait orientation for directories and space-constrained layouts
- Back-of-screen clearance for ventilation and cable bends
If you’re converting existing TVs as a starting point, this walkthrough on turning a TV into a digital signage display can help you plan the hardware additions you’ll likely need (player, mount, cable routing, power).
Step 2: Select Your Digital Signage Software
Your software choice determines what day-to-day management feels like. Hardware is the one-time project: the CMS is what we live in every week.
When we’re helping teams select signage software, we look less at flashy demos and more at operational questions:
- Who updates content, marketing, store managers, IT?
- How many locations will we support in 12 months?
- Do we need approval workflows?
- Are there recurring updates (menus, promos, compliance messaging)?
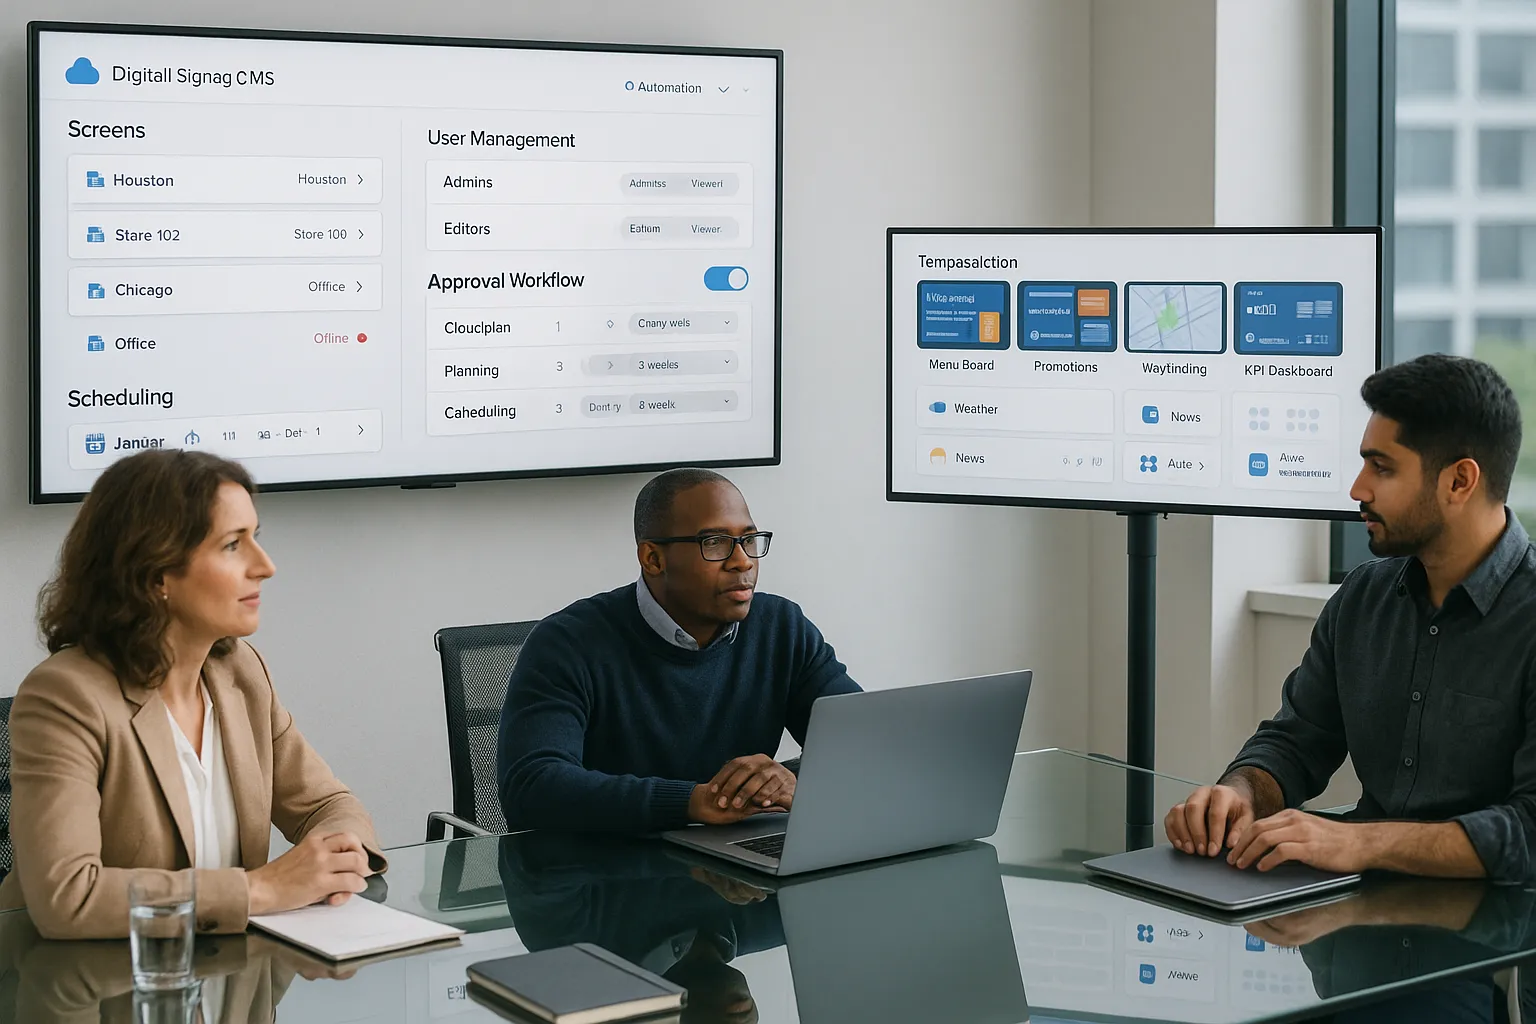
What to look for in a digital signage CMS
For most businesses, the best-fit platform includes:
- Cloud-based management: publish from anywhere without VPN gymnastics.
- Scheduling that’s actually usable: dayparting, date ranges, recurring playlists, and overrides.
- Remote updates and monitoring: push changes without a site visit, and know when a screen goes offline.
- Multi-location support: group screens by location, region, department, or brand.
- Roles/permissions: limit who can publish company-wide.
- Template-driven design: so teams don’t reinvent layouts and accidentally break brand standards.
Content flexibility: templates + widgets + integrations
Most businesses need more than “upload an image.” A strong CMS supports:
- menu boards that change by time of day
- promotional campaigns by region
- dashboards (sales goals, safety stats)
- announcements, events, wayfinding
- feeds and widgets (weather, news, social, etc.)
And when you do embed web-based content (custom widgets, HTML layouts, or internal tools), having a platform that plays nicely with modern web standards matters. For reference on web technologies commonly used in signage widgets, the Mozilla Developer Network documentation is a reliable source we point teams to.
Why we recommend CrownTV’s software for first-time deployments
For teams setting this up for the first time (or scaling beyond a couple screens), we generally recommend keeping software selection simple: pick a system designed for business operators, not just developers.
CrownTV’s cloud platform is built around an intuitive dashboard for managing screens, scheduling, and publishing without constant IT involvement. And the apps marketplace makes it easier to add common content sources and integrations without custom development, so marketing can move quickly while IT still gets a manageable, secure footprint.
If you’re planning multiple screens or locations
The moment you add a second location, or even multiple displays in one building, your CMS must handle grouping, naming conventions, and coordinated scheduling.
If that’s your scenario, we suggest reviewing our guide on how to set up and coordinate multiple digital signage displays so your software and network structure don’t become a tangle later.
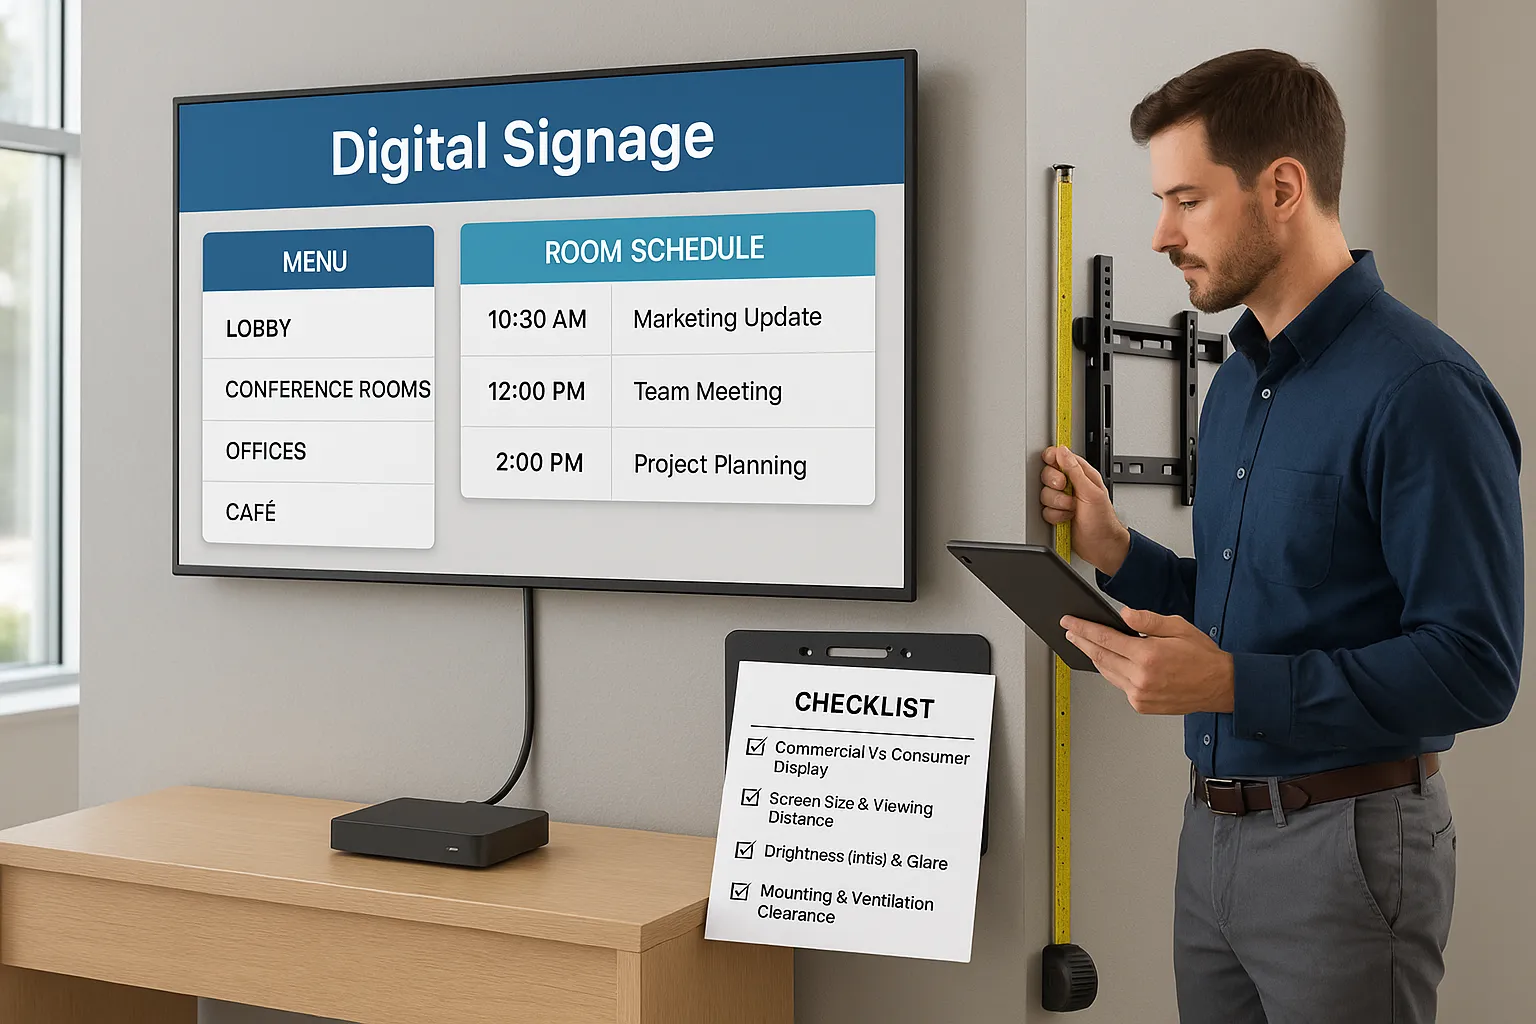
Step 3: Mount and Install Your Displays
This is the “boots on the ground” part of the digital signage installation guide, where planning turns into holes in drywall, cable pulls, and making sure the screen is straight (we’ve all seen the crooked ones).
A good install isn’t just safe: it also makes ongoing maintenance easier.
Choose the right location (sightlines first)
We place displays based on:
- Viewer flow: where people naturally pause (queues, waiting areas, checkout, elevators).
- Line of sight: minimal obstructions, minimal glare.
- Viewing height: typically eye-level for standing audiences, adjusted for ADA and context.
For example, a reception screen should be visible before someone reaches the desk. If you’re specifically planning that environment, our step-by-step on setting up signage in a reception area goes deep on placement and content strategy.
Mount selection and safety considerations
Mount selection depends on display size/weight, wall type, and whether the screen needs tilt or motion.
Key considerations:
- Studs / structural support: drywall anchors alone are rarely appropriate for commercial installs.
- VESA compatibility: ensure the mount matches the display’s VESA pattern.
- Ventilation: don’t trap heat behind the display, especially for 16/7 or 24/7 use.
- Service access: plan how you’ll reach ports, power, and the media player later.
Cable management (where professional installs quietly shine)
Cable management is one of those things that doesn’t get budgeted… until the first time someone yanks an HDMI cable loose.
We recommend:
- routing cables through walls or raceways where allowed
- using strain relief and secure fastening
- leaving a service loop (a little slack) to avoid tight bends
- labeling ends when you have multiple screens
Network connectivity: Wi‑Fi vs. Ethernet
For most commercial deployments, Ethernet is the gold standard, more stable, less susceptible to interference, and easier to troubleshoot.
That said, Wi‑Fi can work well when:
- you have strong coverage at the screen location
- your network is properly segmented/secured
- you don’t rely on heavy streaming content
Our rule of thumb: if the screen going offline creates operational pain (menu boards, critical messaging), use Ethernet wherever possible and treat Wi‑Fi as a convenience, not the backbone.
Electrical requirements and power planning
At minimum, each display and player needs power. What trips teams up is where that power comes from.
Plan for:
- outlet location (behind the display when possible)
- surge protection (especially in older buildings)
- code compliance (conduit requirements vary)
- avoiding overloaded circuits in high-density installs
When to bring in pros
Many businesses can mount a single screen on their own. But once you’re dealing with multiple sites, strict safety requirements, or any in-wall routing, a professional install typically pays for itself.
CrownTV offers professional, nationwide installation with licensed technicians, which helps reduce risk, keeps everything compliant, and saves your internal teams from turning a signage project into a construction project.
Step 4: Connect Your Media Player and Configure Content
Once the screen is mounted and powered, the fastest wins come from a clean player setup: connect it, get it online, pair it to your account, and confirm content playback.
This step is where “DIY signage” can become unexpectedly technical, especially if we’re mixing hardware vendors, imaging devices, or troubleshooting network policies.
Typical connection checklist (player → screen → network)
Most setups follow the same sequence:
- Mount or place the media player (often behind the display or in a secure enclosure)
- Connect HDMI from player to display
- Connect power for both devices
- Connect to the network (Ethernet preferred: Wi‑Fi as needed)
- Assign the screen in the CMS (name it, set location/group, confirm timezone)
- Push a test playlist to verify audio/video, orientation, and resolution
Network “gotchas” we check early
In commercial environments, the network is often the hidden constraint.
We typically confirm:
- Captive portals: guest Wi‑Fi with a login page usually breaks unattended players.
- Firewall rules: players may need outbound access to the CMS and content CDNs.
- DNS reliability: flaky DNS can look like “random offline screens.”
- Timezones: wrong timezone = wrong schedule (common and surprisingly painful).
Why plug-and-play matters in real deployments
If you have one screen, a hands-on setup might be fine. If you have ten screens across two locations, every manual step becomes a multiplier.
CrownTV’s proprietary media player is designed to be plug-and-play, eliminating much of the technical complexity that shows up with generic devices. Instead of spending hours configuring settings, we can focus on the parts that actually drive ROI, placement, content, and scheduling.
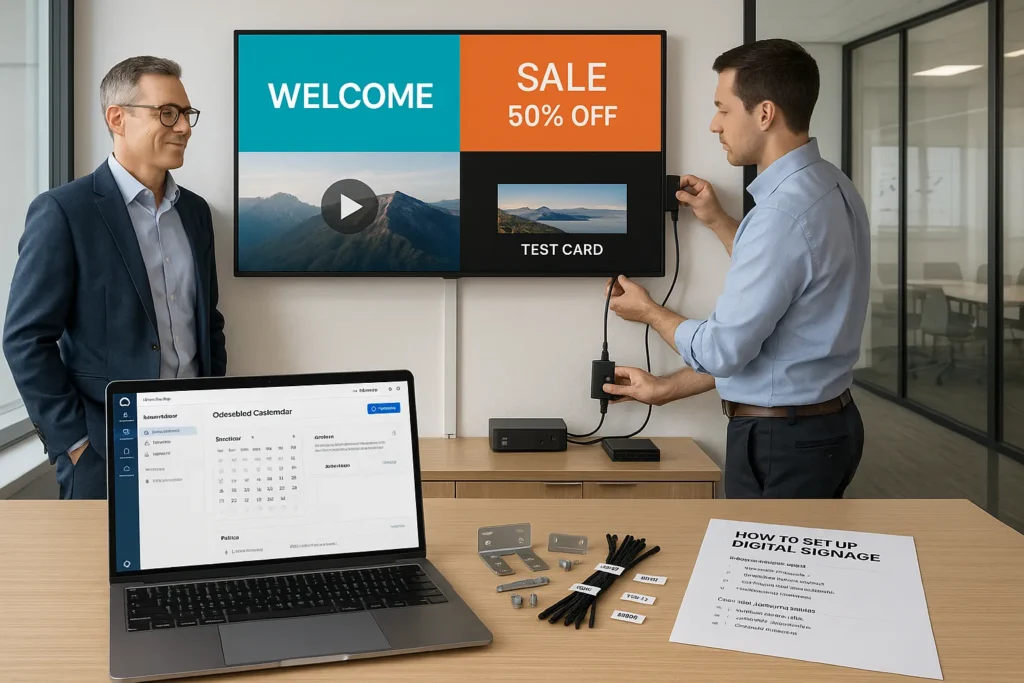
Setting up your “baseline” content package
Before we get fancy, we recommend a baseline playlist that proves everything is healthy:
- a branded welcome slide
- a simple promo or announcement
- one short video (to validate playback)
- a “test card” slide (small text in corners to confirm scaling)
Once that runs cleanly for a day, then we expand into scheduled rotations, dayparts, and location-specific messaging.
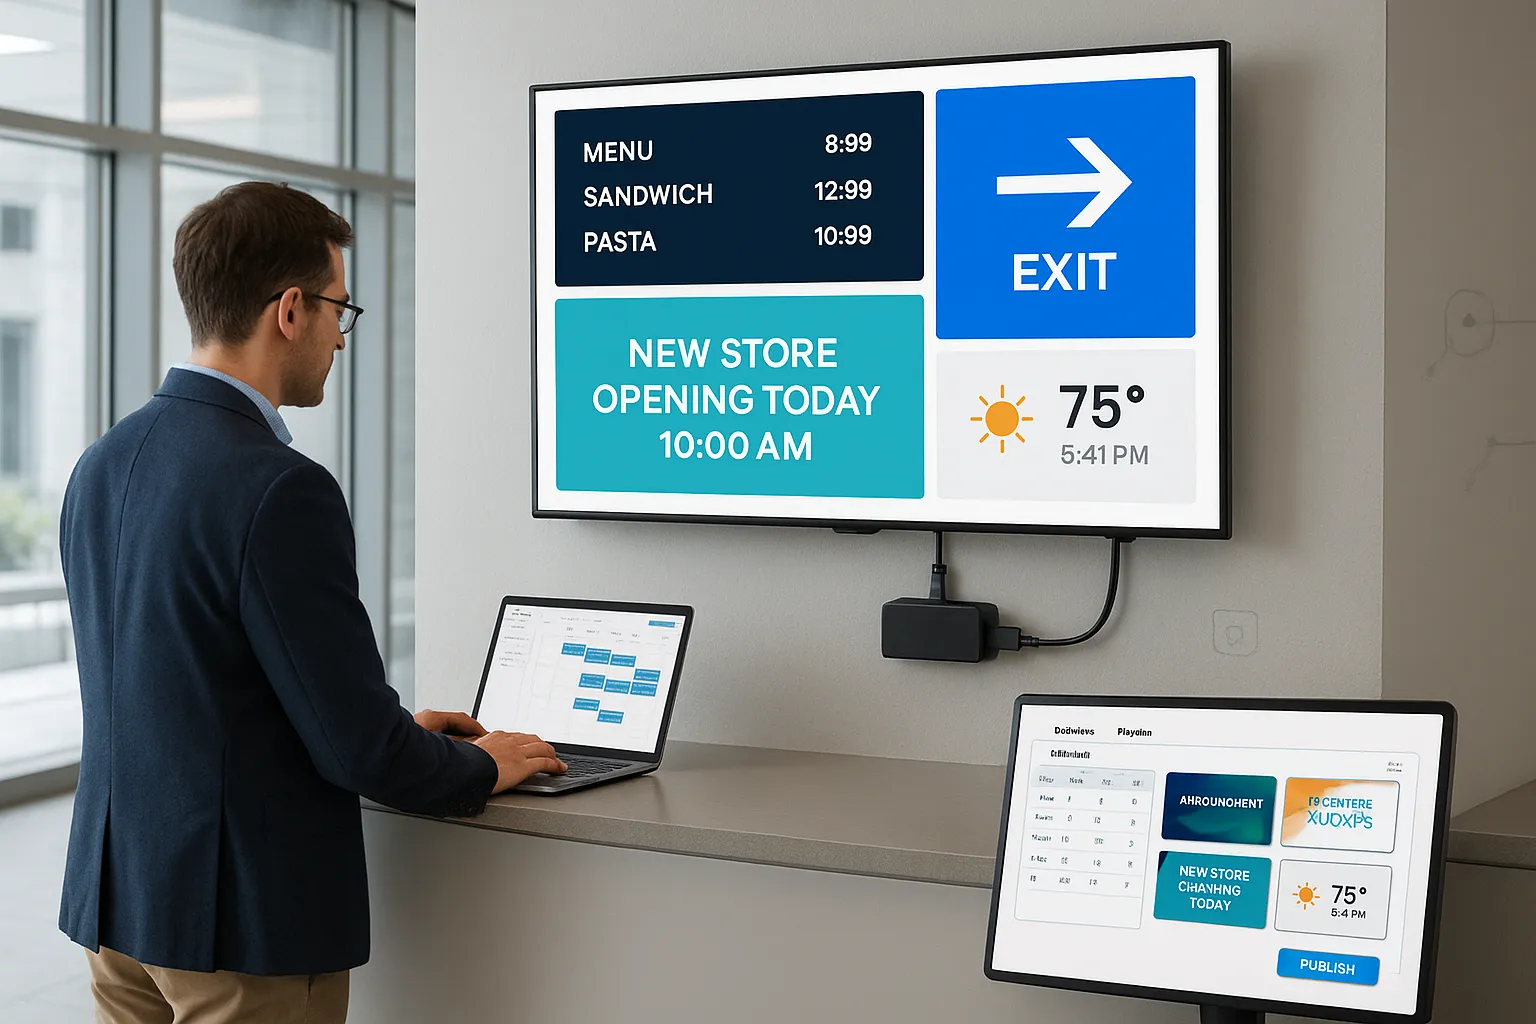
Step 5: Create and Schedule Your Content
If hardware is the engine, content is the fuel. And this is where digital signage either becomes a business asset, or a screen that quietly loops the same slide for six months.
We’ll keep this practical: what to show, how to design it, and how to schedule it so it stays relevant.
Content strategy: start with jobs-to-be-done
Before we open a template editor, we decide what the screen is for. Common jobs-to-be-done in digital signage for business include:
- Sell: promotions, bundles, upsells, limited-time offers
- Inform: hours, events, policies, wait times, safety updates
- Direct: wayfinding, room schedules, queue guidance
- Reassure: brand story, reviews, community proof
A screen can do more than one job, but not all at once. We aim for one primary purpose per screen location.
Design rules that hold up in the real world
In real spaces, people glance, not read.
We use a few reliable rules:
- Big type wins: if it’s important, it should be readable from the farthest viewing point.
- High contrast: avoid light-gray text on white backgrounds.
- Fewer words, better visuals: trade paragraphs for icons, pricing blocks, and simple calls-to-action.
- Motion with restraint: a little movement draws attention: too much feels chaotic.
Templates vs. custom layouts
Templates are your friend, especially for multi-location teams. They:
- keep branding consistent
- let non-designers publish safely
- speed up seasonal refreshes
CrownTV includes built-in content tools and an integrations ecosystem, so we can build a template once and reuse it across stores, offices, or departments, without recreating layouts every time.
Scheduling best practices (the part most teams underestimate)
Scheduling is where signage becomes “smart.” A few scheduling patterns we recommend:
- Dayparting: breakfast/lunch/dinner menus, morning vs. evening promos
- Evergreen + campaign mix: keep core info always present, rotate promos around it
- Local overrides: corporate creates the template: locations add their own slide within guardrails
- Expiration dates: every promo should have an end date so old offers don’t linger
A practical cadence:
- Weekly: refresh promos, events, and announcements
- Monthly: review performance, retire underperforming slides
- Quarterly: update brand visuals, seasonal content libraries
Multi-screen content planning
If you’re running multiple screens in one venue (or a network across locations), treat it like a small channel lineup: each screen gets a role.
For more on organizing that structure, screen groups, naming conventions, and governance, our article on building and managing a digital signage network pairs well with these digital signage setup steps.
DIY vs Turnkey Digital Signage Solutions
At this point in the guide, most teams can picture two paths:
- DIY: source screens, pick mounts, choose a player, subscribe to a CMS, then coordinate installation and support.
- Turnkey: one provider delivers the integrated stack, hardware, software, player provisioning, and installation.
Both can work. The right choice depends on how much time, technical tolerance, and internal ownership you realistically have.
DIY: where it shines (and where it bites)
DIY can be a fit if:
- you have in-house AV/IT resources
- you enjoy vendor management and testing
- you want maximum flexibility to tinker
But here’s the catch: DIY projects often fail on the “in-between” responsibilities. Who images the players? Who tests firmware updates? Who handles screen replacements? Who coordinates installers in different cities? Those gaps don’t show up on a purchase order, until they show up as downtime.
Turnkey: why many businesses choose it
A turnkey approach is ideal when:
- you want predictable rollout timelines
- you’re deploying across multiple locations
- you need a supportable, standardized stack
- marketing wants autonomy without breaking things
CrownTV is built as a turnkey digital signage provider: commercial-grade displays, a proprietary plug-and-play player, cloud software, and nationwide professional installation. The practical benefit is that we reduce friction across the entire chain, from procurement to mounting to day-two operations.
If you want a deeper comparison specifically for 2025 buying and sourcing realities, we recommend our guide on turnkey vs. DIY signage installation and screen sourcing.
Common Digital Signage Setup Mistakes to Avoid
Even well-run teams make predictable mistakes on their first deployment. Here are the ones we see most often, and how we avoid them.
1) Buying consumer TVs for commercial hours
Mistake: choosing a TV designed for occasional home use, then running it all day in a bright environment.
How we avoid it:
- prioritize commercial-grade displays for reliability, duty cycle, and brightness
- plan around the real lighting conditions, not the showroom
2) Underestimating brightness and glare
Mistake: installing a screen near windows or under harsh lighting, then discovering content looks washed out.
How we avoid it:
- match nits to environment
- check angles and reflections at the time of day you’re busiest
3) Treating networking as an afterthought
Mistake: relying on guest Wi‑Fi, captive portals, weak access points, or inconsistent DNS.
How we avoid it:
- prefer Ethernet where possible
- validate outbound access requirements early
- standardize network settings across locations
4) Mounting without a service plan
Mistake: mounting flush to the wall with no clearance, no access to ports, and no plan to replace a player.
How we avoid it:
- leave service access and ventilation clearance
- use proper mounts and consider future maintenance from day one
5) No content governance (a.k.a. “everyone can publish”)
Mistake: too many people with full permissions leads to off-brand slides, inconsistent messaging, and accidental overrides.
How we avoid it:
- define roles: creators, approvers, publishers
- use templates and locked brand elements
6) Not scheduling with timezones and expiration dates
Mistake: yesterday’s promo runs for weeks, or lunch menus show up at breakfast.
How we avoid it:
- enforce timezones per location
- use start/end dates on every campaign
- build a weekly review habit (15 minutes goes a long way)
7) Planning for launch, not for “month three”
Mistake: a great first week… then no one owns updates.
How we avoid it:
- assign an internal owner (marketing ops, store ops, or facilities)
- create a content calendar
- choose a platform that makes publishing fast enough to keep up
Our practical recommendation
If you want full control and you have the internal bandwidth to support it, DIY can be a reasonable route.
But if your priority is getting digital signage live quickly, without wrestling with hardware compatibility, player configuration, multi-site installation coordination, and ongoing troubleshooting, turnkey solutions tend to win in real business conditions. That’s exactly why we built CrownTV as an end-to-end option: displays, a plug-and-play player, cloud software, and professional installation working as one system.
Frequently Asked Questions
How to set up digital signage from start to finish?
To set up digital signage, plan ownership and goals first, then choose a commercial-grade display, a dedicated media player, and a cloud CMS. Mount the screen safely, connect power and network (Ethernet preferred), pair the player in the CMS, publish a test playlist, then schedule ongoing content updates.
What equipment do I need to set up digital signage?
Most setups need four parts: a commercial display, a media player (HDMI-connected “computer” for playback), digital signage software (CMS) to design and schedule content, and the content itself (images, video, menus, widgets). Reliability depends on the full chain: CMS → player → screen, not just the TV.
Should I use a consumer smart TV or a commercial display for digital signage?
For business hours, commercial displays are usually the safer choice: higher brightness, better thermal management, longer duty cycles (often 16/7 or 24/7), and features built for remote management. Consumer smart TVs can work for basic loops, but they often become the weak link when uptime and support matter.
What’s the best network setup for digital signage—Wi‑Fi or Ethernet?
Ethernet is typically best for digital signage because it’s more stable and easier to troubleshoot, especially for mission-critical screens like menu boards. Wi‑Fi can work with strong coverage, but avoid guest networks with captive portals. Also confirm firewall/DNS reliability so players can reach the CMS and CDNs.
How do I create content that actually works on digital signage screens?
Design for “glance viewing”: big type, high contrast, fewer words, and simple visuals. Start with one job per screen (sell, inform, direct, reassure), then build template-driven layouts so updates stay on-brand across locations. For web-based widgets and HTML layouts, reference standards on MDN.
Is a turnkey solution better than DIY when learning how to set up digital signage?
DIY can fit teams with in-house AV/IT and time to test hardware, players, installs, and updates. Turnkey is often better for first-time deployments or multi-location rollouts because the hardware, player provisioning, CMS, and support are standardized, reducing “in-between” failures like imaging, networking issues, and downtime.