GUIDE: How to Create Digital Signage Content with Google Slides or Canva
Although digital signage software includes apps for displaying social media, weather and other interactive content, sometimes you need your content to be.
On this page
Although digital signage software includes apps for displaying social media, weather and other interactive content, sometimes you need your content to be more customized. But what if you're not exactly a graphic design pro? Thanks to accessible, easy-to-use design tools like Google Slides and Canva, you don't have to be!
This guide will show you how to use Google Slides and Canva to create digital signage content. The tools are free to use, quick and easy, so you'll save time, money and resources by being able to create digital signage content on your own and on the fly.
We'll begin by introducing these two tools, as well as some best practices to follow when creating your content. You'll then receive step-by-step instructions for creating basic content in Google Slides, as well as two static graphics and one animated graphic in Canva!
Meet Google Slides and Canva
Content design best practices
How to create digital signage content with Google Slides
How to create digital signage content with Canva
Meet Google Slides and Canva
Google Slides is Google’s equivalent of PowerPoint. It's part of the Google Drive suite along with Google Docs, Sheets, Forms and others. It's a cloud-based tool, meaning you can access it on a web browser and collaborate with colleagues in real-time. Although PowerPoint is usually associated with slideshow presentations, Google Slides can function as a design tool. It’s also free of charge!
Canva is a web-based graphic design tool founded in Australia in 2012. It features a simple drag-and-drop interface as well as millions of photos, graphics, fonts and other design elements available for use. Over 15 million designers and non-designers alike use Canva to create web and print designs. It's free of charge, with options to purchase premium design elements or upgrade to a paid plan.
Content Design Best Practices
In creating and customizing your templates, you should keep some best practices in mind to ensure they're easy to read, attractive and persuasive. Here are a few:
- Incorporate branding. Include branding elements like your color scheme, logo and font wherever you can. Audiences should recognize your content as belonging to your brand.
- Keep text short and concise. Viewers may only glance at your screen for a few seconds. Use as few words as possible to get the point across. If you can, write in fragments or bullet points rather than full sentences.
- Make fonts large enough to be read from a reasonable distance. You can test this out on your own. Create some sample text in different sizes, then display it on your screen and check it for readability.
- Stick to one or two fonts. Using more than two will make your design appear busy.
- Be sure your font color is in high contrast with the background color. If text and background colors are too similar, the text will be difficult to read.
- Choose sans-serif fonts. They display better than serif fonts.
- Use high quality, high dimension photos. Avoid using blurry, pixelated, poorly lit photos.
How to create a digital signage template with Google Slides
1. Open up Google Slides and log in to your Google account.
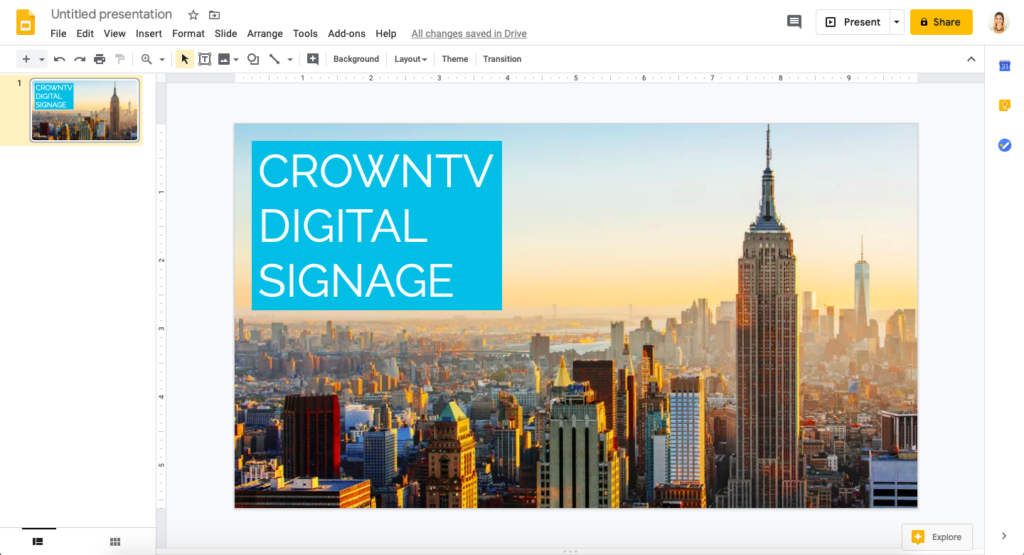
2. Start a new blank presentation.
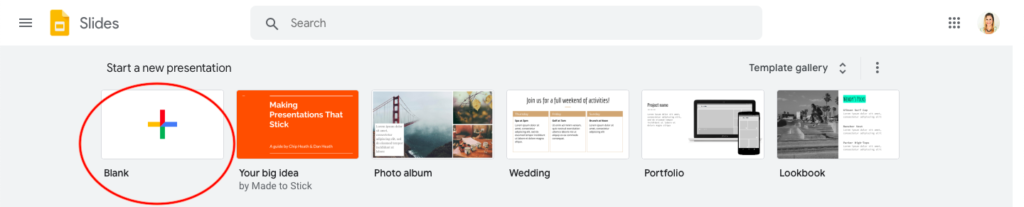
You may close the box on the right labeled Themes.
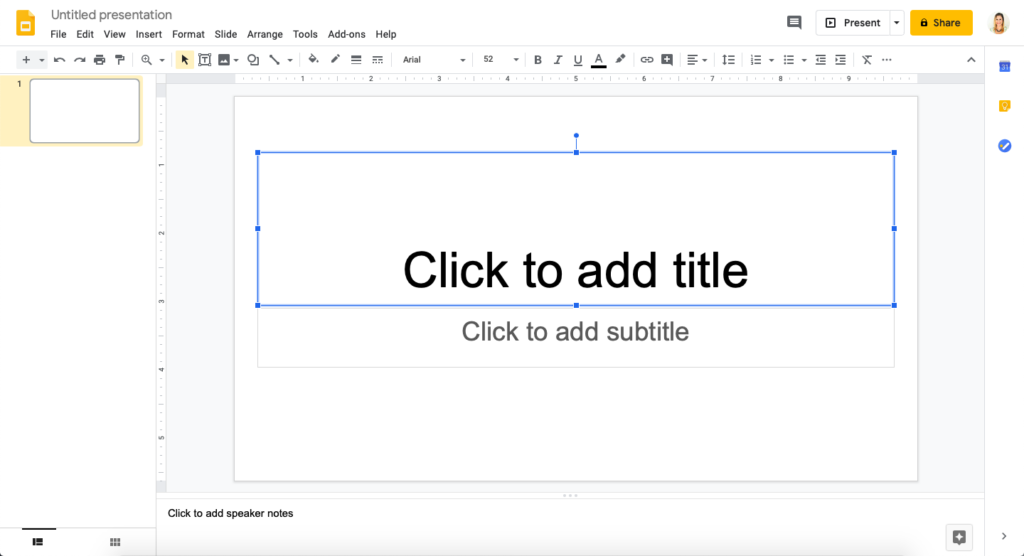
3. First, let's delete the existing text boxes. To delete a text box, select it and then press backspace or delete.
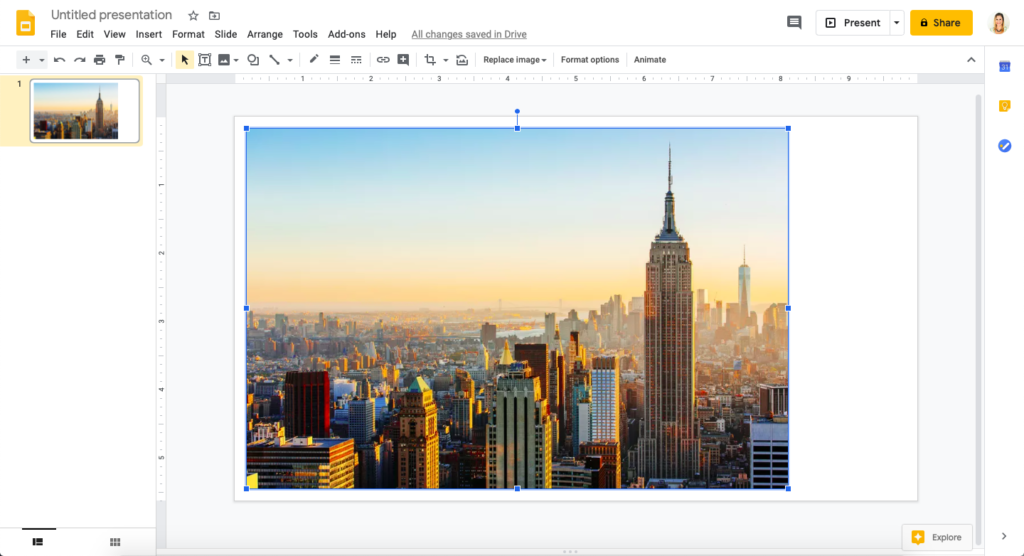
4. Insert a background image. Go to Insert > Image. You'll see a few different options, including uploading an image from your computer, searching the web or selecting one from your Google Drive files. We're going to upload a photo from our computer.
TIP: If you'd like to search the web for an image to use, it's important to make sure you have permission to use the image. When you go to search for an image in Google, click "Tools" underneath the search bar. Under "Usage rights", select "Labeled for reuse".
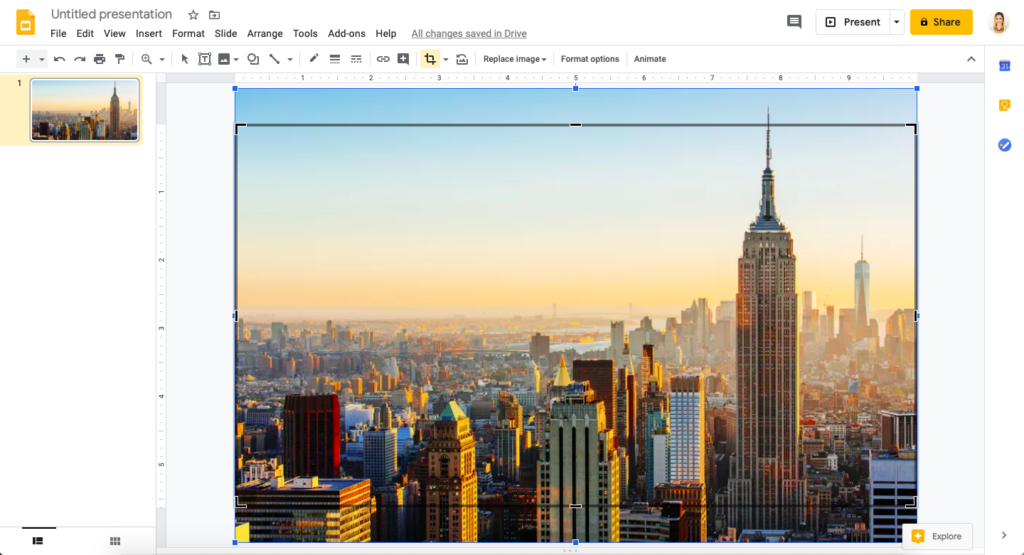
As you can see, you'll need to adjust your image so it fits the slide. To adjust the image's size while maintaining its proportions, select the image, hold the shift key, then drag each corner of the image until it's as wide or long as the template. A red line will appear when you hit the edges of the slide. You can also drag the image until it's centered on the slide, vertically and/or horizontally. Red lines will appear and indicate when the image is centered.
To make the image better fit the slide, we're also going to crop it. Select the crop ![]() icon on the top toolbar, then hover over an edge of the image so the pointer turns into an arrow. Drag your mouse to crop the image (again, a red line will appear when you've hit the edge of the slide). Repeat for each edge of the image until it's the same size as the slide.
icon on the top toolbar, then hover over an edge of the image so the pointer turns into an arrow. Drag your mouse to crop the image (again, a red line will appear when you've hit the edge of the slide). Repeat for each edge of the image until it's the same size as the slide.
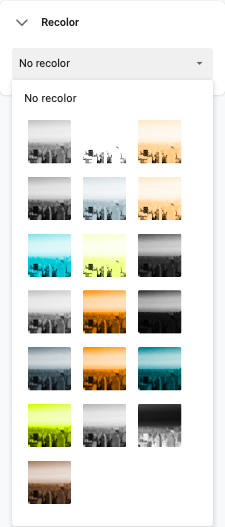
5. If you'd like, you can add a filter to your background image. Google Slides doesn't use the term "filter", but the Format Options feature serves the same purpose.
Select the image, then click "Format options" in the top toolbox. Options will appear on the right. Under Adjustments you can adjust the transparency (fade), brightness or contrast of the image, or under No Recolor you can add a filter. We're going to leave our image as is for this tutorial, but be aware of this option.
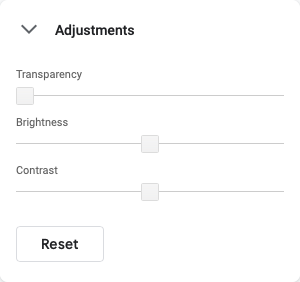
TIP: To make dark-colored text more readable on top of your background, increase the transparency of your background image.
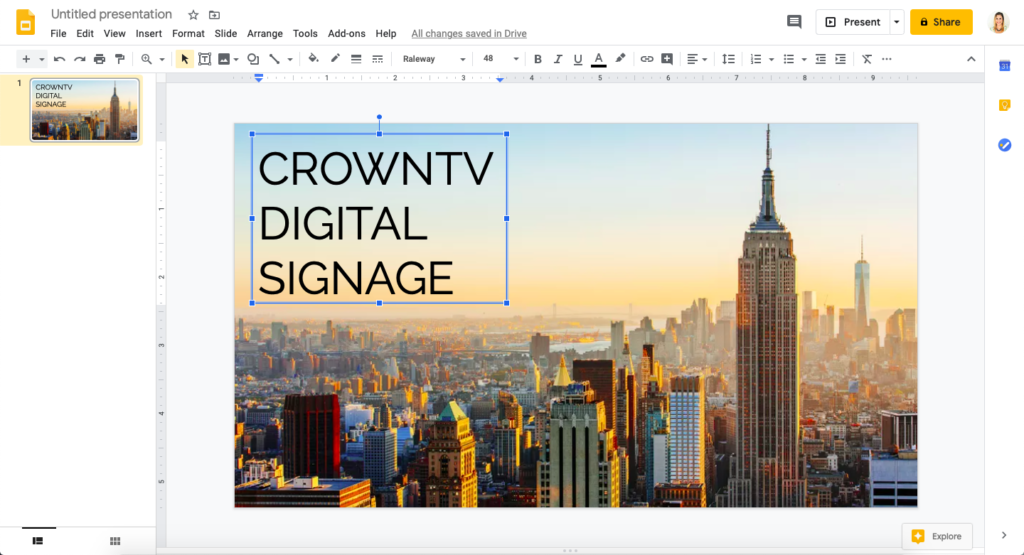
6. Add text. Select the text box ![]() icon in the top toolbar, then drag your mouse to create a text box. Double-click within the text box to type in it.
icon in the top toolbar, then drag your mouse to create a text box. Double-click within the text box to type in it.
Choose your font and type in your text. We recommend using a font size of at least 48 for title text, and at least 24 for body text. Adjust the size of your text box so it better fits the text you've just typed.
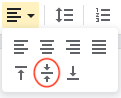
You can also center your text vertically within the text box by using the align options at the top:
7. Add a background color to your text (if desired). There are two methods of doing this:
Method One
Select the paint bucket icon ![]() in the top toolbar and choose a color for your text background. You can click the + button under Custom to type in a hex code – perhaps make it one of your brand's signature colors. Make sure to change the color of your font (
in the top toolbar and choose a color for your text background. You can click the + button under Custom to type in a hex code – perhaps make it one of your brand's signature colors. Make sure to change the color of your font (![]() ) if it no longer shows up against the background color.
) if it no longer shows up against the background color.
Method Two
Select the shape ![]() icon in the top toolbar. In the drop down, choose a rectangle or rounded rectangle. We'll go with a regular rectangle in this example.
icon in the top toolbar. In the drop down, choose a rectangle or rounded rectangle. We'll go with a regular rectangle in this example.
Drag your mouse to create a rectangle shape, just like creating a text box. Adjust it, like you would an image, until it's your desired size.
To change the fill color of the rectangle, select the paint bucket ![]() in the top toolbar and select your desired color. If you notice the edges of the rectangle are a different color than the rest of it, select the border color
in the top toolbar and select your desired color. If you notice the edges of the rectangle are a different color than the rest of it, select the border color ![]() icon and change it to Transparent.
icon and change it to Transparent.
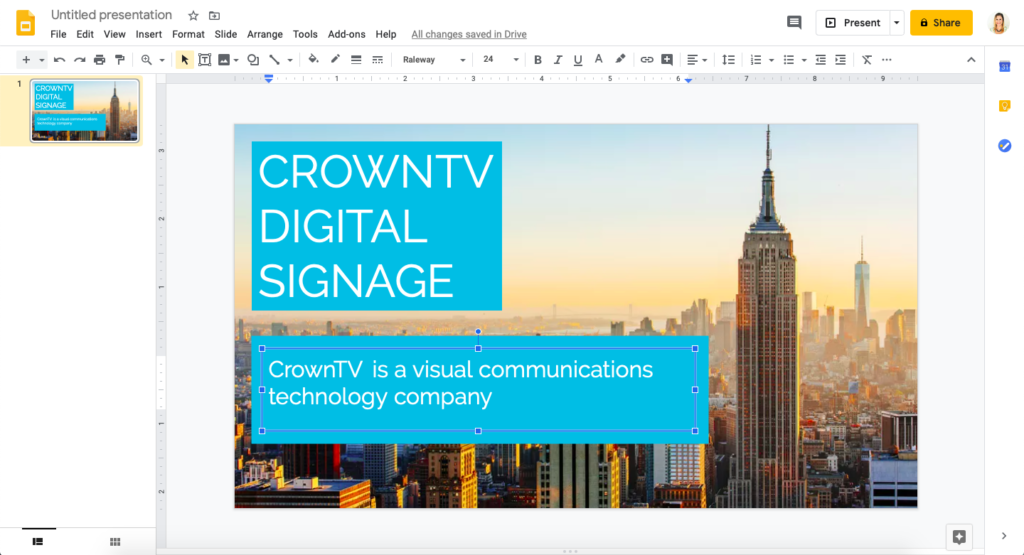
Next, create a text box on top of the colored rectangle you just created. Make it slightly smaller than the rectangle. You can drag the text box with your mouse to move it and center it on top of the rectangle. Perpendicular red lines will indicate when it's centered.
Type in your text like you did in step 6.
8. Add more text and images. Repeat step 8 to insert more text boxes and add more text, if desired. To add more images, follow the same procedure as step 5, sizing and cropping the images to your liking.
9. Export your design as an image when it's finished. Go to File > Download and save the design as either a JPEG or PNG image. PNGs are higher quality but have a larger file size. JPEGs have a slightly lower quality and smaller file size.
How to create digital signage content with Canva
For this example, we'll create a simple graphic containing a motivational quote, as well as two graphics promoting good hygiene in the workplace: one static and one animated!
Graphic #1: Motivational quote (static)
1. Create a Canva account, if you don't already have one. You can create one using Facebook, Google+ or email.
2. To the right of "Create a design", click "Custom dimensions". Set your dimensions to 2560x1440 pixels for landscape orientation, or the reverse for portrait (we'll use landscape again in this example). Click "Create new design" when you're ready.

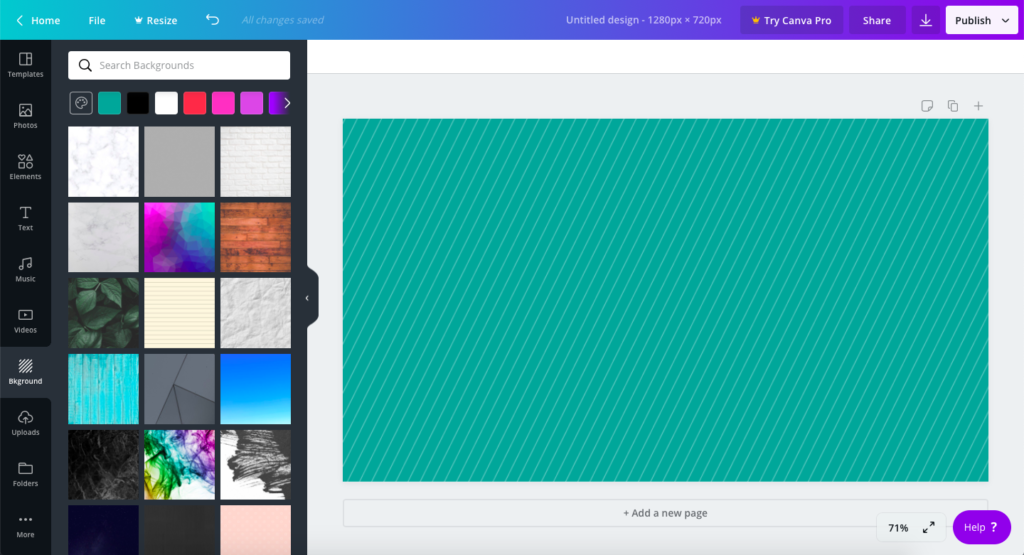
3. Go to the Background tab and choose a background image or color. Canva provides over a million background designs and images for you to choose from. Use the search box to type in a keyword and find something specific, like "mountain" or "road". You may also upload your own image by going to the Uploads tab, or make the background a solid color. For this example, we chose one of Canva's free background designs.
4. Add a filter to your background image (if desired). Click the background and click "Filter" if you'd like to do this. Slide the Intensity bar to make it more or less prominent. You can also click "Adjust" to play with the brightness, contrast, saturation, etc. We like our background as it is, so we won't be adding a filter in this tutorial.


5. Add text. Start by going to the "Text" tab. Click "Add heading" on the left if you'd like to add plain text and customize its font and size. You can also choose from several typography templates, which we'll use for this example. We chose the one that reads "CERTIFICATE OF COMPLETION". Click on it to insert it.
To change the text, double click the existing text to highlight all of it, then type in yours. We're using the quote "Move fast and break things" by Facebook CEO Mark Zuckerberg.
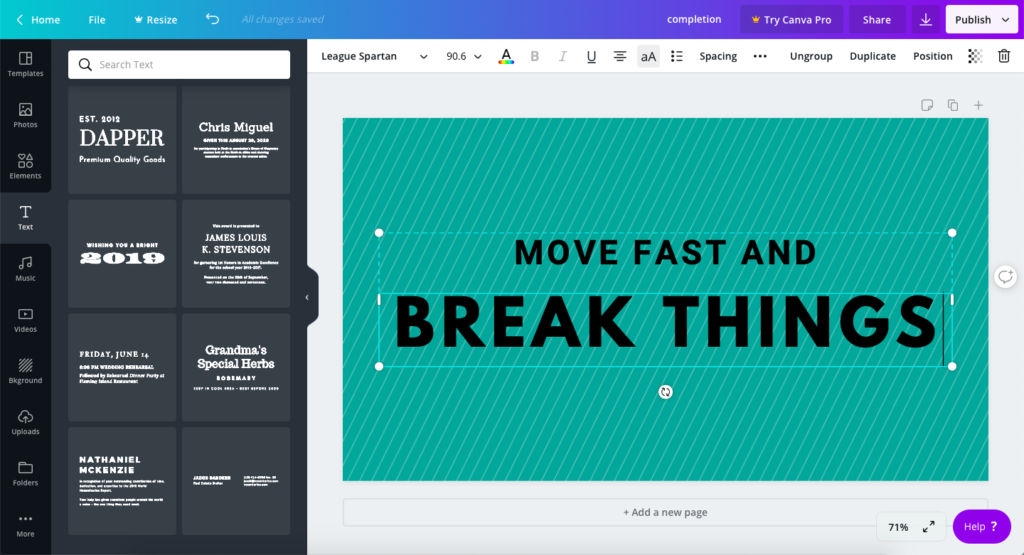
Adjust the size and position of the text, if you'd like, by holding and dragging the text box. Pink lines will appear and indicate when the text box is centered to the background. You can also center the text, which we've done above.
6. Add more text, images and other elements (if desired). Use the same procedures as in steps 3 and 5.
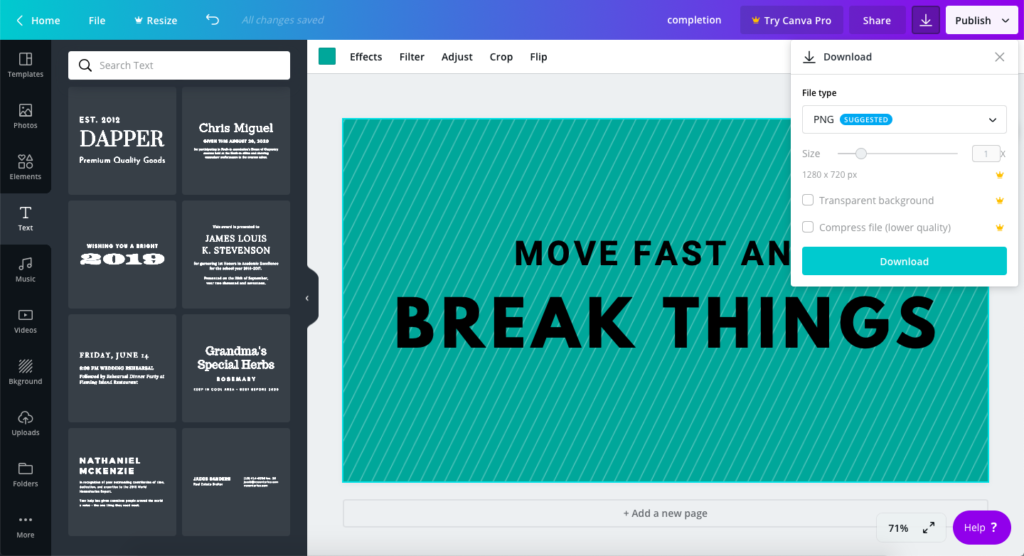
7. Export your design as an image. Click the download icon in the top right corner. Export the design as a PNG or JPEG image.
To use this template again in the future, log in to your Canva account and select it in the "All your designs" tab. You'll be able to edit all elements of the template.
Graphic #2: Feeling sick? (static)
1. Create a new design just like you did in the previous example.
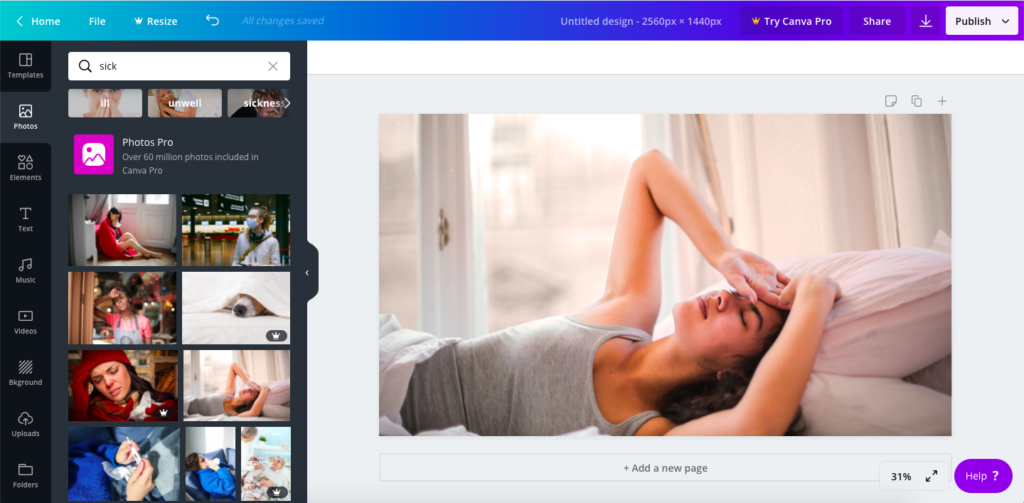
2. Find and choose an image. Go to the Images tab and search the word "sick". If you hover over an image option, you'll see if it's free to use or requires payment. We'll go with the image circled in red.

3. Make the image your background. To do this, drag the image from the preview panel onto the white space until it fills up the whole design. You'll see a teal border around the image when it's been properly placed.
The image will be automatically centered to the design, but if you'd like to move it, double-click it and then drag it to your desired position.
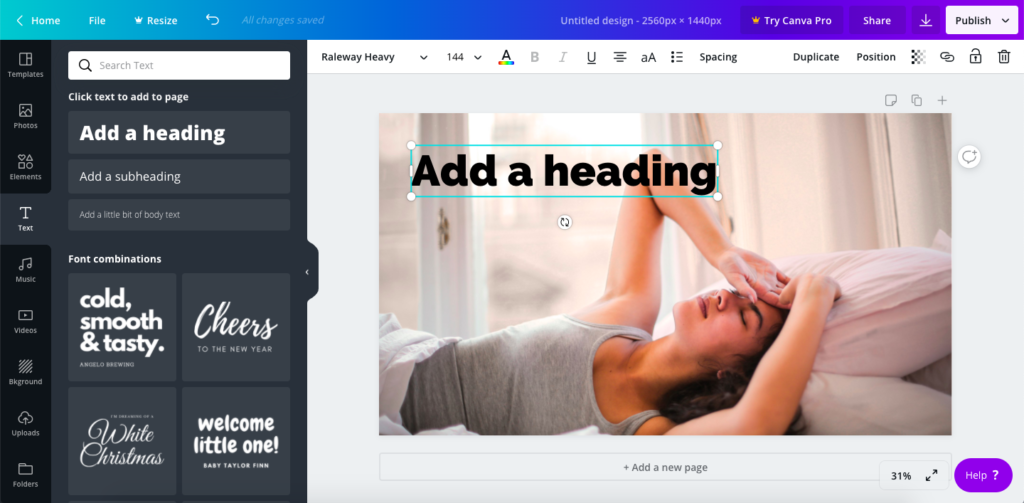
4. Add a text box. Go to the Text tab and select "Add a heading". Choose your desired font, font size and color, if you don't like the default. We're going to use Raleway Heavy at size 144, in black. You can also drag the text box to position it. Pink lines will indicate when the text box is centered to the design, vertically and/or horizontally, and when it's near the edges of the design. We'll place ours in the top left.
5. Type in your text by double-clicking the text to highlight it, then typing in your desired text. You can also change its alignment, style and spacing at the top.

6. Add more text. Create a new text box, this time using the "Add a subheading" option. Change the font, size and color, if desired. Type in your text, then drag the text box until it aligns with the other one, if desired. Pink lines will indicate when the two text boxes are aligned.
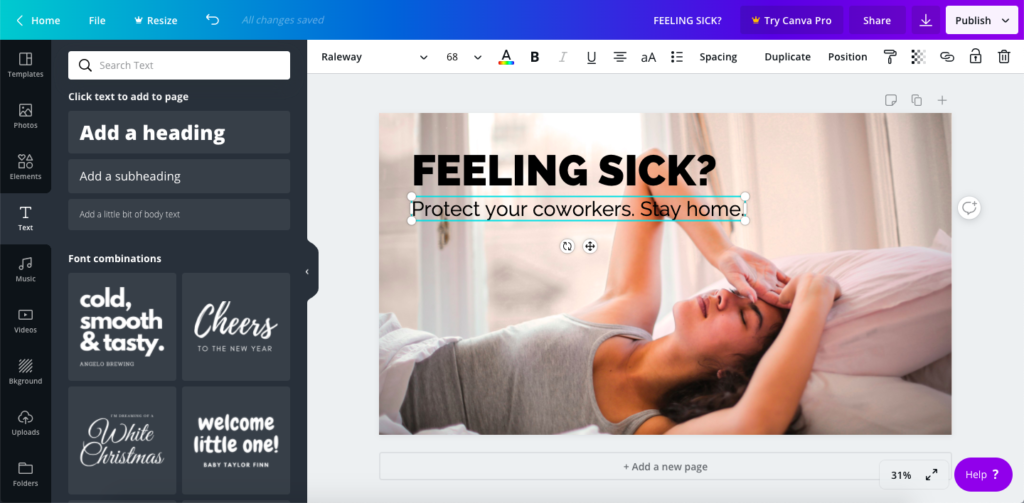
Add more text, if you'd like. We think this one is now ready to download!
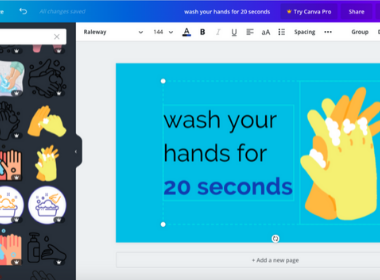
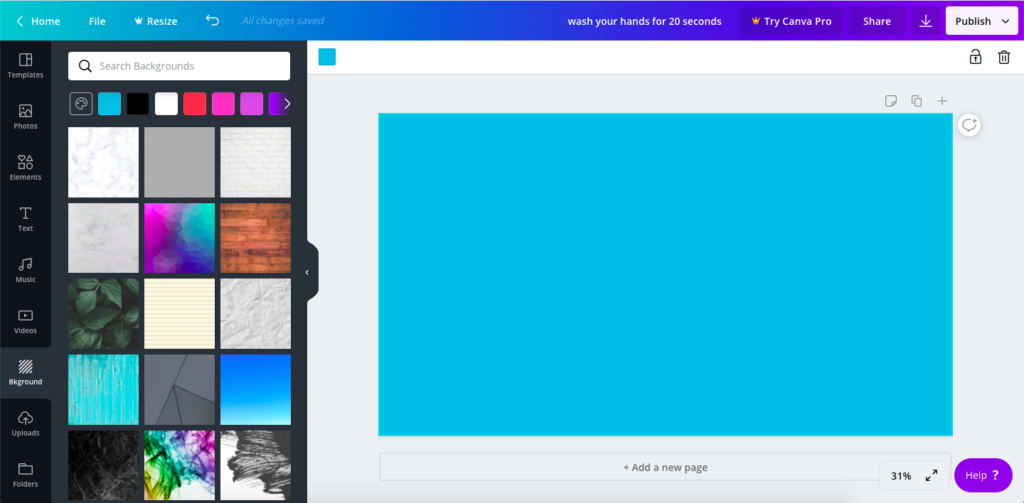
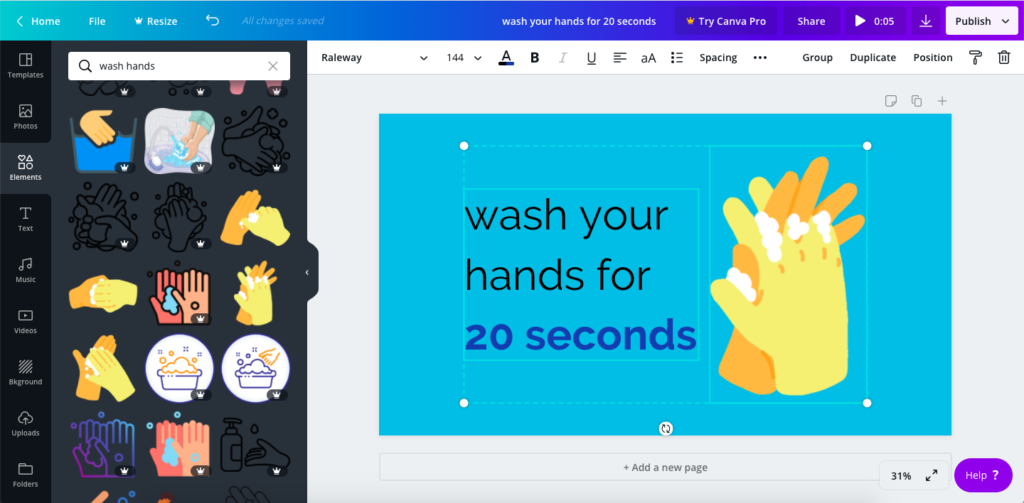
Graphic #3: Wash your hands (animated)
1. Create a new design.
2. Choose a background design or color. We're going with a solid teal background.
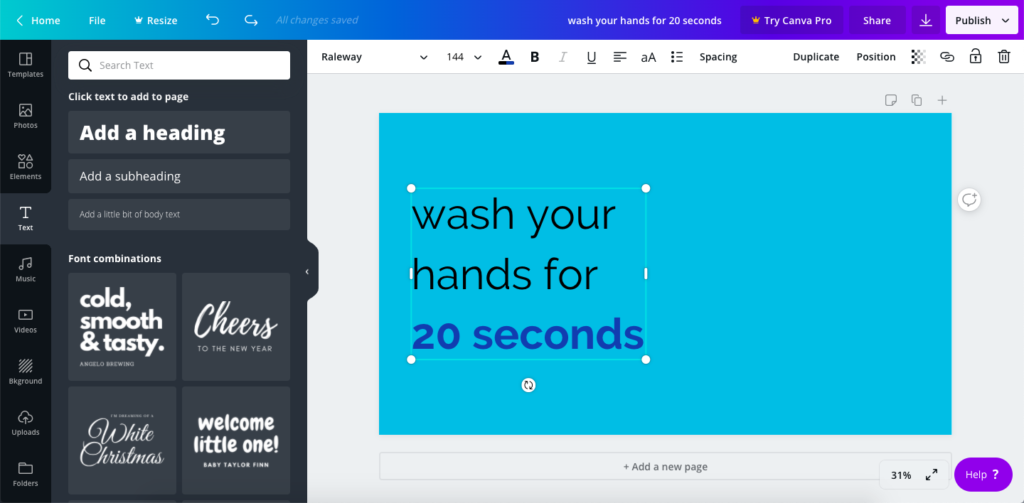
3. Add, stylize and position your text. We've decided to bold and change the color of the last two words, place it to the left and center it vertically.
4. Add an animation. Go to the Elements tab and search for an animation. We'll search for "wash hands". As with photos, you'll see each illustration will be labeled as free or requiring payment. You'll be able to tell it's an animation because it will be moving. Simply click on it or drag it onto the design. Drag it until it's positioned to the right of the text box.
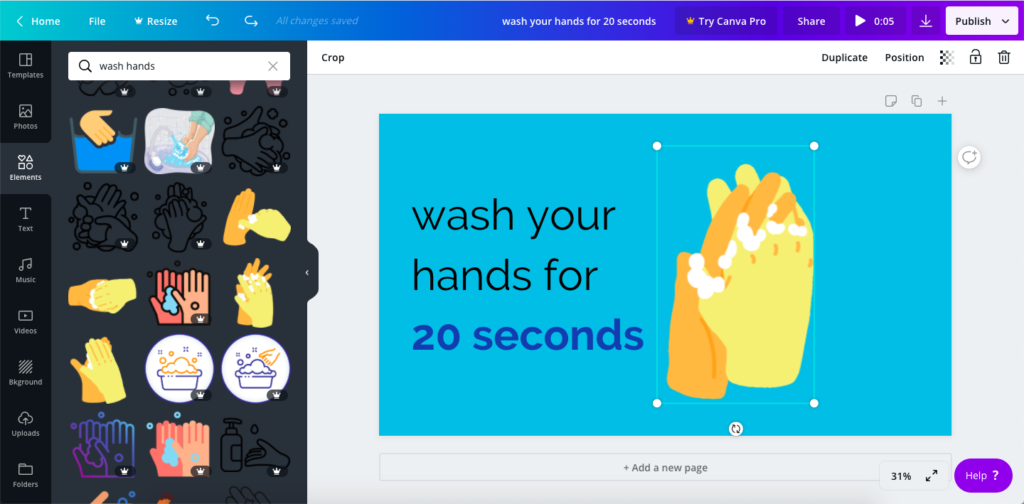
5. Center the text and animation. Select both the text and the animation by holding down the Shift key as you click both elements. Drag them as if they were a single element until they're centered on the design, indicated by pink perpendicular lines.
6. Download the design as a video. Click the download button in the upper right, and you'll have the option to download the video as an MP4. Click "Download" and you've created an animated graphic!
Do you feel like a professional graphic designer yet? Why not show off your creations on digital signage screens? Request a demo of CrownTV's system today.
Keep reading
More guides like this
Operator-grade playbooks, weekly.
Proof, not pitches
See real installs
Live deployments across hospitality, retail, and offices.
Ready to deploy?
Get a quote in 4 hours
Reply within four business hours. No call required.