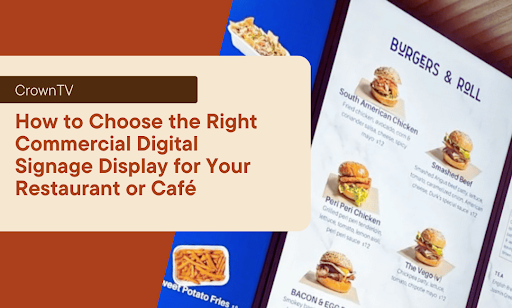
You spent $4,000 on a sleek digital menu board. Six months later, customers squint at washed-out text while sunlight floods through your windows. The display you bought wasn’t built for your space, and now you’re stuck with an expensive mistake.
Choosing the wrong commercial display costs more than money. It wastes wall space, frustrates customers, and makes your brand look cheap. But picking the right display transforms empty walls into revenue generators that sell more items, cut perceived wait times, and free up your staff from answering the same questions 50 times per day.
The difference between a display that works and one that collects dust? Knowing exactly what specs matter for your specific environment.
Here’s what we’ll cover:
- Key display specs that actually impact performance (and which ones are marketing fluff)
- How to match screen brightness and viewing angles to your space
- Indoor vs outdoor display requirements for cafés with patios
- Screen size calculations based on viewing distance
- Mounting options that maximize visibility without disrupting flow
- Budget-friendly picks vs premium displays and when each makes sense
Keep reading!
Separating Performance Specs from Sales Pitch
Most display spec sheets read like alphabet soup: 4K resolution, HDR10+, 178° viewing angles, 120Hz refresh rate. Half of these features sound impressive, but do absolutely nothing for a menu board or promotional display.
Let’s separate what matters from what sells.
Resolution That Actually Makes Sense
Screen resolution determines text clarity and image sharpness. Here’s what each level delivers in real-world restaurant use:
| Resolution | Best Use Cases | When to Skip It |
| 1080p (Full HD) | Menu boards, promotional displays, screens under 55″ | Never; this is your baseline |
| 4K (Ultra HD) | Screens over 55″, close-viewing kiosks (3-4 feet) | Standard menu boards, displays viewed from 10+ feet |
| 8K | Large-format video walls, luxury applications | 99% of restaurant installations |
- The 1080p reality: This resolution handles 90% of restaurant digital signage needs. Text stays crisp, images look sharp, and you’re not paying a premium for pixels that customers won’t notice from 10 feet away.
- When 4K makes sense: Massive screens over 55 inches, or displays where customers stand within 3-4 feet (like self-service kiosks). For standard menu boards mounted behind your counter? You’re burning budget on specs that provide zero visual improvement.
Brightness Measured in Nits
This spec separates functional displays from failures. Nits measure screen brightness, and most restaurant owners underestimate how bright their displays need to be.
Brightness Requirements by Environment:
- 300-400 nits: Dim rooms, minimal windows, controlled lighting only
- 450-600 nits: Standard restaurants with moderate natural light
- 700-1,000 nits: Window-facing displays or bright overhead lighting
- 1,500-2,500+ nits: Outdoor installations or direct sunlight exposure
That 300-nit display works beautifully in the store showroom. Mount it near your café windows, and customers see a dark, unreadable screen by noon.
Specs You Can Safely Ignore
Not every specification deserves your attention. Here’s what marketing departments love promoting that won’t impact your restaurant operations:
- Viewing angles over 160°: Manufacturers advertise 178° viewing angles. Sounds impressive. Means nothing for wall-mounted displays. Your customers view screens head-on or at slight angles. A 160° viewing angle performs identically to 178° in real-world use.
- Refresh rates above 60Hz: Standard content needs 60Hz. Menu items, promotional videos, and social media feeds don’t require higher rates. Sports bars showing fast-action content benefit from 120Hz. Your café menu? The extra hertz adds zero value.
- Smart TV features: Built-in Netflix and streaming apps serve zero purpose for commercial signage. You’ll use dedicated signage software anyway. These “smart” features just create security vulnerabilities and unnecessary complexity.
Panel Types That Impact Longevity
The panel type determines durability, not the brand name on the bezel. Here’s what you need to know:
| Panel Type | Operating Hours | Lifespan | Best For |
| Consumer TV | 8-10 hours daily | 12-18 months continuous use | Never use commercially |
| Commercial LCD | 16-18 hours daily | 50,000-70,000 hours | Standard restaurant signage |
| Commercial LED | 24 hours daily | 100,000+ hours | 24/7 operations, high-traffic |
Commercial-grade panels run 16-24 hours daily and last 50,000-100,000 hours. Consumer TVs might look identical, but fail after 12-18 months of continuous operation. A commercial display from a lesser-known manufacturer outlasts a consumer Samsung TV repurposed for business use.
Brightness and Viewing Angles for Your Specific Space
Walk into your restaurant at different times of day. Notice how light changes your space: morning sun floods through east windows, afternoon glare hits the bar area, and evening dinner service operates under warm overhead lighting.
Your display needs to perform across all these conditions.
The Light Assessment Method
Grab your smartphone and check your space at three critical times. These assessments reveal problem areas your eyes adjust for, but displays can’t compensate:
Morning rush (7-10 AM)
- Where does natural light hit hardest?
- Which walls catch direct sunlight?
- What’s the sun angle relative to potential display locations?
Lunch peak (11 AM-2 PM)
- When is overhead lighting at maximum brightness?
- How does combined natural and artificial light affect visibility?
- Which areas create the most glare?
Evening service (5-8 PM)
- How do interior lights interact with window darkness?
- Do reflected lights from outside create visibility issues?
- What’s the contrast between lit areas and dark windows?
Take photos of each wall where you’re considering display placement. Review these photos before purchasing any equipment.
Matching Brightness to Location
Most restaurant owners buy displays based on price, then fight visibility issues for years. Flip this approach, let your space dictate brightness requirements.
| Display Location | Minimum Nits | Optimal Nits | Installation Tips |
| Behind counter (controlled lighting) | 400 | 450-500 | Position perpendicular to windows |
| Side walls with windows | 600 | 700-800 | Avoid direct sunlight paths |
| Window-adjacent | 700 | 900-1,000 | Mount at angles minimizing reflection |
| Drive-thru displays | 800 | 1,000-1,200 | Account for vehicle headlight glare |
| Covered outdoor patio | 1,500 | 1,800-2,000 | Full weatherproof enclosure |
| Full sun exposure | 2,500 | 3,000-5,000 | Professional-grade outdoor-rated |
- Counter-facing displays (behind the POS or order counter): You control the lighting. A 450-500 nit display works well here. Position screens perpendicular to windows to avoid competing with natural light.
- Window-adjacent installations: You need 700+ nits minimum. Anything less creates a washed-out appearance during daylight hours. Mount displays at angles that minimize direct sunlight reflection on the screen surface.
Viewing Angle Considerations That Matter To Brand Identity
Forget the spec sheet viewing angles, focus on your customer’s actual position relative to the screen. Here’s how to optimize placement:
Horizontal viewing angles (left-to-right movement):
- Counter queues: 140° minimum for customers standing at angles
- Bar seating: 160° for patrons seated along the length
- Dining room visibility: 130° sufficient for wall-mounted displays
Vertical viewing angles (up-and-down viewing):
- Standing customers: Mount 5-7 feet high, standard viewing angle fine
- Seated diners: Angle displays 10-15° downward from perpendicular
- Drive-thru installations: Account for vehicle height variations
The sweet spot for most installations: Mount displays 5-7 feet high, angled 10° down from perpendicular. This position optimizes readability for standing customers while remaining visible to seated diners.
Anti-Glare Solutions Beyond Brightness
High-brightness displays solve most visibility problems, but some locations need additional help. Consider these options for challenging environments:
- Anti-glare screen filters: Reduce reflection without dimming content, which works well for displays opposite windows
- Matte-finish screens: Cost slightly more than glossy alternatives but eliminate the mirror effect under harsh lighting
- Polarized film overlays: Cut specific glare angles while maintaining brightness levels
- Recessed mounting: Set displays back from the wall surface to reduce ambient light impact
Indoor vs Outdoor Digital Display Requirements
That gorgeous 55-inch TV you’re eyeing for your patio? It’ll last three months before moisture kills the internal components. Outdoor displays aren’t brighter than indoor screens; they’re engineered for environmental abuse.
Temperature Tolerance Separates Indoor from Outdoor
The operating temperature range determines where displays can survive long-term:
| Display Type | Minimum Temp | Maximum Temp | Climate Control | Typical Lifespan |
| Indoor Commercial | 32°F | 104°F | None required | 5-7 years |
| Semi-Outdoor | 14°F | 113°F | Passive cooling | 3-5 years |
| Full Outdoor | -22°F | 122°F | Active heating/cooling | 7-10 years |
Indoor commercial displays operate comfortably between 32°F and 104°F. Your heated and air-conditioned restaurant keeps them happy year-round.
Outdoor displays handle -22°F to 122°F temperature ranges. They include internal heating elements for winter operation and cooling fans for summer heat. Consumer displays lack these thermal management systems and fail when temperatures swing outside their narrow comfort zone.
Weatherproofing Goes Beyond Water Resistance
IP ratings tell you what displays can withstand. Indoor displays typically carry no IP rating; they’re not designed for moisture exposure. Here’s what each outdoor rating means for your installation:
IP65 (Good for most patios)
- Complete dust protection
- Water jets from any direction
- Handles rain, splashing, and humidity
- Best for: Covered patios, protected alcoves
IP66 (Enhanced protection)
- Same dust protection as IP65
- Powerful water jet resistance
- Better for: Coastal locations with salt air, areas with pressure washing
IP67 (Maximum protection)
- Complete dust protection
- Submersion resistance up to 1 meter
- Best for: Pool areas, boat docks, extreme weather zones
The rating determines enclosure type. Outdoor displays require sealed, climate-controlled enclosures with ventilation systems that prevent internal condensation while keeping weather out.
Brightness Requirements Triple Outside
Indoor brightness standards don’t translate to outdoor environments. Here’s what you actually need:
Outdoor Brightness by Exposure Level:
- Covered patio (partial shade): 1,500-2,000 nits minimum
- Mixed sun exposure: 2,000-2,500 nits
- Full sun all day: 2,500-3,500 nits
- Intense direct sunlight: 4,000-5,000 nits
That 700-nit display that looks brilliant inside your café? Outdoors, it’s nearly invisible. The brightness premium adds a high cost to outdoor displays to run 3-5x the price of comparable indoor models.
Protection Features for Accessible Locations
Outdoor displays face threats that indoor screens never encounter. Your protection strategy depends on installation height and accessibility:
| Installation Type | Primary Threats | Required Protection | Cost Premium |
| Wall-mounted (7+ feet) | Weather, temperature | IP65 enclosure | 2x indoor cost |
| Ground-level (touchable) | Vandalism, impacts | Tempered glass, reinforced mount | 4x indoor cost |
| High-traffic areas | Accidental damage | Recessed installation | 3x indoor cost |
| Unsupervised locations | Theft attempts | Tamper-resistant hardware | 2.5x indoor cost |
Tempered glass front panels resist impacts better than standard acrylic. Tamper-resistant mounting prevents theft. Recessed installations protect screens from accidental damage while maintaining visibility.
Cable Management in Outdoor Environments
Running power and data cables outside creates unique challenges. Here’s what proper outdoor installations require:
Essential cabling components:
- UV-resistant conduit for all exposed cable runs
- Weatherproof junction boxes for connections
- Dedicated electrical circuits for heating/cooling systems
- Moisture-sealed cable entry points on display enclosures
- Drip loops at the lowest points to prevent water tracking
Plan cable runs during installation; retrofitting weatherproof cabling costs substantially more than building it into your initial setup. Some outdoor displays offer wireless content management, eliminating data cable vulnerabilities. You still need weatherproof power, but wireless operation simplifies installation and reduces potential failure points.
Screen Size Calculations Based on Viewing Distance

You can’t guess screen size and hope it works. Too small and customers miss your content. Too large and you’ve overspent on display real estate that nobody can fully process from their viewing position.
The math is simple, and it determines ROI on your entire installation. Getting the size right is a smart move that prevents costly do-overs.
The 1:10 Viewing Distance Formula
For every inch of screen height, customers can comfortably view content from 10 inches away. A 32-inch display (roughly 16 inches of actual viewable height) works for viewing distances up to 13-14 feet.
| Screen Size | Viewable Height | Optimal Distance Range | Maximum Distance |
| 32 inches | ~16 inches | 8-14 feet | 16 feet |
| 43 inches | ~21 inches | 10-18 feet | 21 feet |
| 55 inches | ~27 inches | 14-23 feet | 27 feet |
| 65 inches | ~32 inches | 16-27 feet | 32 feet |
| 75 inches | ~37 inches | 19-31 feet | 37 feet |
Quick calculation method: Measure the distance from where customers typically stand or sit to your planned display location. Divide that distance (in inches) by 10. The result tells you the minimum viewable height you need.
Content Type Changes the Equation
Menu boards with large text and simple images work at longer distances than displays showing detailed product photos or social media feeds. The ability to update content instantly versus relying on manual updates also affects how you use different screen sizes throughout your space.
Text-heavy content (menu items, prices, descriptions):
- Minimum font size: 0.25 inches per 10 feet of distance
- 32-inch display works up to 12 feet for readability
- 55-inch display extends range to 20 feet
Image-focused content (food photography, promotional graphics):
- Details are visible at closer ranges
- Add 20-30% to the screen size for the same viewing distance
- 43-inch display replaces 32-inch for photo-heavy menus
- Vibrant colors display better on larger screens at medium distances
Video content (promotional clips, social feeds):
- Movement draws attention from farther away
- Standard sizing formula applies
- Higher resolution helps at maximum viewing distances
Larger displays help attract attention to limited-time offers and seasonal promotions, especially those featuring high-quality photography or video content.
Multiple Display Zones Strategy
Single large displays rarely serve every viewing distance in your space. Smart restaurant operators split content across appropriately sized screens for each zone. Managing multiple screens becomes simpler when you can control everything from a single dashboard rather than updating each display individually.
Behind-counter zone (5-8 feet viewing distance):
- 32-43-inch displays handle menu boards
- Customers ordering at the counter need clear, readable text
- Portrait orientation maximizes vertical menu space
Dining area displays (15-25 feet viewing distance):
- 55-65 inch screens for promotional content
- Wider viewing angles accommodate scattered seating
- Landscape orientation suits video content
Drive-thru displays (8-12 feet from vehicle):
- 43-55 inch minimum for driver visibility
- Account for viewing angle from vehicle height
- High brightness matters more than size here
Common Sizing Mistakes to Avoid
Restaurant owners make predictable errors when selecting screen sizes. Here’s what tanks visibility and wastes money:
- Matching existing TV sizes: Your 50-inch home TV sits 8 feet from your couch. Your menu board sits 15 feet from customers. Different distances need different sizes.
- Prioritizing price over function: A $400 32-inch display that customers can’t read from the counter delivers zero ROI. Pay for an adequate size first. This mistake hits small restaurants particularly hard when budgets are tight.
- Ignoring mounting height: Wall-mounted displays 8 feet high need larger screens than counter-height installations at the same viewing distance.
- Oversizing for small spaces: A 75-inch display in a 12×15 café overwhelms the space, and customers can’t process the entire screen from close range.
Mounting Options That Maximize Visibility
Your display purchase means nothing if customers can’t see the screen from where they naturally stand, sit, or move through your space. Mounting strategy determines whether your content reaches eyeballs or gets ignored and whether your displays actually increase sales or become expensive wallpaper.
Start by mapping customer flow patterns before drilling any holes. Understanding customer needs and viewing positions ranks among the key factors that separate effective installations from wasted investments.
Wall Mount Configurations
Wall mounting offers the most flexibility for positioning displays where customers naturally look. Here’s how each mounting style serves different restaurant layouts:
| Mount Type | Tilt Range | Swivel Range | Best Applications | Typical Cost |
| Fixed mount | 0° | 0° | Eye-level installs, stable viewing positions | $20-50 |
| Tilting mount | 15° down | 0° | High-wall installations reduce ceiling glare | $40-80 |
| Full-motion mount | 15° up/down | 180° left/right | Corner positions, multi-zone viewing | $80-200 |
| Slim mount | 0° | 0° | Flush aesthetic, minimal wall clearance | $30-60 |
- Behind-counter installations: Mount displays 6-7 feet high, tilted 10-12° downward. This angle optimizes readability for customers standing at the POS while remaining visible to those in the queue. Position these displays to showcase high-margin items and eye-catching promotional offers that drive dwell time at the counter.
- Side wall placements: Full-motion mounts allow you to adjust viewing angles as customer traffic patterns change throughout the day. Swivel capability points content toward peak traffic zones during rush periods. This flexibility helps you manage content direction during peak hours without reinstalling hardware. The customization options these mounts provide support brand consistency across different viewing scenarios.
- High-traffic corridors: Fixed or slim mounts keep displays tight against walls, preventing accidental bumps from customers or staff moving through narrow spaces. These installations work well for food courts and high-volume environments where operational costs demand durable, low-maintenance solutions.
Ceiling Mount Solutions
Ceiling-mounted displays work where wall space is limited or where you need visibility from multiple angles. They excel in open floor plans and high-ceiling environments where you want to display multiple items or dynamic content in scattered seating areas.
Drop-ceiling installations (standard 8-10 foot ceilings):
- Adjustable poles extend 18-36 inches from the ceiling
- Rotate displays 360° for optimal positioning
- Hide cable runs through the ceiling infrastructure
- Weight capacity: Check ceiling tile support before installation
Structural ceiling mounts (12+ foot ceilings):
- Heavy-duty poles support larger displays
- Requires ceiling joist or beam attachment
- Best for open dining areas with scattered seating
- Professional installation recommended for safety compliance
Ceiling mounts help small business operators maximize limited wall space while maintaining clear sightlines. They allow you to schedule content that rotates throughout the day, keeping your content fresh without physical adjustments to the mounting hardware.
Freestanding and Portable Options
Not every installation allows permanent mounting. Freestanding solutions provide flexibility for seasonal changes, special events, or lease restrictions that prohibit wall modifications. These options help streamline operations by adapting to changing business needs.
Floor stands with wheels:
- Move displays between locations as needs change
- Weighted bases prevent tipping (50-80 lbs typical)
- Height-adjustable from 4-7 feet
- Cable management channels are built into the pole structure
Countertop stands:
- Small displays (24-32 inches) at POS locations
- Tilt adjustment for customer viewing angles
- Minimal footprint on limited counter space
- Easy content updates without reaching overhead
Kiosk enclosures:
- Self-contained units with built-in displays
- Touchscreen capabilities for self-service
- Tamper-resistant construction for unsupervised areas
- ADA-compliant heights available
Portable solutions work particularly well for displaying loyalty programs, seasonal promotions, and information that reinforces brand identity in temporary or changing locations.
Safety and Code Compliance
Mounting displays involves more than finding studs and drilling holes. Your installation needs to meet safety standards that protect customers and staff. Proper installation reduces long-term operational costs by preventing failures and liability issues.
Weight capacity requirements:
- Mount must support 4x the display weight minimum
- Wall anchors rated for dynamic loads, not static weight
- Stud mounting is preferred over drywall anchors for displays over 40 inches
- Consider warranty length requirements; some manufacturers void coverage for improper mounting
ADA compliance considerations:
- Protruding displays can’t extend more than 4 inches from the walls in pathways
- Mounting height affects accessibility for wheelchair users at interactive displays
- Touch-enabled screens need reachable controls
Fire code compliance:
- Exit signs and emergency lighting can’t be obstructed
- Minimum clearances from sprinkler heads
- Electrical requirements for hardwired installations
Budget-Friendly Picks vs Premium Displays

Price tags on commercial displays range from $300 to $5,000+ for similar screen sizes. Understanding what you’re actually paying for prevents overspending on features you don’t need or buying cheap equipment that fails within months.
The difference between budget and premium rarely comes down to picture quality alone. It’s about how well your digital signage solution performs under real-world restaurant conditions.
What Budget Displays Deliver
Entry-level commercial displays ($300-800 for 43-55 inch screens) handle basic signage needs without premium features. Here’s what you get at this price point:
Core specifications:
- 1080p resolution sufficient for menu boards
- 350-450 nit brightness for indoor controlled lighting
- 50,000-hour panel lifespan
- Basic mounting options (VESA compatible)
- Limited warranty (1-2 years parts and labor)
Where the budget displays work well:
- Back-of-house staff communication screens
- Secondary dining area displays promotional content
- Low-traffic locations with minimal daily operating hours
- Temporary or seasonal installations
Limitations you’ll encounter:
- Lower brightness struggles near windows
- Fewer input options (2-3 HDMI ports typical)
- No built-in content management systems
- Consumer-grade components dressed in commercial housing
Budget digital signs work fine for coffee shop locations with controlled lighting and limited operating hours. They can’t compete with static menu boards for durability, but they beat printed menus for flexibility when you need to update pricing with just a few clicks.
Mid-Range Display Value
The $800-1,800 range offers the sweet spot for most restaurant digital signage. You’re paying for durability and brightness, not unnecessary bells and whistles. This price point gives modern restaurants reliable hardware that supports enhancing customer experience without breaking the budget.
| Feature Category | Budget ($300-800) | Mid-Range ($800-1,800) | Premium ($1,800-5,000) |
| Panel lifespan | 50,000 hours | 70,000 hours | 100,000+ hours |
| Brightness | 350-450 nits | 500-700 nits | 700-2,500 nits |
| Warranty | 1-2 years | 3 years | 3-5 years |
| Operating hours | 16 hours/day | 18 hours/day | 24 hours/day |
| Input options | 2-3 HDMI | 4+ inputs, USB | Multiple inputs, network capable |
Mid-range advantages:
- Brightness handles typical restaurant lighting conditions
- Extended warranties reduce long-term replacement costs
- Better color accuracy for food photography
- Improved thermal management for consistent performance
Mid-range displays pair well with quality digital signage software that lets you automatically switch from your breakfast menu to lunch offerings. The ability to display social media feeds and user-generated content on one screen makes a difference in enhancing customer engagement throughout the day.
Premium Display Justification
Spending $2,000-5,000+ on a single display makes sense in specific scenarios. Premium pricing buys longevity, brightness, and advanced features that budget displays can’t match. For restaurant chains and fast casual chain operators, premium displays deliver the operational efficiency needed to manage multiple locations.
When premium displays pay off:
- Window-facing installations requiring 700+ nits
- 24/7 operations (diners, airports, hotels)
- Video walls requiring perfect color matching across multiple screens
- High-profile lobby or entrance displays representing brand image
Premium features worth paying for:
- High-brightness panels (1,000-2,500 nits) for challenging lighting
- Advanced thermal management for continuous operation
- Built-in content management and scheduling
- Network connectivity for remote management
- Extended warranties (5 years with advance replacement)
Premium features you can skip:
- 4K resolution on screens under 55 inches
- Smart TV functionality for signage use
- Integrated speakers (you’ll use better external audio)
- Curved screens (offer no advantage for signage)
Premium displays aren’t just a trend; they’re built to boost sales through superior visibility and reliability. The right hardware combined with custom templates can make all the difference in how customers perceive your brand.
Digital Displays We Highly Rely On
- Samsung OH55A-S
- Samsung QM43C
- Samsung QM50C
- Samsung QM55C
- Samsung QM65C
- Samsung QM75C
- Samsung QM85C
- Samsung OM55B
- Samsung OM75A
- Samsung The Wall All-in-One 146″
Total Cost of Ownership Calculation
The purchase price represents only part of your actual investment. Factor in these additional costs when comparing budget versus premium options. Understanding true digital signage cost over time changes how you evaluate each tier.
Budget display true costs ($300 purchase):
- Replacement every 3-4 years: $300 x 3 over 10 years = $900
- Higher failure rate: $200 average repair costs
- Limited warranty: Out-of-pocket repairs after year 2
- 10-year total: ~$1,400-1,600
Premium display true costs ($1,500 purchase):
- Replacement every 7-10 years: Single purchase over 10 years
- Extended warranty: Covered repairs years 1-5
- Lower failure rate: Minimal unexpected costs
- 10-year total: ~$1,500-1,800
The premium option costs only $200-400 more over a decade while delivering better performance throughout its lifespan. For primary customer-facing displays, premium pays for itself through reduced headaches and superior visibility. You can update content with a few clicks instead of worrying about hardware failures, and the improved digital display quality reinforces your investment in customer satisfaction.
The Right Display Choice Saves You From a $4,000 Mistake
You now know exactly which specs matter and which ones waste your budget. The difference between a display that works and one that collects dust comes down to matching technical requirements to your specific space, not falling for marketing hype or choosing based on price alone.
Here’s what happens when you apply this knowledge to your next display purchase:
- Your content stays visible all day because you matched brightness levels to actual lighting conditions instead of guessing
- Customers read your menu from their natural positions after calculating the proper screen size based on viewing distances
- Your displays last 5-7 years because you chose commercial-grade panels rated for continuous operation
- Outdoor installations survive weather extremes with proper IP ratings and temperature-rated enclosures
- You avoid overspending on 4K and features that provide zero value for standard menu board distances
- Installation happens right the first time using mounting strategies that optimize viewing angles for customer flow
Getting the hardware right is half the battle. The other half? Content management that lets you update menus, schedules, and promotions without climbing ladders or calling technicians. CrownTV’s dashboard handles remote management across single or multiple locations, while our media players deliver reliable performance that matches your display quality.Need help with the entire setup? Our installation team specs the right displays for your space and handles mounting, cabling, and configuration, so your system works from day one. Contact us now at +1 (347) 410-6890 to educate yourself further.