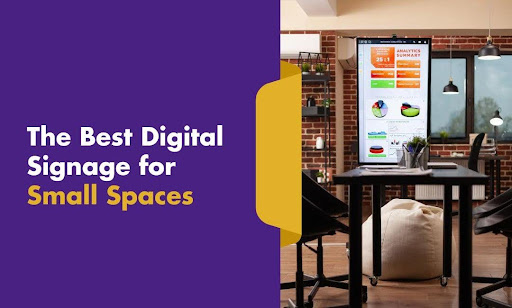
In this guide, we explore everything you need to know about best digital signage for small spaces and how it can transform your business communications.
Too many digital signage displays waste space instead of working with it. The problem isn’t the lack of options—it’s knowing what actually fits. Not just physically. Operationally. Visually. Financially.
Most screens are made for big storefronts, malls, and mega-chains. But if your square footage is tight and foot traffic is close-range, throwing up a 65” display won’t help—it’ll block sightlines and pull focus away from the product.
So, how do you choose signage that fits you, not the other way around? You start by filtering the hype out. Then you match the screen to the space, tie the digital signage software to the outcome, and lock the cost into the budget without sacrificing performance. That’s exactly what we’ll break down here.
Here’s what we’ll walk you through:
- What to look for in small-space digital signage
- How to size the screen right without wasting a single inch
- Brightness levels that actually work indoors and near windows
- Mounting setups that keep things clean, flexible, and secure
- Top display recommendations that check every box
- How CrownTV helps you set the whole system up — fast, smart, and without the tech stress
We’ll break each part down and show you how to fit digital signage solutions into compact stores and cafés without clogging the space or the workflow. Let’s sort the signal from the noise.
Best Digital Signage for Small Spaces: Stop Wasting Wall Space — Here’s What Actually Matters
Fitting screens into tight spaces takes more than measuring width and calling it a day. You’re not looking for the biggest display you can hang — you’re looking for the smartest one you can run.
Compact environments demand discipline. Every screen has to pull its weight in performance, cost, and maintenance. Overspend on features you won’t use, and you burn budget. Skimp on capability, and you end up with tech that slows you down or locks you in.
Here’s how to pick the best signage for a small business that makes the most of small spaces, without dragging your operations or your margins.
Lock the Costs Down Early
Upfront cost matters — but it’s the lifecycle cost that really defines value in small stores and cafés. Cheap displays often break fast or run hot, forcing early replacements or extra cooling.
Look for screens with:
- Commercial-grade durability (not TVs rebranded as signage)
- Built-in media playback to avoid buying separate players
- Warranty coverage that goes beyond 12 months
- Energy efficiency ratings to keep your utility bills stable
The goal is to cut your total cost of ownership, not just your receipt.
Pick Systems that Don’t Box You In
Space is limited. Your flexibility shouldn’t be. Avoid systems that force you to use proprietary software, expensive mounts, or single-purpose formats.
Instead, find small space digital signage that:
- Plays well with standard media formats (MP4, JPEG, HTML5)
- Supports cloud scheduling and remote access
- Works with different operating systems or web-based dashboards
- Doesn’t lock content to USBs or one machine
Open systems give you room to scale, shift content fast, and keep the tech on your terms.
Factor Simplicity Into the Setup
Compact doesn’t mean low-stakes. If your team can’t run the display without a manual — or if content updates require calling tech support — the whole system ends up unused.
Small businesses do better with signage that:
- Installs cleanly with minimal cabling
- Updates easily, even by non-technical staff
- Runs content loops or playlists without daily input
- Let you test and preview content before pushing it live
If the learning curve eats into your day, it’s the wrong setup.
Bottom line? Get the system to do more with less — or you’ll be spending more to fix what should’ve worked from the start.
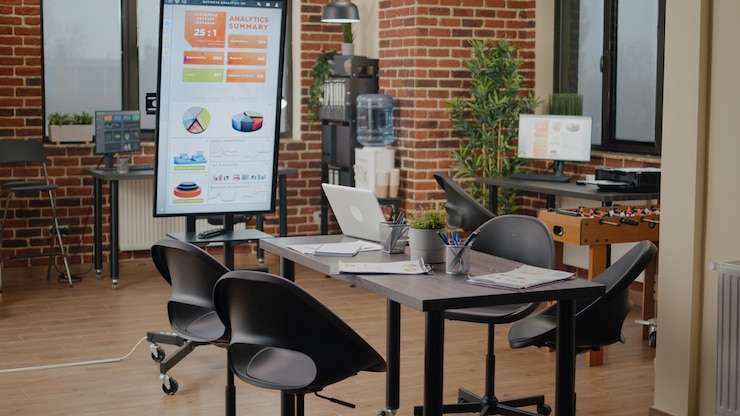
Size the Screen Right Without Swallowing the Space
Go too big, and the display eats the room. Go too small, and the message gets ignored. Finding the sweet spot for screen size in a compact store or café isn’t guesswork — it’s about matching visibility with physical constraints.
Before you pick a size, map the screen’s role. Is it pulling people in from outside? Guiding orders near the register? Highlighting promotions near the product? Each use case changes what “fits” and what overwhelms.
Match the Screen With the Viewing Distance
Screen size doesn’t work in isolation. It’s tightly connected to pixel density, resolution, and viewing distance — and if these don’t match, you’re either wasting money on specs no one will notice, or compromising visibility.
Here’s what matters:
- Optimal viewing distance is calculated by pixel pitch (for LED) or pixel resolution (for LCD).
- For commercial LCDs, the most relevant formula is:
Viewing Distance (in feet) ≈ Screen Height (in inches) ÷ 0.84
This formula ensures text and visuals remain legible without overwhelming the viewer with motion or glare. For tight spaces like POS counters or product shelves, that can mean 22” to 32” compact digital displays — especially if mounted eye-level.
Pro tip: In environments where people pause (like cafés, kiosks, and checkout lines), you can use slightly smaller displays because the dwell time allows viewers to engage more carefully.
But in pass-by situations (hallway displays, entry doors), content needs to be bold and visible in under 3 seconds — and that demands larger fonts, tighter layout spacing, and usually 40–43” screens even in small areas.
Don’t Treat the Diagonal Like it Tells the Whole Story
The screen’s diagonal measurement is just marketing shorthand — it doesn’t reflect actual installable dimensions, nor does it help you plan for layout spacing. You need to break the screen size down into:
- Physical width × height
- Bezel thickness (top, bottom, sides)
- Corner radius or squared edge
- Mount pattern spacing (VESA)
A 43” screen with ultra-thin bezels might occupy less wall than a bulkier 40” with a built-in housing or thick borders. Some interactive displays add up to 2.5 extra inches per side due to reinforced chassis or integrated hardware compartments.
Always pull the mechanical spec sheet (not the user-facing brochure) to find:
- Panel dimensions (without stand)
- Exact mounting hole positions
- Power port and input port placements
- Depth from wall (with and without mounts)
If your install sits near product shelves, customer walkways, or food prep areas, even a 1-inch miscalculation can throw the alignment off, block vents, or violate safety spacing.
Keep Peripheral Clutter Off the Layout
The most common mistake in compact installs? Underestimating what happens around the screen. That includes cabling, mounts, power routing, digital signage media player placement, and airflow clearance. If you don’t account for these, the display might fit the space, but the install won’t.
Here’s what to factor in:
Power and Data Access
- Wall outlets must be placed within 18–24 inches of the screen centerline for low-profile routing.
- If using PoE or HDMI-over-IP, measure access to switch ports or signal extenders.
- Cable gauge matters: longer HDMI runs (25 ft+) require active cables or signal boosters to avoid degradation.
Mounting Depth
- For flush installs, use fixed low-profile mounts with under 1.5” depth.
- For serviceable installs, use tilt or swing-arm mounts that provide access without removing the unit — ideal for spaces where rear ports face the wall.
- Mount VESA compatibility must match both pattern and screw depth — mismatches can create unsafe installs or tilt issues.
Ventilation and Heat Flow
- Never mount screens within 2 inches of a ceiling or enclosed fixture unless fan-assisted.
- Commercial displays often require ambient airflow behind and above to operate within a safe thermal range (usually 0°C–40°C).
If your display includes an external digital signage player, stash it in a nearby enclosure with cable management — or use a screen with internal playback to reduce failure points and simplify setup.
Stop Letting Window Glare Kill Your Content
If your screen sits anywhere near sunlight—front window, glass door, or even under strong interior lighting—standard brightness won’t cut it. Your digital signage content might look fine during setup, but once the light shifts, your display gets washed out and unreadable.
Brightness is one of the most misunderstood factors in indoor signage. And it’s not just about nits on a spec sheet—it’s about where the screen sits, how long it stays visible, and what your viewers are doing when they walk past.
Understand What “Brightness” Actually Means
In commercial signage, brightness is measured in nits—one nit equals the light produced by one candle per square meter. For indoor environments, there’s a baseline to work from:
- 250–350 nits – Typical office-level brightness
- 400–500 nits – Works for general indoor signage with moderate ambient light
- 700–1,000 nits – Needed for screens near windows or under direct artificial lighting
- 1,500+ nits – For displays directly exposed to sunlight, even through glass
If you’re dealing with reflective surfaces or storefront glass, anything under 700 nits will fade during peak light hours. That means your promotions, menus, or visuals lose impact exactly when your foot traffic is highest.
Use The Space Orientation to Guide The Spec
Don’t pick brightness in a vacuum. Pin the display location down first. Then assess how the ambient light moves throughout the day. A screen facing north may never take a direct beam, while a south-facing window can flood it with glare by noon.
Here’s how to filter through the placement:
- Back-wall signage away from windows? 400–500 nits usually hold up well
- Wall-mounted near front-facing glass? Aim for 700+ nits
- Mounted behind glass for outward viewing? You’re crossing into 1,000–2,500 nit territory
Match the brightness to the worst-case lighting condition, not the average.
Consider Ambient Light Sensors or Auto-brightness
If the lighting in your space shifts throughout the day—morning sun, cloud cover, dim evenings—then fixed-brightness displays may create either screen fatigue or visibility loss depending on the hour.
Commercial screens with ambient light sensors can auto-adjust brightness based on the environment. This:
- Preserves clarity
- Reduces unnecessary energy use
- Extends screen life by lowering heat output when max brightness isn’t needed
Alternatively, opt for software control that lets you pre-schedule brightness levels by hour.
Avoid the Trap Of Over-brightening
More brightness isn’t always better. Over-bright screens in dim interiors can feel harsh, drain attention from physical products, and increase power draw unnecessarily.
Use these to keep balance in check:
- Matte finish screens to reduce reflection without compromising brightness
- Light-blocking window films or shades if sunlight floods the space
- Dimmable lighting in the interior to support screen contrast
If the screen starts pulling attention away from your staff or your product, the brightness is too high for the environment.
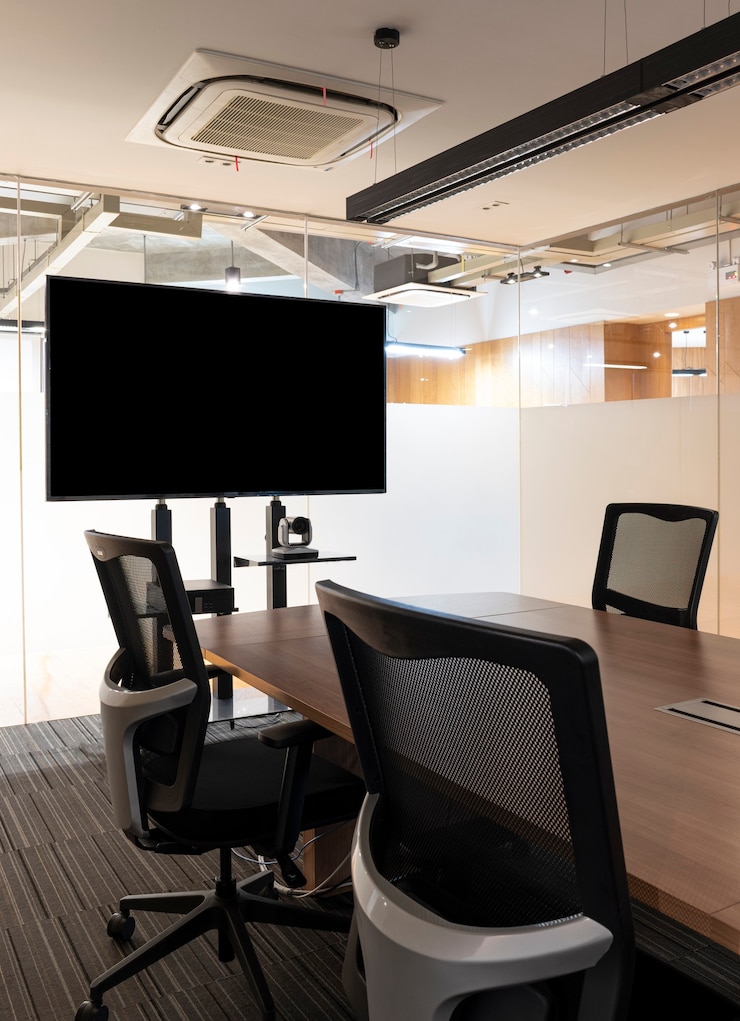
Mount Smarter, Not Harder — What Clean Installs Look Like
In small spaces, mounting isn’t an afterthought — it’s part of the design. A bulky bracket or messy cable setup can make even the slimmest screen feel oversized. The mounting decision affects how the display blends into the space, how easily it gets serviced, and how long it stays locked in place without shifting or sagging.
Let’s break down how to keep your setup tight, flexible, and long-lasting.
Choose the Right Mount Type for the Job
Not every wall is flat. Not every display needs to sit flush. And not every screen needs to stay still. Picking the wrong mount can limit your sightlines, strain the wall structure, or make future adjustments a hassle.
Here’s how to line up the right fit:
- Fixed mounts: Best for permanent, eye-level installs with no glare issues
- Tilting mounts: Ideal for screens mounted above eye level to angle the content downward
- Full-motion or articulating arms: Useful in awkward corners, rotating menus, or shared viewing zones
- Ceiling mounts: Perfect for ultra-tight wall space or when height is your only option
Make sure the mount’s VESA pattern and weight rating match the screen. A mismatch doesn’t just create risk — it can bend the frame or void your warranty.
Keep Cable Clutter Off the Wall
A clean install is a functional one. If power cords or HDMI lines hang loose behind the screen, you’re inviting damage, tampering, or visual distraction. Especially in cafés or retail areas where the screen faces the customer, exposed cables look unprofessional and invite wear.
Tighten the layout by:
- Using cable raceways or in-wall conduit kits for power and signal
- Routing all connections to one access point behind the screen
- Choosing displays with side-facing ports if wall clearance is limited
- Labeling all inputs and power for fast troubleshooting down the line
For ultra-low profiles, consider displays with rear panel cable guides or central power bricks that reduce the need for bulky wall adapters.
Anchor for Both Stability and Safety
Even smaller displays create torque on drywall over time, especially in high-traffic areas or buildings with frequent vibrations (like busy streets or multi-story shops).
Here’s what holds the screen steady:
- Use metal studs or concrete anchors, not hollow-wall anchors or plastic toggles
- Stick with lag bolts or sleeve anchors rated for the screen’s total weight plus 30%
- Don’t mount into shelving systems or fixtures not designed for load-bearing
- If ceiling mounting, check beam placement and load direction before installing
And don’t skip locking mechanisms. Many commercial-grade mounts come with anti-theft or anti-tilt locks built in — they’re worth the extra few bucks for peace of mind.
Displays That Actually Fit the Space and the Use Case
Not every display that technically fits your wall will work in your space. For compact stores and cafés, you need screens that balance size, brightness, mounting flexibility, and long-term reliability, without overcomplicating the setup or overloading your budget.
The best options come down to three things:
- Physical form factor that won’t block customer flow or crowd the wall
- Brightness and resolution tuned for short-to-mid viewing distances
- Commercial-grade build that can handle daily wear, heat, and continuous playback
Here are three display models that hit the mark for small-space installs.
Samsung QMC Series
Best for modern interiors where aesthetics matter. This ultra-slim commercial display keeps the depth under 30mm, making it ideal for recessed mounts or wall-mounted installs with tight clearance. It’s fanless, quiet, and designed to blend into upscale retail and café environments.
Why it works in compact spaces:
- Clean, minimal bezels
- Low-power, 4K resolution for crisp visuals without overshooting brightness
- Compatible with standard VESA mounts and multiple CMS platforms
- Fanless design = silent operation in intimate or quiet zones
- Works seamlessly with cloud-based content management systems for flexible control
Use this when the visual design of your space matters as much as the content.
LG UR640S Series
Best all-rounder for affordability and performance. This display strikes a balance between cost and features. You get 4K clarity, 400–500 nits of brightness, and a clean industrial design built for continuous use. It’s a strong choice for menu boards, promotions, or front-counter signage.
Why it works in tight spots:
- Integrated media player reduces external device needs
- Reliable 16/7 or 24/7 operation, depending on screen size
- HDMI, USB, and LAN support for flexible content playback
- Lightweight design with rear port layout for easier cable management
- Strong choice for content creation workflows in food service and hospitality
Ideal if you’re focused on ROI and need a plug-and-play install with minimal upkeep.
Philips Q-Line Series
Best for multi-location businesses that need consistency. This commercial signage line offers flexible sizing, solid brightness (~500 nits), and simple CMS compatibility. The display supports 4K playback and is VESA-mount ready, with a reinforced housing designed to handle frequent swaps or relocations.
Why it fits smaller formats:
- Internal scheduler and browser support
- Optional Android SoC integration (depending on model)
- Durable enough for long-term use in semi-public areas
- Clean design with matte anti-glare finish
- Can be deployed in interactive kiosks for wayfinding or quick-service setups
Use this when you want standardization across multiple compact storefronts. Whether you’re optimizing premium screens for a boutique space or setting up displays to streamline customer experience, these models are proven to deliver smooth operation in even the most space-restricted environments.
Each of these displays brings a specific strength to small-space digital signage. The key is to match the screen’s strength with your layout, use case, and budget—then build the rest of the system around that anchor.
If you want help cutting through spec sheets and model numbers, CrownTV can source the screens mentioned above, along with dozens of other commercial displays that fit every type and size for personal or public spaces. From indoor-grade models with crisp, glare-free visuals to ultra-bright window-facing screens built to punch through sunlight, CrownTV’s turnkey service gives you access to business-ready multiple displays at every scale. We match the right screen to your install, not the other way around.
Set the System Up Right the First Time — Without Burning Time or Budget
Small spaces don’t leave much room for trial and error. If your screen goes in the wrong spot, if your cable routing slows the counter down, or if your content looks off-center on day one, you’re stuck reworking the entire setup. That’s where CrownTV steps in — not as a vendor pushing basic signage, but as a full-stack signage partner built to help you get compact installs right the first time.
Here’s how we take the friction out of setup — and keep it out.
Streamline Your Screen Control With Our Digital Signage Dashboard
In retail settings like cafés and corporate offices, you’re juggling point of sale systems, staff, customer flow, and time-sensitive offers. You don’t have the bandwidth to manage screens manually. With CrownTV’s user-friendly interface and built-in content management software, you can support multiple displays, group them by location, and keep messaging sharp across the board.
What makes it work:
- Push updates to one or multiple screens in seconds
- Preview layouts before you publish
- Group screens by campaign, region, or format
- Monitor system status remotely — no site visit needed
Whether you’re displaying interactive menus at the register or adjusting indoor displays in your shop window, CrownTV gives you precise control, even across multi-display setups.
Eliminate Clutter With Our Compact Media Player
Tight installs need a space-saving design that doesn’t compromise power. Our media player is a small-but-mighty hub that runs dynamic displays, animated content, and display multimedia content — without creating heat or adding visible bulk.
Why it fits limited spaces like a glove:
- Mounts cleanly behind retail displays or under counters
- Supports wireless connectivity and local playback
- Keeps performance stable during continuous operation
- Runs on low wattage, making it energy efficient for small spaces
You get a streamlined digital signage hardware setup that’s ready to scale with your location or brand.
Plug The System In. Turn It On. Get Back to Business.
From sourcing the right screen to configuring layouts for customer engagement, CrownTV handles setup with technical expertise and clarity. Whether you’re displaying menu items, running outdoor advertising at your front window, or activating dynamic content across various touchpoints, we make sure the system fits both the space and the staff.
No need to hire extra IT. No need to build a custom rig. Whether you’re outfitting retail stores or testing screens across various settings, CrownTV builds systems that work harder than they look, especially where space is tight.
Get Small-Space Signage Set Up Right With CrownTV
Fitting digital signs into a small space isn’t about squeezing just a display into the wall — it’s about building a system that works for the space, the content, and the customer flow. When every square inch matters, the screen, the software, and the setup all need to pull together.
Now you’ve got a clear picture of what to look for and what to leave out. Whether you’re running a corner café, a boutique store, or one of many retail businesses trying to stand out in tight quarters, you’ve got real strategies to work with — not guesswork.
Here’s a quick recap:
- You learned how to prioritize advanced features that fit small environments, not marketing fluff
- You saw how to size your screen to match visibility and layout
- You broke down the brightness range that actually holds up indoors or near windows
- You covered mounting setups that reduce bulk and support a compact form factor
- You looked at the top displays that check the boxes for clarity, size, and reliability
- You saw how CrownTV simplifies remote management and digital signage content playback — all from a single dashboard
From digital menu boards in cafés to multimedia content looping in boutique windows, the right digital signage network doesn’t just light up your space — it keeps your brand sharp, your updates fast, and your setup hassle-free.Ready to build a small-space signage system that works from day one? Talk to the CrownTV team, and we’ll help you put every screen, bracket, and pixel in the right place.